As an affiliate, we may earn a commission from qualifying purchases. We get commissions for purchases made through links on this website from Amazon and other third parties.
A DIY rainwater collection and filtration system works best when you treat it as a series of simple stages: catch the rain, remove large debris, divert the dirtiest first runoff, store the water in a closed tank, then filter it for the way you plan to use it.
For garden watering and many other non-potable uses, the system can stay fairly simple. Drinking water is different. Roof runoff can contain microorganisms, animal waste, metals, chemicals, and other contaminants. A sediment filter alone does not make it safe to drink. Potable use requires suitable collection materials, several treatment steps, ongoing maintenance, current laboratory testing, and compliance with local requirements.
Start With the Water Use
Decide what the collected water will supply before buying tanks, filters, pumps, or fittings.
A basic system may be suitable for:
- Garden watering
- Drip irrigation
- Washing tools
- Other approved non-potable outdoor uses
More treatment and plumbing controls may be needed for uses such as toilet flushing or clothes washing.
If you want drinking water, cooking water, or water for other potable uses, do not simply add a small filter to a garden system. Potable means water intended to be safe for drinking. A potable rainwater system needs to be designed around water quality from the beginning.
Keeping the intended use clear also prevents you from spending money on filters that do not solve a problem you actually have.
The Basic Rainwater System Layout
A typical DIY system follows this path:
Roof → gutter → leaf screen → first-flush diverter → tank inlet screen → storage tank → outlet → filter → pump or gravity line → point of use
Each part has a different job.
The screens keep leaves and larger debris out. The first-flush device sends away some of the initial dirty roof runoff. The tank stores the water. Filters downstream protect irrigation equipment or provide part of a larger treatment system.
Trying to make one filter do all these jobs usually causes fast clogging and poor water quality.
Step 1: Check the Roof and Gutters
Your roof is the collection surface, so its condition matters.
Roof runoff can pick up:
- Dust
- Leaves
- Pollen
- Bird and animal droppings
- Roofing particles
- Metals
- Chemicals from coatings or nearby pollution
Keep gutters reasonably clean and repair places where standing debris collects. Avoid knowingly collecting water from surfaces or coatings that may add harmful substances, especially if the water could eventually be used for household purposes.
Roof and gutter cleanliness directly affects what reaches the storage tank. Regular cleaning and protected tank openings help limit debris, sediment, insects, and algae.
Estimate How Much Water the Roof Can Collect
In U.S. units, a useful theoretical estimate is:
Gallons collected = roof area in square feet × rainfall in inches × 0.623
For example, a 1,000-square-foot roof receiving 1 inch of rain could theoretically produce:
1,000 × 1 × 0.623 = 623 gallons
You will not normally store every gallon. First-flush diversion, splash, gutter losses, leaks, overflow, and an already-full tank reduce the actual amount.
Use the calculation mainly to judge whether your tank and overflow are reasonably sized.
Step 2: Add a Gutter or Downspout Debris Screen
Stop large material before it reaches the tank.
A gutter guard, downspout screen, or similar debris separator can catch leaves, twigs, and other large material.
Make the screen easy to reach. A screen that is difficult to clean tends to become a clogged screen.
Do not use an extremely fine filter at this stage. Fine material can quickly form a mat on it and cause the gutter or downspout to overflow during heavy rain.
Step 3: Install a First-Flush Diverter
A first-flush diverter sends some of the first roof runoff away from the tank.
That first runoff often carries a larger share of the dust, droppings, pollen, and loose debris that accumulated on the roof between rains. Diverting it can reduce the amount entering storage, although it does not sterilize the remaining water or guarantee that it is safe.
First-flush devices come in several layouts. A common design temporarily fills a separate vertical pipe before later runoff continues toward the tank.
Whatever design you use, make sure it can:
- Drain or reset after a rain
- Be opened for cleaning
- Handle the expected downspout flow
- Operate without creating a major blockage
There is no single correct first-flush volume for every roof. Roof size, roof condition, dry periods, local contamination, rainfall pattern, and intended water use all matter.
Step 4: Prepare a Safe Tank Base
Water is extremely heavy.
One U.S. gallon weighs about 8.34 pounds. That means:
- 55 gallons of water weighs about 459 pounds
- 275 gallons weighs about 2,294 pounds
- 500 gallons weighs about 4,170 pounds
Those numbers do not include the tank, frame, plumbing, or supporting structure.
Place a storage tank on a stable, level base that can safely carry its full weight. Do not put a large tank on an improvised raised platform just to gain water pressure.
A small rain barrel may be raised modestly on a properly designed base. Large totes and cisterns require much more attention to structural loads.
If you are unsure whether a deck, stand, slab, or elevated structure can carry the tank, have the support evaluated before filling it.
Step 5: Install the Tank Inlet
Route the cleaned downspout flow into the top portion of the storage tank.
Use a screened inlet so insects and remaining larger debris cannot easily enter.
The tank should be:
- Closed against animals and insects
- Protected from unnecessary sunlight
- Accessible for inspection and cleaning
- Made from material suitable for its intended water use
- Positioned where overflow cannot damage a foundation or create erosion
Sunlight encourages algae growth. An opaque tank or another suitable way of blocking light is generally easier to manage than a clear container exposed to the sun.
If you reuse an IBC tote, know what it previously contained. Do not use a mystery tote or one that previously stored hazardous chemicals for water storage.
For potable systems, use tanks, pipes, fittings, coatings, and treatment components specifically suitable for drinking-water applications.
Step 6: Add a Proper Overflow
The tank needs somewhere for excess water to go when it fills.
Connect an overflow line near the top of the tank and route it to an appropriate drainage location.
Do not undersize this connection. During a hard rain, water may be arriving almost as quickly as the downspout can deliver it.
The overflow should also have insect protection without being so restrictive that debris can easily plug it.
Keep discharged water away from places where it could cause:
- Foundation problems
- Soil erosion
- Mud
- Flooding
- Damage to neighboring property
A full tank does not stop the roof from collecting water. The overflow becomes part of the stormwater system whenever storage capacity runs out.
Step 7: Install the Tank Outlet
An outlet is usually installed low on the side of the tank, but placing it slightly above the absolute bottom can help keep settled sediment from being pulled directly into the water line.
A common tank connection uses a bulkhead fitting. This is a fitting that passes through a hole in the tank wall and seals against the wall with a gasket.
From the bulkhead fitting, you might install:
Tank → shutoff valve → union or removable connection → filter → hose, irrigation line, or pump
The shutoff valve lets you service the downstream plumbing without draining the whole tank.
A removable union or similar connection makes filter and pump maintenance much easier.
Follow the tank and fitting manufacturer's instructions when drilling or installing fittings. Thin tank walls, curved surfaces, incorrect hole sizes, and poorly supported pipes can all cause leaks.
Step 8: Choose Filtration for the Actual Job
Filtration should solve a specific problem.
For Basic Garden Watering
A simple system may need only:
- Gutter or downspout debris screening
- First-flush diversion
- Screened tank inlet
- Stored-water settling
- A downstream screen or sediment filter if the watering equipment requires it
An open-ended garden hose is much less sensitive to small particles than drip irrigation.
For Drip Irrigation
Drip emitters have small water passages that can clog.
Install filtration suitable for the requirements of the particular irrigation equipment. Check the emitter or irrigation manufacturer's filtration specification rather than guessing.
Cleanable screen or disc-style irrigation filters can often make more sense than repeatedly replacing very fine disposable cartridges.
Understanding Micron Ratings
A micron is one-thousandth of a millimeter.
A filter's micron rating describes the approximate size of particles it is intended to capture. A smaller number means finer filtration.
For example, a fine sediment cartridge catches smaller particles than a coarse screen, but it will usually clog faster.
Micron size tells you about particle filtration. It does not by itself tell you whether the water is microbiologically or chemically safe.
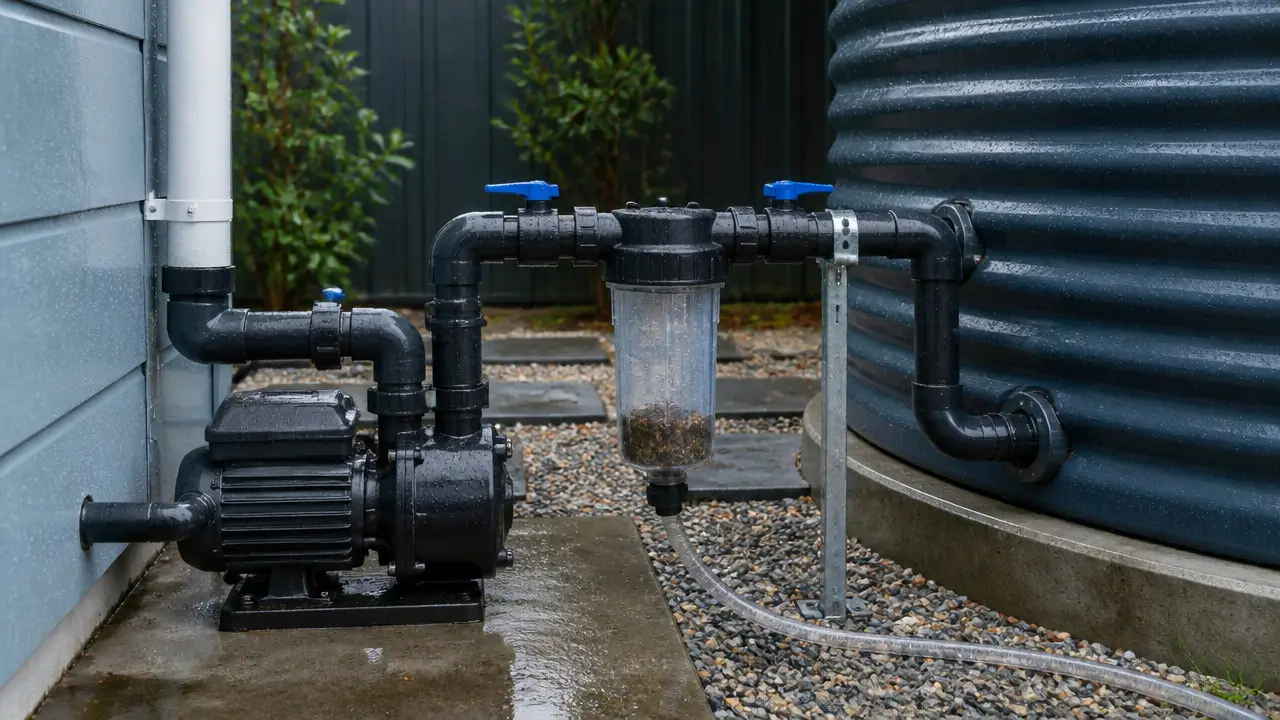
Step 9: Decide Whether You Need a Pump
A tank does not automatically provide normal household water pressure.
If the outlet sits above the watering point, gravity can move the water downhill.
The vertical difference between the water surface and the outlet is called head height. More head height produces more static pressure.
Roughly 2.31 feet of water height produces 1 psi of pressure.
So a rain barrel raised only a few feet will usually provide fairly low pressure. That may work for filling a watering can or supplying a compatible low-pressure irrigation setup, but it may not operate equipment designed for household water pressure.
If you need greater pressure or must move water uphill, you may need a pump.
Select the pump based on:
- Required flow rate
- Required pressure
- Vertical lift
- Pipe length and size
- Filter restrictions
- Power supply
- Pump inlet requirements
- Dry-run protection
Flow rate is how much water moves during a period of time, such as gallons per minute.
Do not assume that a large pump automatically improves the system. A pump must match both the available water supply and the equipment downstream.
Keep electrical connections and equipment protected according to the pump manufacturer's requirements. Permanent outdoor electrical work may require a qualified electrician.
A Practical Non-Potable DIY Setup
For a straightforward garden system, you could arrange the components like this:
Roof
↓
Explore assembling a DIY rainwater collection system to understand the benefits and drawbacks at this design stage.
Clean gutters
↓
Coarse leaf screen
↓
First-flush diverter
↓
Screened tank inlet
↓
Opaque, closed storage tank
↓
Tank outlet and shutoff valve
↓
Cleanable irrigation filter if needed
↓
Gravity hose or suitable pump
↓
Garden or irrigation system
This layout keeps most filtration simple and accessible.
It also keeps fine debris filters downstream of the tank, where they are easier to inspect and clean.
Do You Need a Filter Before or After the Tank?
Often, you need both types of protection, but they do different things.
Before the Tank
Use coarse filtration to stop material such as:
- Leaves
- Twigs
- Larger insects
- Roof debris
The goal is to keep unnecessary organic material out of storage.
After the Tank
Use finer filtration when required by the equipment using the water.
Examples include sediment filtration before pumps, valves, sprayers, or drip emitters.
Putting very fine filtration directly in the downspout can create problems. Heavy rain produces high flow, and a clogged fine filter may simply send water over the gutter or onto the ground.
What About Drinking Rainwater?
A DIY debris-and-sediment system should not be treated as a drinking-water system.
Roof-collected rainwater can contain microorganisms as well as chemical contaminants. First-flush diversion, screens, settling, and ordinary sediment filters reduce certain contaminants but do not establish that the water is safe to drink.
A potable system may require a carefully designed sequence involving:
- Suitable roof and collection materials
- Debris exclusion
- First-flush treatment
- Protected storage
- Sediment filtration
- Additional treatment appropriate to the contaminants
- Effective disinfection
- Protection against recontamination
- Routine maintenance
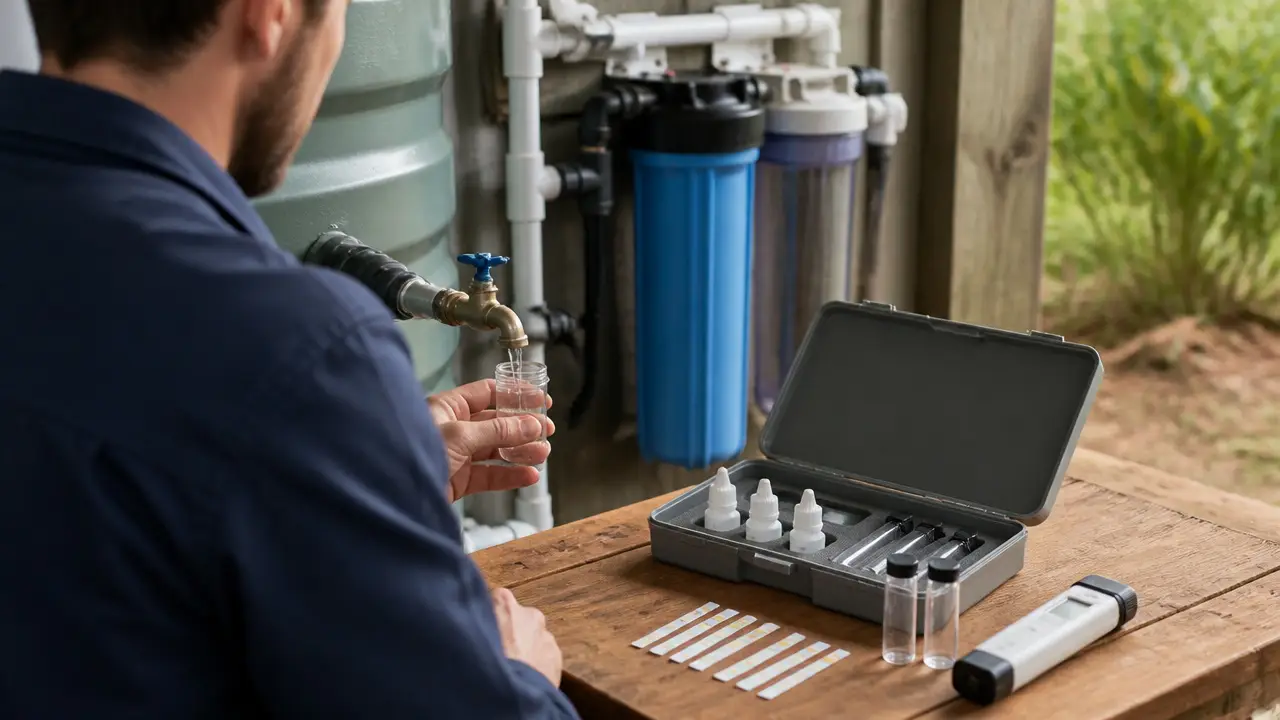
- Current laboratory water testing
For example, EPA's current summary of Texas guidance describes potable residential rainwater treatment using prefiltration followed by specified filtration and disinfection approaches, including properly specified UV systems in some configurations. That is an example of why potable treatment should be designed as a complete system rather than by choosing one filter cartridge. Requirements can differ by location.
A UV unit also has operating limits. Water quality, pretreatment, flow, lamp condition, and maintenance all affect performance. A UV unit does not remove every possible chemical contaminant.
If rainwater will be consumed, work with your local health or drinking-water authority and an experienced water-treatment professional. Use a qualified laboratory to test the treated water for contaminants appropriate to your source and location.
Keep Stored Water From Becoming a Maintenance Problem
Even a well-built system needs regular attention.
Clean Roof Debris and Gutters
Remove accumulated leaves and other material before it washes into the system.
Clean Screens
Check leaf screens, inlet screens, and overflow screens. Clogged screens can redirect large amounts of water during storms.
Service the First-Flush Diverter
Make sure it drains and resets properly. Sediment can build up inside it.
Inspect the Tank
Look for:
- Sediment buildup
- Algae
- Insect access
- Damaged covers
- Leaking fittings
- Cracked hoses
- Overflow problems
Stored tanks eventually accumulate sediment even when good pretreatment is used.
Maintain Filters
A clogged filter reduces flow and increases pressure loss.
Clean or replace filters according to their design and the condition of your water. Do not wait for a cartridge to become completely blocked.
Check the Pump
If you use a pump, inspect strainers, connections, controls, and dry-run protection.
Never assume there will always be water in the tank.
Plan for Freezing Weather
Water trapped inside filters, valves, pumps, exposed pipes, and fittings can freeze and damage them.
In freezing climates, the system may need some combination of:
- Seasonal draining
- Protected plumbing routes
- Equipment installed in a suitable protected location
- Freeze-resistant design appropriate to the local climate
Do not depend on insulation alone as a guarantee against freezing.
Large cistern systems that operate throughout winter require more careful planning than a seasonal rain barrel.
Common DIY Mistakes to Avoid
Making the Tank Hard to Clean
Every screen, diverter, filter, and tank will eventually need service. Design access into the system from the beginning.
Forgetting the Overflow
Overflow is not optional. Once the tank fills, every additional gallon needs a safe path away.
Using a Mystery Storage Container
Do not collect water in containers with unknown previous contents.
Raising a Heavy Tank Too High
Gravity pressure is useful, but structural safety matters more. Large elevated tanks require properly engineered support.
Using Fine Filters Too Early
Fine filters in dirty, high-flow roof runoff clog quickly. Remove large material first and filter progressively where necessary.
Expecting a Filter to Make Water Drinkable
Particle removal and drinking-water safety are not the same thing. Drinking-water treatment must address microbial and chemical risks and be verified through appropriate testing.
Connecting Rainwater Directly to Household Plumbing
A connection between rainwater and potable plumbing can create a contamination hazard. Plumbing requirements, backflow protection, labeling, permitted uses, and required treatment vary by location.
Check your local plumbing and health requirements before connecting rainwater to a building's plumbing system.
A Good DIY System Is Easy to Maintain
The most useful rainwater system is not necessarily the one with the most filters.
For ordinary garden use, concentrate on keeping debris out, diverting dirty first runoff, storing water in a closed tank, providing a safe overflow, and protecting whatever equipment uses the water.
Place valves and filters where you can reach them. Give the tank a stable base. Keep sunlight and insects out. Make sediment removal possible.
Then add pumps, finer filters, or treatment stages only when the intended use actually requires them.
For drinking-water use, move beyond the basic DIY filtration approach. Treat the entire collection, storage, treatment, testing, and maintenance process as one water-quality system.
Frequently Asked Questions
Can I drink rainwater after running it through a filter?
Not simply because it has passed through a filter. Sediment filters may remove particles but can leave microorganisms and dissolved chemical contaminants behind. Drinking-water use requires suitable collection, appropriate treatment and disinfection, maintenance, laboratory testing, and compliance with local requirements.
Do I need a first-flush diverter?
It is a useful part of most roof-based systems because it diverts some of the first runoff that carries accumulated roof debris and contamination. It does not make the remaining rainwater sterile or automatically safe to drink.
Should the filter go before or after the rain barrel?
Use coarse debris protection before the tank. Put finer filtration after the tank when your pump, irrigation equipment, or intended use requires it. This keeps fine filters from receiving the full load of roof debris.
Can I use an IBC tote for collecting rainwater?
Yes, an appropriate tote can be useful for non-potable rainwater storage. Its previous contents must be known, and it should not have contained hazardous chemicals. Protect it from sunlight and install it on a base capable of carrying the full weight. Potable systems require materials specifically suitable for drinking-water service.
How high should I raise my rain barrel?
Only as high as can be safely supported. Raising a tank increases gravity pressure, but water is heavy. Roughly 2.31 feet of water height provides only about 1 psi, so very high stands are usually a poor way to create substantial pressure. Use a suitable pump when higher pressure is needed.
How often should I clean a rainwater tank?
There is no single schedule that fits every system. Inspect it periodically and clean it when sediment or contamination requires it. Roof condition, surrounding trees, rainfall frequency, pretreatment, tank design, and intended use all affect how quickly debris accumulates.
Does a UV light make rainwater safe to drink?
Not by itself. UV is a disinfection stage and must operate under suitable water-quality, flow, equipment, and maintenance conditions. It does not remove all chemical contaminants. Potable rainwater requires a complete treatment and testing plan.
Do I need a pump for a rainwater collection system?
Not always. Gravity may be enough if the tank is above the point of use and the equipment can operate at low pressure. A pump is useful when you need more pressure, higher flow, or need to move water uphill.