As an affiliate, we may earn a commission from qualifying purchases. We get commissions for purchases made through links on this website from Amazon and other third parties.
A basic rainwater collection system is simple: catch water from a roof, keep large debris out, send the water into a covered storage tank, provide a safe overflow path, and add an outlet for the way you plan to use the water.
For most DIY systems, garden watering is the easiest place to start. Systems that supply toilets, washing machines, showers, or drinking water need more plumbing, treatment, safeguards, and maintenance.
Decide What You Will Use the Rainwater For
Design the system around its final use before buying a tank or cutting a downspout.
Common uses include:
- Watering flowers, trees, and landscape plants
- Supplying a drip irrigation system
- Washing tools or outdoor surfaces
- Toilet flushing where local rules allow it
- Other household uses with suitable treatment and plumbing
Water used for drinking has much stricter requirements.
The CDC notes that collected rainwater can contain germs and chemicals even when it looks clear. Contamination can come from the air, roof, gutters, pipes, animals, and storage system.
For that reason, a simple roof-to-barrel system should normally be treated as a non-potable system. Non-potable means the water is not intended for drinking.
If drinking water is your goal, treat it as a separate whole-system project involving suitable collection materials, prefiltration, treatment matched to the contaminants present, regular laboratory testing, maintenance, and applicable local requirements. One filter or UV unit by itself does not automatically make roof runoff safe to drink.
Parts of a Basic Rainwater Collection System
A useful home system usually has these parts:
| Part | What It Does |
|---|---|
| Roof | Provides the collection surface |
| Gutters | Gather runoff from the roof |
| Downspout | Moves water toward the tank |
| Debris screen | Keeps leaves and larger material out |
| First-flush diverter | Sends some early roof runoff away from storage |
| Tank or barrel | Stores the collected water |
| Inlet screen | Helps keep debris and insects out |
| Overflow | Carries excess water safely away |
| Outlet | Lets you remove stored water |
| Pump, if needed | Provides more flow or pressure |
Not every small system needs every part. A garden barrel may only need a screened inlet, tank, overflow, and faucet. A large cistern feeding irrigation zones may need filters, valves, a pump, controls, and more careful pipe sizing.
Step 1: Choose a Suitable Roof Catchment
Most home rainwater systems collect runoff from a roof because the roof already sends water toward gutters and downspouts.
Before using it, inspect the collection area.
Look for:
- Heavy leaf buildup
- Bird or animal waste
- Flaking coatings
- Rust or damaged gutters
- Overhanging branches
- Sources of smoke, dust, or other contamination
Roof and gutter materials matter more as the intended water use becomes more sensitive. Water for ornamental plants is a different situation from water that may be swallowed.
Do not assume that rain becomes clean just because it fell from the sky. The CDC explains that rainwater can pick up contaminants both before it reaches the roof and while flowing across roofing, gutters, pipes, and storage materials.
Step 2: Estimate How Much Water Your Roof Can Collect
You can estimate the theoretical amount of rain falling on your collection area with this formula:
Gallons = roof area in square feet × rainfall in inches × 0.623
For example, suppose 1,000 square feet of roof drains toward your tank and the roof receives 1 inch of rain:
1,000 × 1 × 0.623 = 623 gallons
That does not mean 623 gallons will reach the tank.
Real systems lose some water because of:
- Splashing
- Gutter losses
- First-flush diversion
- Debris
- Tank overflow
- Water left on the roof
- Leaks or poor connections
Use the formula as a planning estimate rather than a guaranteed yield.
Also remember that only the roof area feeding the connected downspout counts. If half of your roof drains toward another side of the house, that part should not be included unless you connect it too.
Step 3: Pick a Tank Based on Your Use and Rainfall
A rain barrel works well for small garden systems. Larger gardens or longer dry periods may justify several linked barrels, an IBC tote intended for suitable water storage, or a purpose-built cistern.
Do not choose capacity based only on how much water one storm can produce.
Also consider:
- How often rain normally falls
- How much water you use between storms
- Available ground space
- Tank dimensions
- How you will clean the tank
- Where overflow will go
- Whether freezing occurs
- Whether a pump will be used
Remember How Heavy Water Is
Water weighs about 8.34 pounds per gallon.
That means 55 gallons of water weighs about 459 pounds, not including the barrel.
A 275-gallon container can hold about 2,294 pounds of water.
Large tanks therefore need a firm, level, stable base that can safely carry the full load. Do not place a large cistern on a deck, elevated platform, roof, or questionable structure without confirming that the structure can support it.
Step 4: Prepare a Stable Tank Base
For a small ground-level barrel, the base should be:
- Level
- Firm
- Resistant to settling
- Large enough to support the whole bottom of the container
The tank should not rock or lean when full.
Some people raise a small barrel to improve faucet access or create a little gravity pressure. If you do this, use a support designed for the full weight of the filled barrel.
Avoid tall improvised stands made from loose blocks or unstable materials. A full container is very heavy.
Larger tanks may need a properly prepared pad according to the tank manufacturer's installation requirements.
Step 5: Install a Debris Screen
Keeping debris out before it reaches the tank makes the whole system easier to maintain.
Depending on your setup, you might use:
- Gutter guards
- A downspout screen
- A rain head
- A screened tank inlet
- A removable basket or strainer
The goal is to stop leaves, twigs, insects, and other large debris without restricting the flow so much that the gutter backs up during heavy rain.
Screens still need cleaning. A clogged screen can cause water to spill over the gutter or bypass the tank.
Step 6: Consider a First-Flush Diverter
A first-flush diverter sends away some of the first runoff from the roof at the beginning of a rain event.
That early runoff can carry accumulated dust, debris, animal waste, and other material from the roof.
After the diverted portion fills or drains according to the device design, later runoff continues toward the tank.
The CDC recommends considering a first-flush device as one way to improve collected rainwater quality and notes that the amount diverted depends in part on the size of the collection roof.
There is no single first-flush volume that is correct for every system. Roof area, local conditions, intended use, rainfall patterns, and applicable guidance all matter.
A first flush can reduce some contamination entering storage. It does not make the remaining water potable.
Step 7: Connect the Downspout to the Tank
You can either:
- Send most of the downspout flow directly into a screened tank inlet, or
- Install a downspout diverter that directs some water into the barrel while allowing excess water to continue through the existing drainage system.
Your best choice depends on tank size and the existing drainage layout.
Make sure the inlet:
- Can handle expected flow
- Does not easily clog
- Is screened against insects
- Does not create an uncontrolled opening into the tank
- Can be accessed for cleaning
Avoid permanently sealing parts that you will later need to inspect.
Step 8: Add an Outlet Near the Bottom
Most rain barrels use a faucet or valve near the lower part of the container.
A common way to make a watertight connection through a tank wall is a bulkhead fitting.
A bulkhead fitting is a fitting made to pass through the wall of a tank while sealing around the hole. Pipe, tubing, a valve, or a faucet can then connect to it.
Whenever possible, use openings and fittings designed or approved for your tank rather than drilling random holes into a container.
Leave enough clearance around the outlet so you can reach the valve and replace parts later.
Step 9: Install a Proper Overflow
Overflow is one of the most important parts of the system.
Once the tank is full, every additional gallon entering it has to go somewhere.
Route overflow:
- Away from building foundations
- Away from areas where erosion could occur
- Away from neighboring property
- Toward an appropriate drainage or infiltration area where permitted
Do not simply allow water to spill around the bottom of the tank.
The overflow opening should also be protected against insects and animals without creating a screen so restrictive that it cannot handle heavy flow.
If your original downspout previously carried roof runoff safely away from the building, installing a barrel should not remove that protection.
Step 10: Keep the Tank Covered and Protected
Sunlight and open tank connections make storage harder to manage.
With collecting rainwater at home, you can verify likely upkeep demands over the system’s service life.
A good storage setup normally has:
- A covered tank
- Screened openings
- Limited sunlight entering the water
- Secure lids or access covers
- No unnecessary openings
Screens help prevent mosquitoes from reaching standing water. CDC guidance specifically recommends screening rainwater-system openings or otherwise managing standing water to reduce mosquito breeding.
Check screens often because small tears can defeat their purpose.
Step 11: Decide Whether Gravity Is Enough
A tank does not automatically provide useful household water pressure.
Gravity creates pressure based mainly on the vertical distance between the water surface and the point where the water is being used. This vertical distance is called head height.
A barrel sitting slightly above the ground may work well enough for:
- Filling a watering can
- A short open hose
- Some low-pressure drip arrangements
It may not operate equipment that expects normal household pressure.
Also remember that pressure drops as the tank empties because the water level falls.
When You May Need a Pump
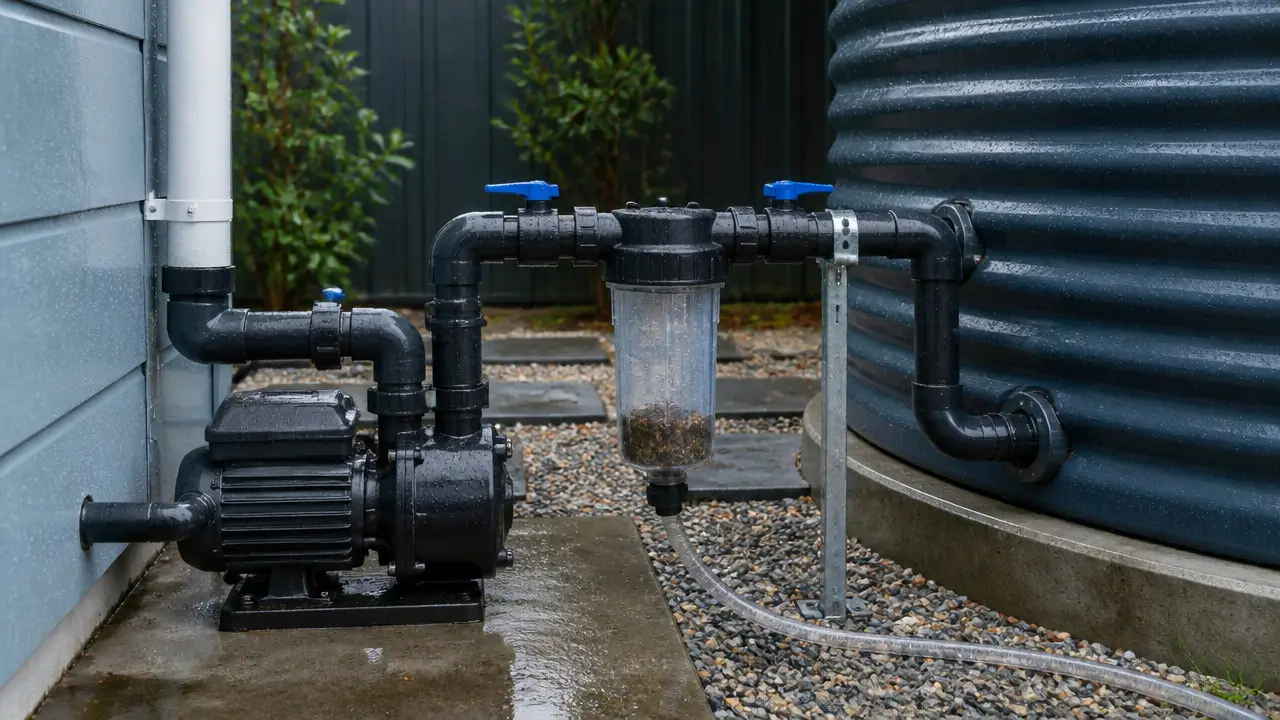
A pump may be useful for:
- Longer garden hoses
- Irrigation zones
- Sprinklers
- Moving water uphill
- Supplying fixtures
- Systems requiring steady pressure
Pump selection involves more than tank size.
You need to consider:
- Required flow rate, or how much water must move per minute
- Required pressure
- Vertical lift
- Pipe length and diameter
- Power supply
- Pump inlet requirements
- Dry-run protection
- Freeze exposure
A pump should not be allowed to keep running after the tank has gone dry unless it is designed and controlled for that condition.
Electrical equipment around water also needs suitable protection and installation. Use a qualified electrician when the work involves permanent outdoor circuits, questionable existing wiring, or other electrical work beyond a basic plug-in installation.
Step 12: Match Filtration to the Intended Use
Filtering leaves from rainwater is not the same as treating it for human consumption.
For basic outdoor use, your system might rely mainly on:
- Roof and gutter cleaning
- Debris screening
- First-flush diversion
- Covered storage
- Additional irrigation filtration if emitters need it
Drip irrigation systems often need finer filtration because small emitters can clog.
Filter fineness may be described with a micron rating. A micron is a very small unit of measurement. A smaller micron rating generally means the filter can catch smaller particles, but particle removal alone does not tell you whether water is safe to drink.
Drinking Water Requires a Different Approach
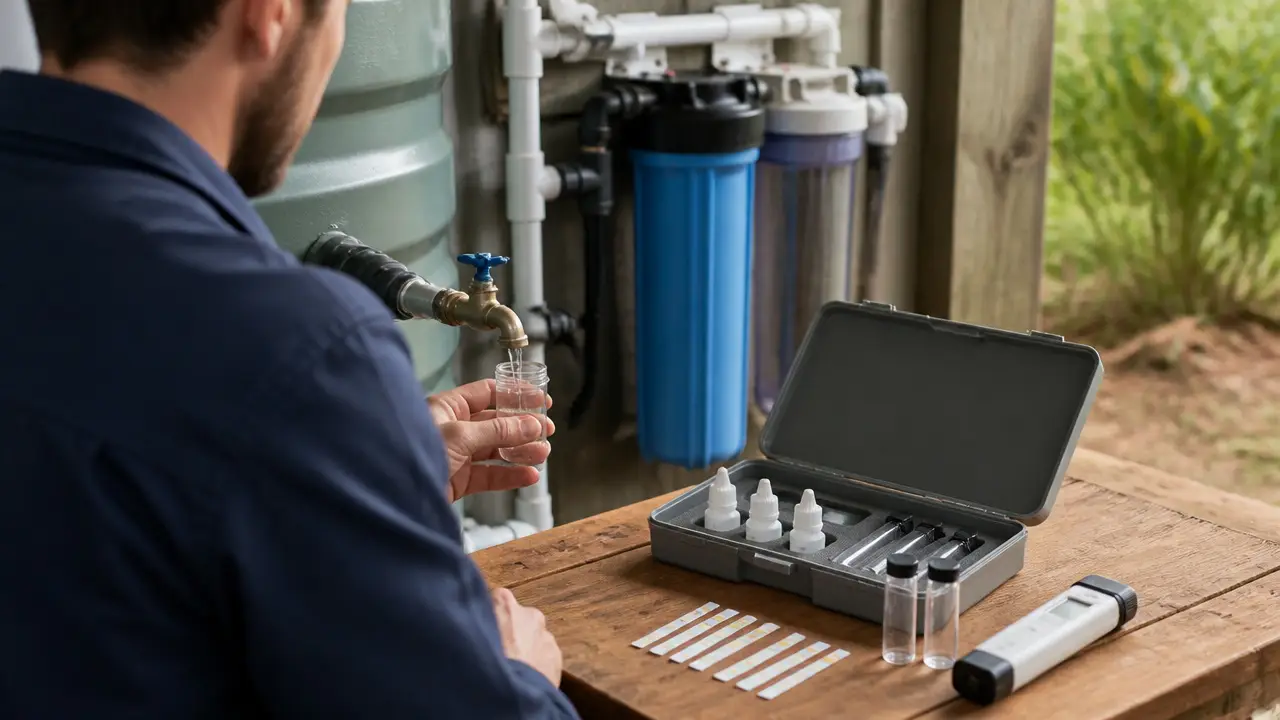
The CDC recommends regular testing for germs and chemicals when collected rainwater is used for drinking, cooking, or bathing. Treatment should then be selected for the contaminants that need to be removed.
A complete drinking-water system may require several stages rather than one filter.
Do not assume that:
- Clear water is safe water
- A carbon filter removes every contaminant
- A sediment filter removes dissolved chemicals
- UV removes chemicals
- Boiling removes every chemical contaminant
- A home water meter establishes potability
Potable means suitable for drinking. That is a much higher standard than water simply looking clean.
EPA guidance also treats water quality and treatment as dependent on the intended end use, with higher-exposure uses requiring greater protection.
Keep Rainwater Separate From Drinking-Water Plumbing
A simple garden system is easiest to keep completely separate from the home's drinking-water pipes.
If you plan to connect rainwater to indoor plumbing, cross-connections become a serious concern. Untreated rainwater must not be allowed to flow backward into drinking-water plumbing.
CDC guidance recommends keeping collected rainwater from entering pipes carrying treated drinking water.
Indoor rainwater plumbing may also be controlled by local plumbing, health, building, or water rules. Requirements vary by location, so check the current rules with the authority responsible for your property before making these connections.
This is often the point where a simple DIY rain barrel becomes a job for a qualified plumber or rainwater-system professional.
Plan for Freezing Weather
Water expands when it freezes.
If your area experiences freezing temperatures, exposed barrels, filters, pumps, valves, hoses, and pipes may need seasonal protection.
Depending on the system, winter preparation may include:
- Draining exposed lines
- Disconnecting hoses
- Emptying equipment that cannot tolerate freezing
- Bypassing the tank during winter
- Following pump and filter manufacturer winterizing instructions
Do not assume that wrapping a tank or pipe guarantees freeze protection.
Buried cisterns and permanent year-round systems require more careful climate, plumbing, drainage, and frost-depth planning.
Maintain the System Regularly
Rainwater systems are not maintenance-free.
Create a simple routine based on how quickly debris builds up at your property.
Inspect:
- Roof collection areas
- Gutters
- Leaf screens
- First-flush devices
- Tank inlet screens
- Tank lids
- Mosquito screens
- Overflow pipes
- Faucets and valves
- Hoses and irrigation filters
- Pumps and controls, if installed
Clean accumulated sediment when needed and inspect the inside of accessible tanks using safe methods.
Never enter a cistern or large tank. Tanks can be confined spaces with serious hazards. Cleaning that requires entry should be handled by properly trained professionals.
After flooding or other contamination events, do not assume normal filtration will restore the water. CDC guidance warns that floodwater can contaminate cisterns with germs and chemicals and recommends additional precautions before using the water again.
A Simple DIY Layout for Garden Watering
For a basic garden system, the water path might look like this:
Roof → gutter → downspout → debris screen → optional first-flush diverter → screened barrel inlet → covered barrel → faucet → garden hose
Then add:
Barrel overflow → safe drainage area
This arrangement is usually much easier to build and maintain than an indoor rainwater system.
You can expand later by adding more storage, irrigation filtration, or a suitable pump after you know how much water you actually collect and use.
Where a DIY Rainwater System Should Stop
Many homeowners can safely assemble a small, ground-level rain barrel for outdoor watering.
Professional help becomes more important when the project involves:
- Large or elevated structural loads
- Underground cistern excavation
- Tank entry
- Permanent electrical work
- High-pressure pumps
- Indoor plumbing
- Connections near potable plumbing
- Drinking-water treatment
- Chemical dosing
- Complex freeze protection
- Permits or inspections
Starting with a simple non-potable outdoor system lets you learn how your roof, rainfall, storage capacity, and water demand work together before adding complexity.
Frequently Asked Questions
How big should my rainwater tank be?
Size the tank around the roof area feeding it, local rainfall pattern, available space, and how quickly you use the stored water. A theoretical estimate is roof area in square feet multiplied by rainfall in inches multiplied by 0.623 gallons. Actual collection will be lower because of system losses.
Do I need a first-flush diverter?
Not every basic system has one, but a first-flush diverter can reduce the amount of dirt and other material from the early part of a rain event that enters your tank. It is especially worth considering when water quality matters.
Can I drink water straight from a rain barrel?
Do not assume rain-barrel water is safe to drink. Roof runoff can contain germs and chemicals. Drinking-water use requires suitable collection, treatment based on water quality, regular testing, maintenance, and compliance with applicable local requirements.
Can I connect a garden hose directly to a rain barrel?
Yes, if the barrel has a suitable outlet, but gravity pressure may be low. A short hose or watering wand may work better than equipment that needs normal household pressure.
Can I connect several rain barrels together?
Yes. Barrels can be connected to increase storage, but the connecting pipes, overflow system, bases, and tank heights must be arranged so water moves as intended. Every barrel must remain stable when full.
Does a filter make collected rainwater safe to drink?
Not necessarily. Different filters remove different particles, germs, or chemicals. No single filter should be assumed to provide complete drinking-water treatment without water testing and verification that the full treatment system addresses the contaminants present.
How do I keep mosquitoes out of my rainwater tank?
Keep the tank covered and use well-fitted insect screens on inlets, vents, and overflows. Inspect screens for damage and keep debris from preventing lids or screens from closing correctly.
Can I use collected rainwater inside my house?
It may be possible in some locations, but indoor use requires more careful treatment, plumbing, backflow protection, labeling, and maintenance. Local rules vary. Check with your local plumbing, health, building, or water authority before connecting a rainwater system to household plumbing.