As an affiliate, we may earn a commission from qualifying purchases. We get commissions for purchases made through links on this website from Amazon and other third parties.
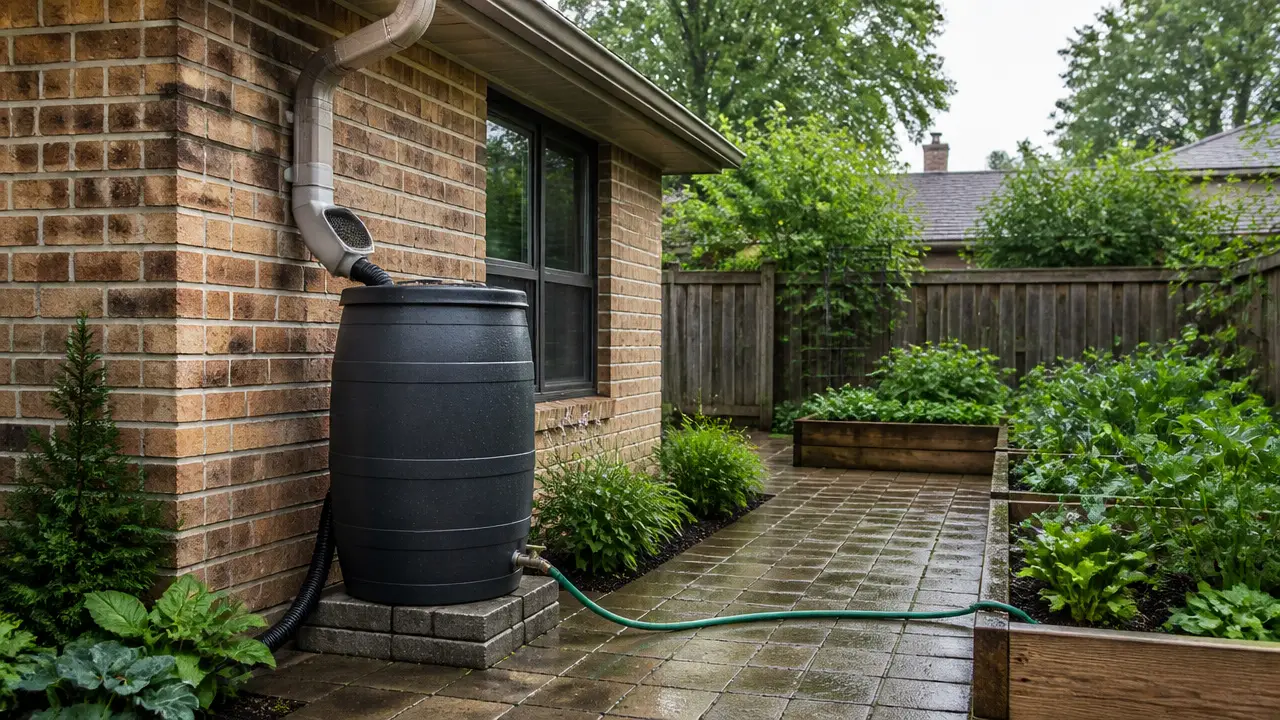
A rain barrel is simple to install when you plan the water path before cutting the downspout. The barrel needs a firm, level base, a screened inlet, a working spigot, and an overflow route that carries extra water away from the house.
Most home rain barrels are best used for non-potable water, such as watering ornamental plants and garden beds. Roof runoff can pick up dirt, bird droppings, chemicals, and other contaminants. It should not be treated as drinking water just because it looks clear.
What You Need to Install a Rain Barrel
The exact parts depend on your barrel and downspout, but a basic installation normally includes:
- A rain barrel with a lid or closed top
- A spigot near the bottom
- An overflow fitting near the top
- Fine insect screening
- A downspout elbow or rain barrel diverter
- A stable base or stand
- Overflow hose or pipe
- A level
- Tape measure
- Screwdriver or drill, if required by the fittings
- Downspout cutting tool, if you need to shorten the downspout
If you bought a complete rain barrel, install its fittings according to the manufacturer's instructions. Hole sizes, gasket positions, and fitting styles are not universal.
Before cutting anything, decide how rain will enter the barrel and where water will go after the barrel fills.
Choose How the Downspout Will Feed the Barrel
There are two common ways to connect a rain barrel.
Direct Downspout Connection
With this setup, the downspout ends above or inside a screened opening in the top of the barrel.
Rain follows this path:
Roof → gutter → downspout → screen → barrel
This setup is simple, but it needs a separate overflow outlet. Once the barrel is full, the same roof may still send a large amount of water toward it.
Downspout Diverter
A diverter is installed into the downspout and sends part of the water through a hose into the barrel.
Many diverter systems are designed so that excess water continues down the original downspout when the barrel fills.
This can make overflow management easier, but the diverter, hose, barrel connection, and downspout must all be compatible. Follow the diverter manufacturer's required hole height and hose layout.
Do not assume every diverter works with every downspout shape or barrel.
Step 1: Choose a Good Location
Place the rain barrel close to the downspout that will supply it.
The location should have:
- Firm ground
- A level surface
- Enough room for the barrel and overflow line
- Easy access to the spigot
- A safe route for excess water
- Enough clearance to remove screens or open the barrel for cleaning
Avoid soft soil that may settle after rain.
Also think about where the roof runoff is coming from. Roof debris, animal droppings, roofing materials, gutters, and piping can all affect collected water quality.
Step 2: Build a Firm, Level Base
A full rain barrel is heavy.
Water weighs about 8.34 pounds per gallon. This means 55 gallons of water alone weighs about:
55 × 8.34 = 459 pounds
The barrel and fittings add more weight.
The base must support the entire filled barrel without sinking, leaning, cracking, or tipping.
Concrete pavers or another firm outdoor foundation can work when properly supported. A manufactured rain barrel stand can also work if it is rated for the filled weight of your barrel.
Check the base with a level before placing the barrel on it.
Do not stack loose bricks, blocks, scrap wood, or other unstable materials just to raise the barrel higher.
EPA rain barrel guidance also stresses that barrels should sit on stable, level ground because a full barrel can become a serious tipping hazard.
Step 3: Raise the Barrel Only as Much as Needed
A small amount of elevation can make the spigot easier to use.
You may want enough space below the spigot for:
- A watering can
- A bucket
- A garden hose connection
Raising the barrel also provides a little more gravity pressure.
The pressure created by stored water depends on head height, which means the vertical distance between the water surface and the outlet.
Each foot of water height produces only about 0.43 psi of pressure. That is why rain barrels usually provide gentle gravity flow rather than normal household water pressure.
Raising a barrel slightly can improve flow, but putting several hundred pounds of water on a tall homemade stand can create a tipping or collapse risk. Use a stable structure designed for the load instead of chasing more pressure through excessive height.
Step 4: Install or Check the Spigot
Many rain barrels come with the spigot already installed.
If yours does, make sure:
- The fitting is tight
- The gasket is seated correctly
- The handle can move freely
- There is enough clearance below it
- A hose can connect without pushing against the stand
If you are installing your own spigot, use a fitting designed for the barrel wall.
A bulkhead fitting is one common choice. It passes through a hole in the tank wall and uses a flange, gasket, and retaining nut to create a sealed connection.
Do not drill the hole until you know the exact size required by your fitting. The fitting's nominal pipe size is not always the same as the required hole diameter.
The spigot should normally sit low enough to use most of the stored water but high enough to avoid the curved bottom of the barrel and leave some space for settled debris.
Step 5: Install a Screened Inlet
Do not leave the barrel open under the downspout.
The inlet should have screening that helps keep out:
- Leaves
- Twigs
- Roof debris
- Insects
- Mosquitoes
EPA and CDC guidance both recommend controlling access to stored water and using screens or other barriers to reduce mosquito problems.
The screen must fit tightly enough that mosquitoes cannot simply enter around its edges.
Clean the screen regularly. A screen covered with leaves can cause roof runoff to splash over the barrel instead of entering it.
Step 6: Position the Barrel Before Cutting the Downspout
Put the barrel in its final position before measuring the downspout.
This matters because the barrel height changes once it is placed on its base.
Measure from the existing downspout to the barrel inlet.
For a direct-fill barrel, you may need to shorten the downspout and add an elbow so water lands on the screened inlet.
For a diverter system, mark the installation point using the diverter manufacturer's instructions. The relative height of the diverter and barrel connection can be important to how the system fills and stops filling.
Measure twice before cutting.
Step 7: Connect the Downspout
For a direct connection, cut the downspout where needed and install the elbow or extension.
The outlet should direct water into the screened inlet without resting heavily on the barrel lid.
Avoid creating a connection that is so rigid that a shifting barrel pulls on the house gutter system.
For a diverter connection, install the diverter and connect its hose to the barrel inlet.
Keep the hose arranged according to the system instructions. Avoid unnecessary dips, sharp bends, or crushed sections that can trap debris or restrict flow.
Step 8: Install the Overflow
Overflow is one of the most important parts of a rain barrel installation.
A barrel has limited storage. Once it is full, every additional gallon coming from the roof must go somewhere else.
The overflow should carry water away from:
- The house foundation
- Basement walls
- Crawl spaces
- Walkways
- Erodible soil
- The barrel's own base
EPA guidance specifically recommends directing rain barrel overflow away from building foundations.
Connect the overflow hose or pipe securely and route it toward a suitable drainage area.
Do not reduce the overflow opening with a much smaller hose unless the barrel manufacturer designed the system that way. A restricted overflow can back water up and cause the barrel to spill around its lid or inlet.
Also make sure the end of the overflow cannot become blocked with leaves, soil, or mulch.
Step 9: Consider a First Flush Diverter
A first flush diverter is optional for many simple garden barrels, but it can reduce some of the material entering the tank.
First flush means the first portion of runoff from a roof after rain begins.
Guidance on DIY rain barrel designs helps evaluate service access for sediment removal and odor prevention.
That early runoff can carry a larger amount of:
- Dust
- Pollen
- Bird droppings
- Leaves
- Other roof debris
A first flush diverter sends some of that initial water away before allowing later roof runoff into storage.
CDC recommends considering first flush diversion as one way to improve collected rainwater quality. The amount that should be diverted depends in part on the roof area feeding the system.
A first flush diverter does not make roof runoff potable. It is only one collection-stage control.
Step 10: Test the System With Water
Do not wait for a major storm to discover an installation problem.
You can run water into the gutter or barrel inlet at a moderate rate and watch the entire system.
Check:
- Whether water reaches the barrel
- Whether the inlet leaks or splashes
- Whether the barrel remains level
- Whether the spigot leaks
- Whether the overflow works
- Where overflow water ends up
If you have a diverter, test its operation according to the manufacturer's instructions.
Then open the spigot and make sure water drains where you expect.
Correct leaks or unstable supports before allowing the barrel to fill completely.
Step 11: Secure the Barrel
A rain barrel should not be easy for a child, pet, or accidental bump to tip or open.
Keep the lid secured.
If your installation or local conditions call for anchoring, use a method suitable for the barrel and structure. Do not drill random holes into the barrel because that can weaken the container or create leaks.
Remember that the barrel's stability changes as it fills and empties. A nearly empty barrel may also be easier for wind to move than a full one.
Where to Use Rain Barrel Water
A basic roof-fed rain barrel is usually best treated as a source of non-potable outdoor water.
Common uses include:
- Ornamental gardens
- Trees
- Shrubs
- Flower beds
- Some landscape watering
Roof runoff is not automatically clean. CDC notes that collected rainwater can contain germs and chemicals even when it looks clear. CDC recommends limiting uses that could lead to swallowing untreated rainwater and, when possible, using a public water supply or bottled water for drinking, cooking, brushing teeth, rinsing produce, and watering plants that will be eaten.
Do not connect a basic rain barrel directly to household drinking-water plumbing. Rainwater must remain separated from treated potable plumbing unless the system has been professionally designed to meet applicable plumbing and health requirements.
Potable means water suitable for drinking. Non-potable water is water not intended for drinking.
If you want to use collected rainwater for drinking, cooking, bathing, or indoor household supply, that becomes a different type of system. It requires suitable collection materials, prefiltration, treatment matched to actual contaminants, regular maintenance, current laboratory testing, and compliance with local requirements. A single filter or UV device does not by itself establish that roof runoff is safe to drink.
Keep Mosquitoes Out
A poorly sealed barrel can become a mosquito breeding site.
Keep:
- The inlet screened
- The lid closed
- Overflow openings screened or otherwise protected when needed
- Standing water out of nearby buckets and containers
CDC recommends screening rainwater systems or emptying rain barrels frequently enough to help prevent mosquitoes from laying eggs.
Inspect the screening often because small tears and gaps can defeat the purpose of the screen.
Maintain the Barrel After Installation
Installation is only the first part of owning a rain barrel.
Regularly:
- Remove leaves from the inlet screen
- Clear gutters and downspouts
- Check the overflow
- Look for leaks
- Check that the base remains level
- Inspect hoses and fittings
- Use stored water so the barrel has room for another storm
- Remove sediment when it builds up
EPA guidance recommends regular emptying and maintenance because long periods of stagnant water can contribute to odor, insects, algae, and other problems.
In Freezing Climates
Water expands when it freezes.
If your barrel, fittings, valves, or hoses are not designed to remain full during freezing weather, drain and winterize the system before hard freezes.
That may include:
- Disconnecting the barrel from the downspout
- Restoring the normal downspout drainage path
- Draining the barrel
- Emptying hoses
- Opening valves after draining
- Cleaning the barrel before storage
EPA guidance recommends seasonal disconnection and draining where winter freezing can damage rain barrels.
Follow the barrel manufacturer's winter-storage instructions because materials and fittings differ.
Common Rain Barrel Installation Mistakes
Putting the Barrel on Soft Ground
A full barrel can weigh hundreds of pounds. Soft soil may settle unevenly and make the barrel lean.
Start with a firm, level base.
Forgetting the Overflow
The barrel will eventually fill.
If there is no controlled overflow path, water may spill beside the foundation or wash out the barrel's base.
Plan the overflow before connecting the downspout.
Cutting the Downspout Before Setting the Barrel
The final barrel height depends on its stand or foundation.
Position the barrel first. Then measure and cut.
Leaving the Top Open
An open barrel allows debris, insects, and animals easier access.
Use a secure lid and screened water openings.
Expecting Household Water Pressure
A rain barrel works mainly by gravity.
A short garden hose may flow reasonably well for slow watering, while sprinklers and pressure-dependent irrigation equipment may work poorly.
If an irrigation system requires more pressure, a suitable pump may be needed.
Using an Unstable Tall Stand
More height can create more pressure, but it also raises hundreds of pounds of water.
Use only a base or stand that can safely support the full barrel.
Letting Overflow Drain Beside the House
Collecting rainwater does little good if the overflow sends a storm's runoff directly against the foundation.
Route excess water to an appropriate drainage area.
Frequently Asked Questions
How high should a rain barrel be off the ground?
Raise it only as much as needed for spigot access and useful gravity flow. The stand must safely support the barrel's full weight. A 55-gallon barrel contains about 459 pounds of water before the barrel itself is counted.
Does a rain barrel need an overflow?
Yes. Once the barrel fills, additional roof runoff needs a controlled path away from the barrel and house foundation. An overflow hose, pipe, or properly designed downspout diverter can provide that path.
Do I need to cut my downspout?
Not always. A direct-fill setup often requires cutting or shortening the downspout. A diverter installation usually requires cutting or drilling into the downspout according to the diverter instructions.
Can I connect a garden hose to a rain barrel?
Yes, if the spigot has a compatible garden-hose connection. Flow will depend on water level, barrel height, hose length, hose diameter, and restrictions in the watering device. Gravity-fed rain barrels provide much less pressure than household plumbing.
Should I put a screen over my rain barrel?
Yes. Screen the inlet and protect other openings that could allow mosquitoes or large debris into the stored water. Check the screen regularly for tears, gaps, and leaf buildup.
Can I drink water from a rain barrel?
Do not assume ordinary roof runoff stored in a rain barrel is safe to drink. It can contain germs and chemicals from the air, roof, gutters, animals, and storage system. Drinking-water use requires a properly designed whole system, suitable treatment, regular laboratory testing, maintenance, and compliance with applicable local requirements.
What should I do with a rain barrel during winter?
If freezing can occur and the barrel is not designed to remain in service, disconnect it, drain the barrel and hoses, and restore the downspout so roof runoff has a safe drainage path. Follow the manufacturer's winter instructions.