As an affiliate, we may earn a commission from qualifying purchases. We get commissions for purchases made through links on this website from Amazon and other third parties.
A DIY rain barrel can be as simple as a clean food-grade barrel connected to a downspout, or it can include an overflow line, screened inlet, spigot, and linked storage barrels. The best design depends on how you plan to use the water and how much maintenance you are willing to do.
For most homes, the safest place to start is a closed container used for non-potable water, such as watering gardens or filling watering cans. Roof runoff can contain dirt, bird droppings, chemicals, and other contaminants, so collecting it in a barrel does not make it drinking water.
1. Basic Downspout Rain Barrel
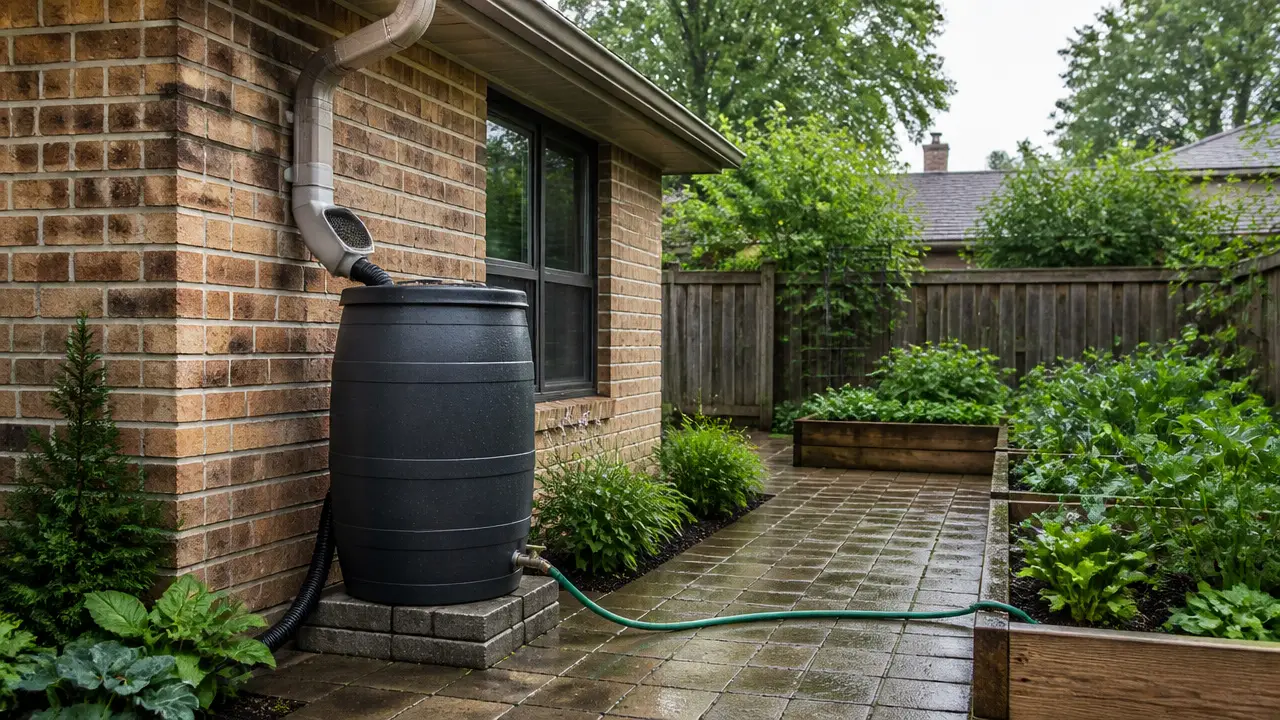
The simplest DIY setup uses one barrel placed beside a downspout.
A typical setup includes:
- A suitable barrel with a lid
- A screened water inlet
- A spigot near the bottom
- An overflow fitting near the top
- A downspout diverter or redirected downspout
- A solid, level base
Water enters from the downspout and fills the barrel. When the barrel reaches capacity, excess water leaves through the overflow.
Do not treat the overflow as optional. A full rain barrel cannot accept more water, and even a short storm can send a large amount of roof runoff toward it.
Route overflow somewhere that already handles roof drainage safely. Keep it away from foundations and other areas where standing water can cause problems.
2. Rain Barrel With a Downspout Diverter
A downspout diverter can make a barrel easier to integrate with an existing gutter system.
Instead of removing the lower section of the downspout and directing all water into the barrel, the diverter sends some runoff through a hose or pipe into the barrel.
Depending on the diverter design, water may return to the downspout when the barrel fills.
This type of setup can be useful when you want to keep the original downspout drainage path in place.
Check that the diverter, barrel connection, and downspout size work together. A small hose or poorly placed fitting can restrict flow or leak.
3. Elevated Rain Barrel for Easier Watering
Putting a barrel on a raised platform can make the spigot easier to reach and provide a little more gravity-fed pressure.
The pressure comes from head height, which means the vertical distance between the water level and the outlet.
More height generally gives you more pressure, but a rain barrel still produces much less pressure than a household water system.
Do not build an unnecessarily tall stand just to gain pressure. Water is heavy. One gallon of water weighs about 8.3 pounds, so a full barrel can weigh several hundred pounds before you include the barrel itself.
Use a broad, stable base on firm ground. If the stand could shift, sink, tip, or collapse, use a safer setup.
4. Two-Barrel System for Extra Storage
If one barrel regularly fills during storms, you can connect a second barrel.
There are two common approaches.
Connect Them Near the Top
The first barrel fills until water reaches the connecting hose or pipe. Extra water then flows into the second barrel.
This is simple but may not keep the water levels perfectly even.
Connect Them Near the Bottom
A lower connection lets water move between the containers as their levels change.
This can make multiple barrels behave more like one larger reservoir.
Bottom connections need dependable seals because they remain below the waterline. A bulkhead fitting is a fitting designed to create a sealed connection through the wall of a tank or barrel.
Keep both barrels on level, stable bases so uneven settling does not pull on the connecting pipe.
5. Rain Barrel Feeding a Soaker Hose
A barrel can supply a short gravity-fed garden line if the garden is low enough and the hose does not require much pressure.
A soaker hose may work, but results vary. Some soaker hoses are designed for pressures much higher than a rain barrel can provide.
For better gravity flow:
- Raise the barrel moderately.
- Keep the hose run short.
- Avoid unnecessary bends and restrictions.
- Keep the watering area below the water level when possible.
- Use fittings that do not sharply reduce the outlet size.
If you need strong or consistent pressure, a pump may be more suitable than trying to make a gravity system do more than it can.
6. Rain Barrel With a Short Garden Hose
One of the easiest DIY designs is simply adding a hose-compatible outlet near the bottom of the barrel.
This lets you attach a short hose and direct water toward nearby plants.
Gravity-fed flow will slow as the water level drops. This is normal. The amount of water available above the outlet affects both pressure and flow.
For filling watering cans, buckets, or gently watering nearby beds, strong pressure may not be necessary.
7. Rain Barrel With a First-Flush Section
A first-flush diverter sends away some of the earliest runoff from a storm.
That first runoff often carries loose dirt and debris from the roof and gutter.
A first-flush device can reduce some of that material entering storage, but it does not disinfect the water or make it safe to drink.
First-flush systems also need maintenance. Sediment can collect inside them, and drains or seals can clog.
For a simple garden barrel, good gutter maintenance and inlet screening may be enough. More complex collection systems can benefit from additional prefiltration.
8. Decorative Rain Barrel
A rain barrel does not have to look like a plastic utility container.
You can build a simple enclosure around a suitable barrel using materials such as wood slats or lattice.
Keep the enclosure removable or provide access to:
- The lid
- Inlet screen
- Spigot
- Overflow fitting
- Drain
- Connecting hoses
Do not permanently box in the barrel. You will eventually need to inspect and clean it.
Also avoid adding decorations that interfere with ventilation around electrical equipment if your system includes a pump.
9. Repurposed Food-Grade Barrel
Used food-industry barrels can sometimes make practical rain barrels.
Before using one, find out what it previously contained.
Avoid containers with unknown contents or barrels previously used for chemicals, fuels, pesticides, or other hazardous materials.
A barrel that looks clean is not proof that it is suitable.
For garden-water storage, a known food-grade container is a much better starting point than an unidentified drum.
10. Small Rain Barrel for a Shed or Greenhouse
You do not need a house-sized roof to collect rainwater.
A small shed, greenhouse, chicken coop, or garden structure may provide enough roof area for a modest barrel used nearby.
The basic collection estimate is:
Collected water = roof catchment area × rainfall depth
Real systems collect less than the theoretical maximum because of first-flush losses, splash, leaks, overflow, and other losses.
Planning around rain barrel plumbing connections helps evaluate service access for sediment removal and odor prevention.
Even small roofs can send more water into a barrel than expected during heavy rain. Include a safe overflow path.
11. Rain Barrel With a Removable Sediment Drain
Sediment slowly settles at the bottom of many barrels.
A low drain can make periodic cleaning easier.
The normal garden spigot is often installed slightly above the bottom so it does not draw directly from the heaviest sediment layer. A separate drain at the lowest practical point can then be used when cleaning the barrel.
Make sure any low fitting is protected from accidental impacts. A broken fitting near the bottom can empty the entire barrel quickly.
12. Linked Rain Barrels Along a Wall
Several barrels can be arranged in a row when you have enough space.
This can be useful when one large tank would be difficult to move or install.
Before building a long chain, think about:
- How the barrels will fill
- How their water levels will equalize
- Where overflow will go
- How each barrel can be isolated
- How each barrel can be cleaned
- Whether connecting hoses can sag or kink
Do not place barrels where their weight could overload a deck, balcony, platform, or questionable structure.
13. Rain Barrel With an Easy-Clean Screen Basket
Instead of letting leaves fall directly into the barrel, you can make the inlet easier to maintain by adding a removable screen or debris basket.
The goal is to catch larger material before it enters storage.
The screen should be easy to remove because clogged screens can cause water to spill around the inlet during heavy rain.
Use fine enough screening to help prevent mosquitoes from entering the barrel, while still allowing adequate flow.
Any openings, vents, and overflow outlets should also be protected where mosquitoes could enter.
Choosing the Right DIY Design
The simplest design that meets your needs is usually the easiest to maintain.
For watering a few plants, one screened barrel with a spigot and proper overflow may be enough.
For a larger garden, you might add:
- More storage
- Larger connecting lines
- A convenient hose outlet
- Better prefiltration
- A pump if gravity pressure is insufficient
Start by deciding what the water will be used for. That choice determines how much storage, filtration, pressure, and treatment you actually need.
Parts That Matter Most
Whatever design you choose, pay special attention to a few parts.
Inlet
The inlet must handle incoming water without letting large debris or pests into the tank.
Overflow
The overflow needs enough capacity to move excess water away safely when the barrel is full.
Outlet
Place the normal outlet low enough to use most of the water but high enough to avoid constantly pulling settled sediment into the hose.
Connections
Fittings through the barrel wall need to seal properly. Flexible barrel walls can deform if fittings are overtightened.
Base
The barrel needs firm, level support capable of carrying its full water weight.
Common DIY Rain Barrel Mistakes
One common mistake is concentrating on how water enters the barrel while ignoring what happens after it becomes full.
Other problems include:
- Using an unknown chemical drum
- Leaving openings accessible to mosquitoes
- Installing the spigot too close to the ground
- Building an unstable stand
- Using undersized overflow tubing
- Expecting household-level hose pressure
- Forgetting that sediment will need to be removed
- Making the barrel impossible to open for cleaning
- Letting overflow discharge beside a foundation
A rain barrel works best when filling, overflow, water use, and maintenance are planned as one system.
What About Freezing Weather?
A barrel full of water can be damaged when the water freezes and expands.
If freezing weather is expected, follow a winter plan appropriate for your barrel and climate. This may include draining the barrel, disconnecting collection components, and restoring normal downspout drainage.
Do not assume that a flexible plastic barrel or partially drained tank is freeze-proof.
Pipes, valves, pumps, filters, and fittings can also hold trapped water and may need protection.
Can DIY Rain Barrel Water Be Used for Drinking?
Do not assume roof-collected rainwater is safe to drink.
A basic DIY barrel, screen, sediment filter, or first-flush system does not establish that water is potable. Potable means suitable for drinking.
Drinking-water systems require much more careful consideration of the roof and collection materials, contamination risks, treatment stages, maintenance, current laboratory testing, and applicable local requirements.
If you are planning to use harvested rainwater for drinking or other household uses where people may ingest it, get current guidance from your local health or water authority and use qualified professional help where appropriate.
Frequently Asked Questions
What is the easiest DIY rain barrel to build?
A single closed barrel with a screened inlet, spigot, stable base, and properly sized overflow is one of the simplest designs. A downspout diverter can make the connection easier while keeping the existing drainage route.
How high should a rain barrel be off the ground?
It only needs enough height to make the outlet convenient and provide the modest gravity flow you need. Avoid excessive height because a full barrel is very heavy and requires a strong, stable support.
Can I connect two rain barrels together?
Yes. They can be connected near the top so the second fills after the first, or lower down so water can equalize between them. Use suitable sealed fittings and keep both barrels securely supported.
Can I use a regular trash can as a rain barrel?
It depends on the container. Many trash cans are not designed to remain full of water and may bulge, crack, or become unstable. Use a container intended for liquid storage and make sure you know what any reused container previously held.
Do I need a pump for a rain barrel?
Not always. Gravity may be enough for filling watering cans, short hose runs, or some low-pressure irrigation. A pump may be needed when you require greater pressure, longer runs, or water delivery uphill.
How do I keep mosquitoes out of a rain barrel?
Keep the barrel closed and use appropriate screening over openings where insects could enter, including inlets, vents, and overflow connections. Inspect the screens regularly because damaged or displaced screening can create an entry point.
Does a first-flush diverter make rainwater safe to drink?
No. A first-flush device can divert some of the initial dirty runoff from a roof, but it does not disinfect the remaining water or prove that it is safe to drink.
Where should rain barrel overflow go?
Direct overflow to a location that can safely receive roof runoff without causing erosion, standing water, foundation problems, or other drainage issues. In many installations, that means preserving or recreating the drainage path the original downspout used.