As an affiliate, we may earn a commission from qualifying purchases. We get commissions for purchases made through links on this website from Amazon and other third parties.
A rainwater collection system can be as simple as a roof, gutter, screened inlet, rain barrel, overflow hose, and spigot. A larger system may use a cistern, first-flush diverter, filters, pump, and irrigation lines.
The right setup depends mainly on how you plan to use the water. A garden system is much simpler than a system that supplies toilets, laundry, showers, or drinking water.
Rainwater collected from a roof should not be assumed to be clean or safe to drink. Roofs can add dirt, bird droppings, chemicals, and other contaminants. The CDC recommends matching water quality to its intended use and using additional testing and treatment when rainwater will be used for drinking, cooking, or bathing.
How a Rainwater Collection System Works
Most systems follow the same basic path:
Roof → gutters → debris screen → first flush or prefilter → storage tank → outlet or pump → point of use
Each part has a job.
- The roof catches rainfall.
- Gutters and downspouts move it toward the tank.
- A screen or prefilter keeps leaves and larger debris out.
- A first-flush diverter, when used, sends away some of the first runoff from a storm.
- The barrel or cistern stores the water.
- An overflow safely carries away water once the tank is full.
- A spigot, gravity line, or pump moves the stored water where you need it.
A small garden system may need only these basic parts. Indoor uses and pressurized systems require much more planning.
Step 1: Decide What You Will Use the Water For
Start here before buying a tank, pump, or filter.
Simple outdoor uses
Rainwater systems are easiest to set up for uses such as:
- Watering ornamental plants
- Watering trees and shrubs
- Filling watering cans
- Supplying some drip irrigation systems
- Outdoor cleaning where potable water is not required
Water that is not intended for drinking is called non-potable water.
Even for outdoor use, keeping leaves, insects, animals, and sediment out of the tank makes the system easier to maintain.
Indoor non-potable uses
Using rainwater for toilets, laundry, or other household plumbing is more complicated. You may need:
- Additional filtration
- A pump
- Pressure controls
- Separate rainwater plumbing
- Backflow or cross-connection protection
- Required permits or inspections
Rainwater must not be allowed to flow backward into a drinking-water plumbing system. The CDC specifically recommends keeping collected rainwater separate from piped drinking water.
Check local plumbing and health requirements before connecting a rainwater system to a house.
Drinking and cooking
Do not treat a basic rain barrel as a drinking-water system.
The CDC states that collected rainwater is not necessarily safe to drink because germs and chemicals can enter from the roof, gutters, piping, and storage system. It recommends regular testing when rainwater is used for drinking, cooking, or bathing.
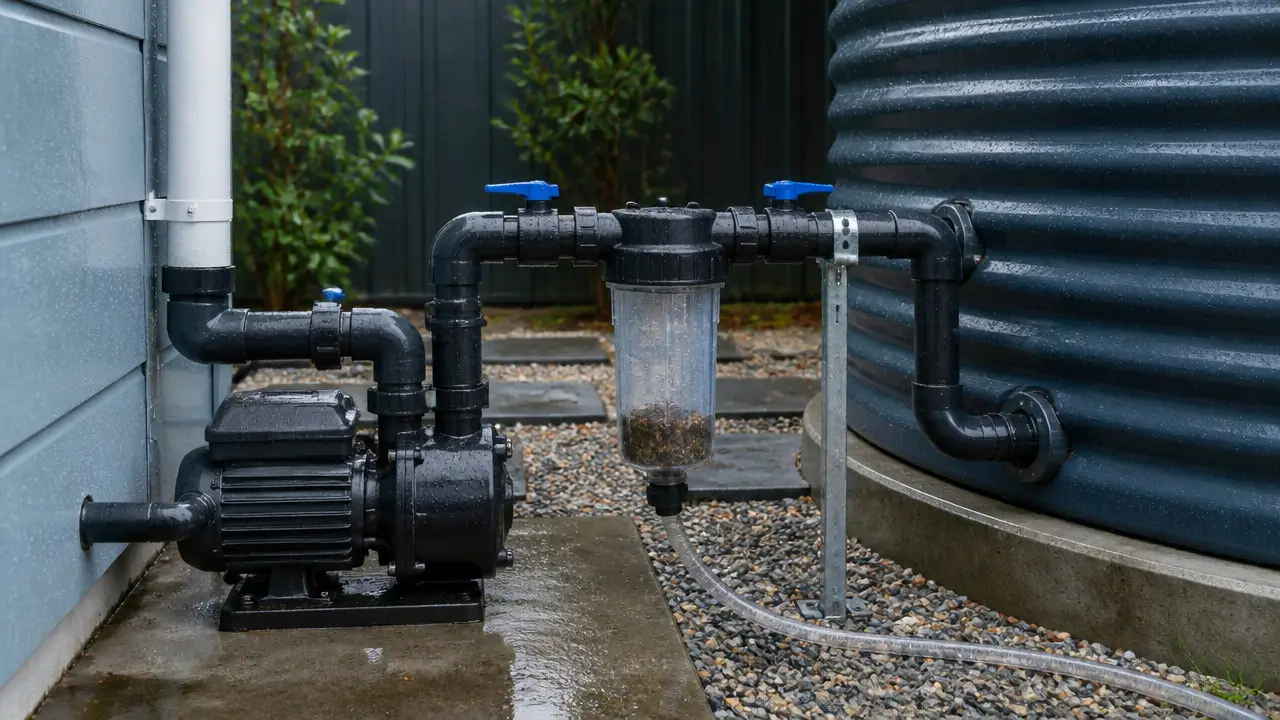
A complete setup starts with understanding the components of a rainwater collection system and how water moves between them.
Making rainwater potable, meaning suitable for drinking, is a whole-system project. It can involve suitable collection surfaces, prefiltration, several treatment stages, disinfection, current laboratory testing, maintenance, and compliance with local requirements.
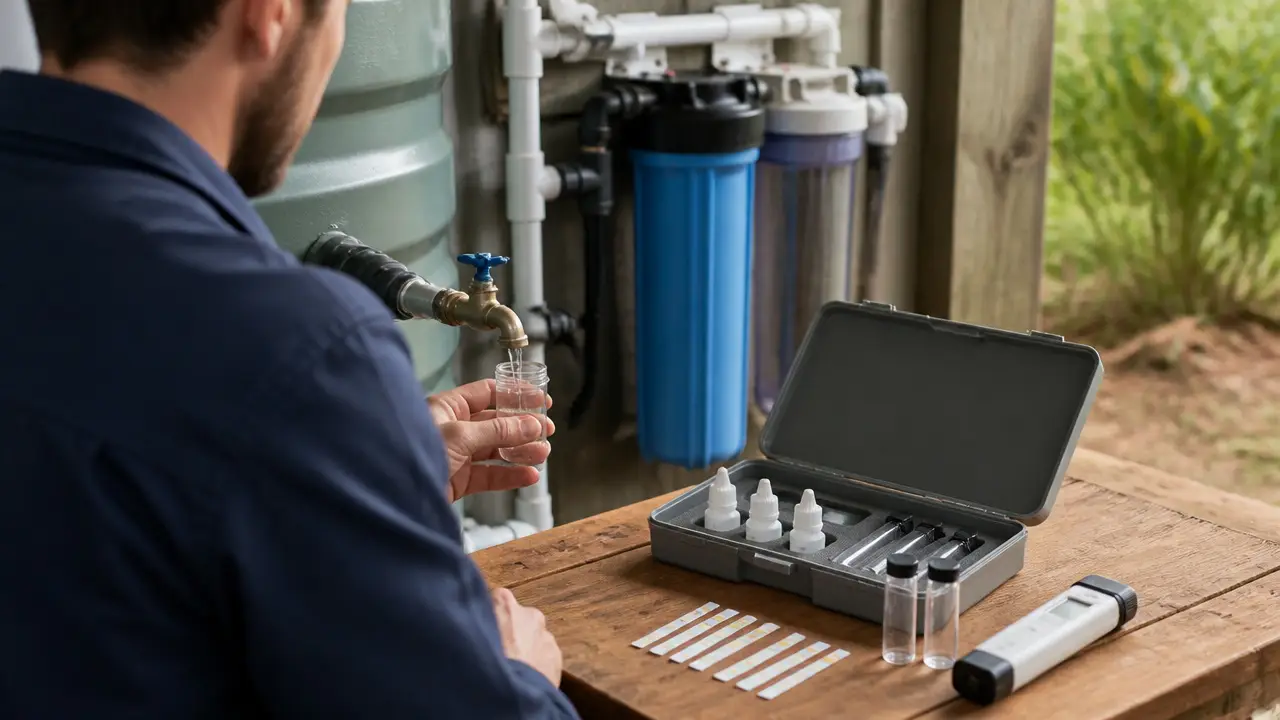
A single sediment filter, carbon filter, UV unit, purifier, test strip, or water-quality meter cannot by itself prove that roof runoff is safe to drink.
Step 2: Choose Your Catchment Area
For most home systems, the roof is the catchment surface.
Look at:
- Which roof sections drain toward each downspout
- The roof area connected to the chosen downspout
- Roof and gutter condition
- Nearby trees
- Bird and animal activity
- Roofing materials
- Where a tank can safely sit
Do not assume every roofing material is suitable for every intended use. Roofing, coatings, flashing, gutters, and other materials can affect the water collected from them.
For basic landscape watering, the main practical goal is usually keeping excessive debris out of the system.
For uses involving greater human exposure, the collection surface and all materials in contact with the water need much closer review.
Step 3: Estimate How Much Water Your Roof Can Collect
You can estimate the theoretical amount of rainfall reaching your system with:
Gallons = roof area in square feet × rainfall in inches × 0.623
For example, suppose 500 square feet of roof drains toward one downspout and a storm produces 1 inch of rain:
500 × 1 × 0.623 = about 312 gallons
That is the theoretical amount falling on that roof area.
You will normally collect less. Water can be lost through:
- First-flush diversion
- Splashing
- Leaking gutters
- Wetting of roof surfaces
- Debris filters
- Tank overflow
- Water remaining in piping
Do not size your tank by assuming every theoretical gallon will reach storage.
Why roof area matters
A small barrel can fill surprisingly fast when connected to a large roof.
For example, a 50-gallon barrel requires only a fraction of the runoff produced by a 500-square-foot roof during a 1-inch rain.
That makes a safe overflow just as important as the tank itself.
Step 4: Choose the Right Storage Capacity
Rain barrels work well when you want a modest amount of water close to a downspout.
Larger cisterns make more sense when you want to store water between storms or supply larger irrigation demands.
Think about three things together:
- How much roof area feeds the system
- How much rain your location receives
- How quickly you will use the stored water
A huge tank does not automatically make a better system. If your roof cannot refill it or you use very little water, much of that capacity may go unused.
A tank that is too small has the opposite problem. It fills quickly and sends most additional rainfall through the overflow.
Step 5: Prepare a Safe Tank Location
Water is heavy.
One U.S. gallon of water weighs about 8.34 pounds. This means 100 gallons of water alone weighs about 834 pounds. A 500-gallon tank can hold more than 4,000 pounds of water.
The base needs to support the full tank without settling, leaning, or tipping.
For a small rain barrel, use a firm, level base suitable for the load. Larger cisterns may require an engineered or manufacturer-specified foundation.
Do not place a large tank on a deck, raised platform, or other structure unless the structure is known to support the full load.
Raising a rain barrel
A small barrel can sometimes be raised to improve access to the spigot and provide a little more gravity pressure.
Keep the support:
- Stable
- Level
- Wide enough for the barrel
- Suitable for the full weight
Do not build a tall, narrow tower just to gain pressure.
For larger tanks or higher-pressure irrigation, a pump is usually a better solution than trying to raise thousands of pounds of stored water.
Step 6: Connect the Gutters and Downspout
The gutter carries roof runoff toward the downspout.
Before connecting the tank:
- Clean excessive leaves and debris from the gutter.
- Repair major leaks.
- Check that water actually reaches the chosen downspout.
- Make sure the downspout connection can handle heavy rain.
- Plan what happens when the tank becomes full.
You can route the downspout directly toward a screened tank inlet or use a downspout diverter designed to send water into storage.
Avoid creating a connection that causes water to back up into the gutter during heavy rain.
Step 7: Add a Debris Screen or Prefilter
A screen or prefilter should stop larger material before it enters storage.
Depending on the system, this may catch:
- Leaves
- Twigs
- Seeds
- Insects
- Roof debris
EPA rainwater guidance identifies screening or filtration before storage as an important way to keep leaves and other debris from entering a rainwater system.
Make the screen easy to reach. A filter that works well but is difficult to clean often becomes a maintenance problem.
Do not make the screen so restrictive that a small amount of debris causes the entire downspout to overflow.
Step 8: Consider a First-Flush Diverter
A first-flush diverter sends some of the first roof runoff from a storm away from the storage tank.
That early runoff can carry accumulated:
- Dust
- Pollen
- Bird droppings
- Small debris
- Other material sitting on the roof
The CDC recommends considering a first-flush diverter because the beginning of a rain event can carry more dirt, germs, and chemicals from the collection surface. It also notes that the amount diverted depends on the size of the roof feeding the system.
There is no single first-flush volume that is correct for every house.
Roof area, local conditions, roof cleanliness, dry periods between storms, intended water use, and system design all matter.
A first flush can improve incoming water quality, but it does not make the remaining rainwater safe to drink.
Step 9: Connect Water to the Tank
Water should enter the storage tank through a screened or otherwise protected opening.
Try to keep the tank as closed as the system allows.
Open tanks invite:
- Mosquitoes
- Leaves
- Animals
- Sunlight
- Additional contamination
A covered tank also reduces light exposure, which can help limit algae growth.
Do not permanently seal a tank in a way that prevents required venting or safe maintenance. Follow the tank manufacturer's installation requirements.
Step 10: Install a Proper Overflow
Every rainwater tank needs somewhere for excess water to go.
Sooner or later, the tank will fill.
The overflow should:
- Handle incoming water during heavy rain
- Carry water away from the building foundation
- Avoid creating erosion
- Avoid flooding neighboring property
- Keep insects and animals from easily entering the tank where practical
- Avoid creating a permanent standing-water area
EPA guidance also recommends routing rain-barrel overflow away from house foundations.
For a simple barrel, an overflow hose may be enough.
Larger roof areas and tanks can require larger overflow piping. Do not assume a small garden hose can safely carry all the runoff from a large roof during a strong storm.
If several tanks are connected together, plan for what happens after the final tank fills.
Step 11: Add a Spigot or Bulkhead Fitting
A tank outlet usually passes through the tank wall using a fitting designed to make a watertight connection.
A bulkhead fitting is a fitting that passes through a hole in the tank wall and seals against the wall with a gasket.
It can provide a connection for:
- A spigot
- Garden hose
- Irrigation tubing
- Larger supply pipe
- Pump suction line
Use fittings that match the tank material and the required pipe or hose size.
Do not force mismatched pipe threads together or rely on large amounts of sealant to compensate for an incorrect fitting.
Place a gravity outlet low enough to use much of the stored water but according to the tank manufacturer's requirements. Keeping an outlet slightly above the lowest point can also leave some settled material at the tank bottom instead of sending all of it into the water line.
Step 12: Decide Between Gravity and a Pump
A rain barrel does not automatically produce household-style water pressure.
Gravity systems
Gravity is often enough for:
- Filling watering cans
- Slow hose use
- Some low-pressure irrigation
- Moving water to a lower location
The available pressure depends mainly on the vertical difference between the water level and the outlet.
As the barrel empties, that height falls, so pressure can also decrease.
Pumped systems
Consider a pump when you need:
- More flow
- More pressure
- Water moved uphill
- Longer irrigation lines
- Sprinklers that require pressure
- Household non-potable supply
When choosing a pump, look at both flow rate and head height.
Flow rate is how much water a pump can move over time, such as gallons per minute.
Head height describes how much vertical lift and resistance the pump must overcome.
Do not select a pump based only on its advertised maximum flow. The actual flow normally decreases as the pump has to lift water higher or push it through restrictive piping.
A pumped system should also be designed so the pump is not damaged when the tank runs out of water. Electrical installations around water should follow applicable electrical requirements and may need a qualified electrician.
Step 13: Connect the Water to Its Final Use
For a simple garden system, this might be:
Tank → spigot → hose
A basic drip system might be:
Tank → outlet → suitable filter → irrigation line
Review assembling a DIY rainwater collection system to evaluate a workable connection between unlike components.
A pumped irrigation system might use:
Tank → intake → pump → filter → pressure control as needed → irrigation zones
Make sure pipe and fitting sizes do not unnecessarily restrict the system.
Drip irrigation can be especially sensitive to dirt. Small emitters can clog, so irrigation filtration may still be useful even when the stored water looks clear.
A filter's micron rating describes the approximate size of particles it is intended to catch. A smaller micron number generally means finer filtration. It does not tell you whether water is safe to drink.
Step 14: Keep Mosquitoes Out
Mosquito control should be part of the system design from the beginning.
The CDC recommends screening rainwater-system openings or regularly emptying barrels to help prevent mosquitoes from laying eggs.
Practical steps include:
- Screen the inlet.
- Protect overflow and vent openings where appropriate.
- Keep the lid secure.
- Repair damaged screens.
- Clear clogged gutters.
- Avoid nearby containers that hold stagnant water.
EPA guidance also emphasizes eliminating or frequently changing standing water that can become mosquito habitat.
Step 15: Test the System Before Relying on It
You do not need to wait for a major storm to discover a plumbing problem.
After installation, check that:
- Water reaches the tank.
- Gutters do not back up.
- Screens stay in place.
- Fittings do not visibly leak.
- The outlet works.
- Connected tanks fill as intended.
- Overflow leaves the system safely.
- Overflow does not collect against the foundation.
- Irrigation lines receive enough flow.
- The pump, if present, operates within its intended conditions.
Recheck the system during an actual rain event when it is safe to do so from the ground.
Avoid climbing onto a wet roof to inspect the system.
A Simple Rain Barrel Layout
For basic landscape watering, a practical system can look like this:
Roof
↓
Gutter
↓
Downspout
↓
Leaf/debris screen
↓
Optional first-flush diverter
↓
Covered rain barrel
↓
Spigot → garden hose or watering can
↓
Overflow → safe drainage area
This is usually a much easier DIY project than connecting a large cistern to household plumbing.
A Larger Cistern Layout
For larger irrigation needs, the system may look more like:
Roof
↓
Gutters and downspouts
↓
Debris screening
↓
First-flush or prefiltration stage
↓
Cistern
↓
Pump
↓
Irrigation filter
↓
Irrigation system
The tank also needs a protected overflow and appropriate venting.
If the system connects to household plumbing, the design becomes more complex and local plumbing requirements become important.
Do You Need Filters?
That depends on what you want the water to do.
Before the tank
A coarse screen or prefilter helps keep large debris from accumulating in storage.
This is useful for almost any system.
After the tank
Additional filtration may help protect:
- Pumps
- Valves
- Drip emitters
- Small irrigation passages
- Other equipment
Match the filter to what the downstream equipment requires.
Do not add extremely fine filtration without a reason. Finer filters can clog more quickly and may reduce flow.
For drinking water
Particle filtration alone is not enough.
Drinking-water treatment must address the actual microbiological and chemical risks present in the source water. The CDC advises testing rainwater for relevant germs and chemicals when it is used for drinking, cooking, or bathing and choosing treatment appropriate for the contaminants found.
That is one reason potable rainwater systems need more planning than ordinary garden systems.
Plan for Cleaning and Maintenance
Every collection system needs maintenance.
Check the system periodically and after severe weather for:
- Leaves in gutters
- Clogged screens
- Damaged mosquito mesh
- Sediment buildup
- Loose fittings
- Leaks
- Blocked overflow pipes
- Algae or unusual growth
- Pump problems
- Damaged hoses or pipes
Clean screens before they become fully blocked.
Tank-cleaning frequency depends on how much sediment enters the system and how the water is used. Design the system so inspection and maintenance are possible without entering the tank.
Do not enter a large cistern or enclosed tank. Confined spaces can be dangerous and require specialized safety procedures.
Protect the System in Freezing Weather
If your area freezes, plan for winter before installing the system.
Water trapped inside:
- Barrels
- Pipes
- Valves
- Filters
- Pumps
- Hoses
can expand when it freezes and damage equipment.
A simple seasonal rain barrel may need to be disconnected, drained, and protected before freezing weather. EPA guidance for seasonal rain barrels includes disconnecting and emptying them when freezing conditions threaten.
Large year-round systems require a freeze-protection design suitable for the local climate. Simply wrapping exposed equipment does not guarantee protection during prolonged cold weather.
Common Rainwater Collection Setup Mistakes
Choosing a tank before estimating runoff
Even a moderate roof can fill a small rain barrel quickly.
Estimate roof runoff first so you understand how often the tank may overflow.
Forgetting the overflow
A tank without a safe overflow can send water against the foundation or across an area that cannot handle it.
Plan the overflow when you plan the inlet.
Leaving the tank open
Open water makes it easier for insects, leaves, animals, and other contaminants to enter.
Use a covered storage system with protected openings.
Expecting strong pressure from a rain barrel
Gravity produces limited pressure when there is little height between the tank and the outlet.
Use gravity for applications that can tolerate low pressure. Consider a properly sized pump when pressure is important.
Installing filters without considering flow
Every screen, filter, fitting, valve, and length of pipe adds some resistance.
A system with many small fittings may deliver much less water than expected.
Treating a first flush as water treatment
A first-flush diverter can reduce some contamination entering the tank. It does not sterilize the water and does not make roof runoff potable.
Connecting rainwater directly to drinking-water plumbing
This can create a cross-connection contamination risk.
Household rainwater plumbing needs suitable separation and any backflow protection required by local rules.
Where a Simple DIY System Ends
A small barrel used for landscape watering is often manageable as a DIY project when the tank has a safe base, screened inlet, secure lid, proper fittings, and safe overflow.
Get qualified help when the project involves:
- Large structural loads
- Large above-ground or buried cisterns
- Excavation
- Indoor plumbing
- Connection near potable-water plumbing
- Electrical pumps and controls
- Complex pressure systems
- Drinking-water treatment
- Confined-space access
- Major roof or structural work
The goal is not to make the system complicated. It is to make sure each part safely matches the job it has to do.
Frequently Asked Questions
How much rainwater can I collect from my roof?
The theoretical yield is about 0.623 gallons for every square foot of roof receiving 1 inch of rain. Multiply roof area in square feet by rainfall in inches by 0.623. Actual collection will be lower because of first flush, splash, leaks, wetting, filtering, and overflow.
Do I need a first-flush diverter?
Not every simple rain barrel uses one, but a first-flush diverter can reduce the amount of dirt and contamination washed from the roof into storage at the start of a storm. It does not make the collected water safe to drink.
Can I connect a garden hose directly to a rain barrel?
Yes, if the barrel has a suitable outlet and the application can work with low gravity pressure. Long hoses, uphill runs, small fittings, and pressure-dependent sprinklers may require a pump.
Does a rainwater tank need an overflow?
Yes. The tank will eventually fill, so excess water needs a safe path away from the tank and building foundation. The overflow should be large enough for the incoming runoff and should not create erosion or standing water.
Does rainwater need to be filtered before storage?
A debris screen or prefilter is useful for keeping leaves, insects, and larger material out of most storage systems. Additional filtration depends on how the water will be used and what equipment it must pass through.
Can collected rainwater be used as drinking water?
Do not assume roof-collected rainwater is safe to drink. Drinking-water use requires suitable collection, treatment based on actual risks, current water testing, maintenance, and compliance with applicable local requirements. A single filter or purifier does not by itself prove the water is potable.
Do I need a pump for a rainwater collection system?
Not always. Gravity may be enough for filling watering cans or some low-pressure irrigation. A pump is useful when you need greater pressure, higher flow, longer piping runs, or water moved uphill.