As an affiliate, we may earn a commission from qualifying purchases. We get commissions for purchases made through links on this website from Amazon and other third parties.
A gravity-fed irrigation system uses the weight of stored water to move water through a hose or irrigation line. It does not need a pump if the water source sits high enough above the area being watered.
The basic setup is simple: raise a rain barrel or tank, connect an outlet near the bottom, run a main line downhill, and feed water to drip tubing, soaker hose, or open outlets. The harder part is making sure the system has enough head height, flow, and compatible irrigation parts.
How Gravity-Fed Irrigation Works
Water pressure increases when the water surface is higher than the irrigation outlet.
This vertical difference is called head height. Measure it from the water level inside the tank to the irrigation outlet, not from the bottom of the tank.
As a useful rule:
- About 2.31 feet of water height produces about 1 psi of pressure.
- 5 feet of head produces about 2.2 psi.
- 10 feet produces about 4.3 psi.
- 20 feet produces about 8.7 psi.
That is much lower than normal household water pressure.
This matters because many standard sprinklers, timers, filters, pressure regulators, and drip emitters are designed for higher pressure. A gravity system works best when every part is chosen for low-pressure operation.
What You Need
A basic gravity irrigation system may include:
- A rain barrel, IBC tote, or water storage tank
- A stable raised base or naturally elevated location
- A tank outlet or bulkhead fitting
- A shutoff valve
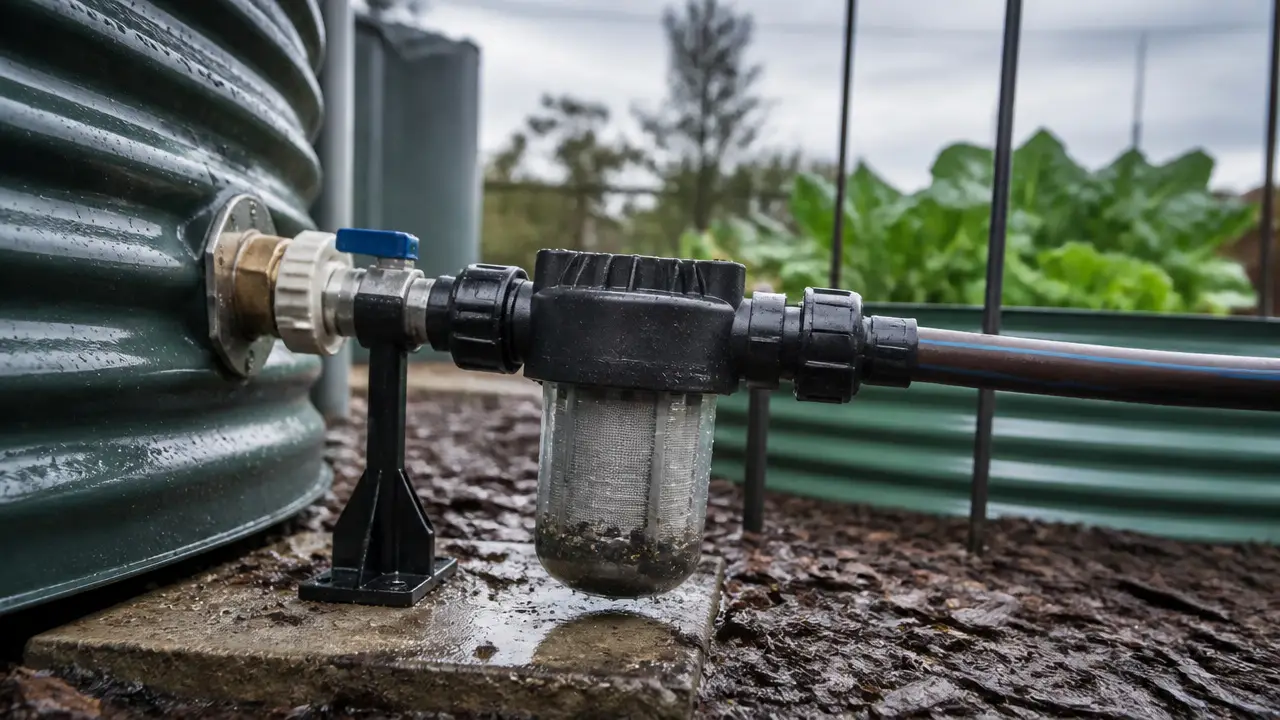
- A filter or screen
- Main irrigation tubing or hose
- Drip tubing, low-pressure emitters, or another suitable watering method
- End caps or flush valves
- An overflow line for the storage tank
A bulkhead fitting is a fitting that passes through a tank wall and creates a sealed connection for pipe, hose, or a valve.
Choose fittings based on the outlet size of your tank and the irrigation tubing you plan to use. Avoid building the system around several small adapters if a larger, simpler flow path is possible.
Step 1: Choose the Water Source
You can gravity-feed irrigation from several types of storage.
A rain barrel works well for a small garden or a short drip line. Several connected barrels can provide more storage.
An IBC tote can hold much more water and may serve a larger garden. A cistern can support an even larger system if the site has enough elevation.
Whatever container you use, make sure it is suitable for storing the water you intend to collect.
For roof runoff, keep leaves and larger debris out of the tank. A screened inlet and good gutter maintenance reduce clogging later in the irrigation system.
Step 2: Decide Where the Tank Will Sit
Elevation is one of the most important parts of a gravity system.
Placing the tank uphill from the garden is usually better than trying to raise a heavy tank on a tall platform.
Remember how much stored water weighs. Water weighs about 8.34 pounds per US gallon.
That means:
- 55 gallons of water weighs about 459 pounds, before adding the barrel itself.
- 275 gallons weighs about 2,294 pounds.
- 330 gallons weighs about 2,752 pounds.
Large tanks should sit on a firm, level base designed for the full loaded weight.
Do not place a large tank on a homemade elevated platform unless the structure has been properly designed for that load. A low, strong base combined with natural slope is safer than trying to gain pressure by lifting thousands of pounds of water high above the ground.
Step 3: Measure Your Head Height
Measure the vertical distance between the water surface in the tank and the irrigation outlet.
For example, imagine a barrel where the water surface is 6 feet above the garden bed.
The approximate pressure is:
6 ÷ 2.31 = 2.6 psi
That may be enough for a simple low-pressure drip system, but it will not behave like a normal hose connected to a house faucet.
Pressure also drops as the tank empties because the water level gets lower.
Design the system around the lowest useful water level in the tank, not only the pressure you get when the tank is full.
Step 4: Install the Tank Outlet and Valve
Connect the irrigation line near the bottom of the tank.
Many rain barrels already have a threaded outlet or spigot. Larger tanks may use a bulkhead fitting or factory-installed valve.
Place a shutoff valve where you can reach it easily. The valve lets you stop the water when cleaning the filter, repairing tubing, or working on the garden.
Use fittings made for the pipe or tubing you are connecting.
Do not force together fittings with different thread types. A connection may appear to fit while damaging the threads or leaking under use.
Step 5: Add a Filter
Gravity-fed drip irrigation usually needs filtration.
Small passages inside emitters can clog with grit, insects, organic material, or sediment from the tank.
Install a filter after the tank outlet and before the small irrigation tubing.
The required micron rating depends on the irrigation equipment. A micron rating describes the size of particles a filter is intended to catch. Smaller micron numbers mean finer filtration.
Do not automatically choose the finest filter you can find. Very fine filters can create too much flow resistance in a low-pressure system.
Follow the irrigation component manufacturer's filtration requirements when they are available.
A coarse tank inlet screen and a suitable irrigation filter often work better together than relying on one very fine filter.
Step 6: Run a Large Main Line First
Gravity systems benefit from reducing friction.
A long, narrow hose can greatly reduce flow. Small fittings, restrictive valves, sharp bends, and partially clogged filters can also cause pressure loss.
When possible, use a reasonably large main line from the tank and divide it into smaller irrigation lines closer to the garden.
Keep the route simple.
Avoid unnecessary:
- Small adapters
- Long sections of narrow tubing
- Sharp turns
- Restrictive valves
- Extra filters
- Uphill sections
The system does not need to be perfectly downhill at every point, but large rises in the line can reduce available pressure and make filling the system harder.
Step 7: Choose Irrigation That Works at Low Pressure
Not every irrigation device works well from a rain barrel.
Drip Irrigation
Drip irrigation can work well if you use emitters or drip tubing designed for low pressure.
Some standard pressure-compensating emitters need more pressure than a short gravity system can provide.
Check the minimum operating pressure before choosing them.
Simple low-pressure drip tape or suitable non-pressure-compensating emitters may be easier to run from a raised tank.
Soaker Hose
A short soaker hose may work, but results vary.
Many soaker hoses need more pressure than a small rain barrel provides. They may water heavily near the tank and barely release water at the far end.
Test the actual hose before depending on it for a large garden.
Sprinklers
Most conventional lawn sprinklers are a poor match for a low-head gravity system.
They generally need more pressure and flow to produce their intended spray pattern.
If you need strong sprinkler pressure, a pump may be a better solution.
Step 8: Divide Large Gardens Into Zones
Trying to water the entire garden at once can overwhelm a gravity system.
Instead, divide the area into smaller zones.
For example, one tank could feed:
- Zone 1: raised beds
- Zone 2: tomatoes
- Zone 3: berry plants
- Zone 4: greenhouse containers
Open one or two zones at a time instead of every irrigation line.
This keeps more of the available flow in the section you are using.
A larger garden may need manual valves at each zone. Low-pressure-compatible automatic valves or timers can also be used, but check their minimum operating pressure first. Some irrigation timers will not open or close correctly on very low pressure.
Step 9: Flush the System
Before installing all the emitters, open the end of the main line and let water run through it.
This pushes out dirt and pieces of plastic left from installation.
Do the same with the smaller irrigation lines.
After the system is operating, flush the ends periodically. Sediment often settles in low spots and at line ends.
A removable cap or flush valve makes this much easier.
Step 10: Test the System While the Tank Is Partly Empty
Do not test only with a full tank.
A full tank gives you the highest head pressure the system will normally see.
Run another test after the water level has fallen.
Check:
- Whether the farthest emitters still flow
- Whether all plants receive similar amounts of water
- Whether the filter is reducing flow
- Whether any fittings leak
- Whether some zones are too large
- Whether the tank drains lower than intended
If the far end stops watering as the tank empties, you may need more elevation, shorter lines, fewer emitters per zone, larger tubing, or a pump.
How Much Pressure Does a Gravity Irrigation System Need?
There is no single minimum pressure for every system.
The right pressure depends on the irrigation equipment.
The key is to compare your available head pressure with the minimum operating pressure required by the emitters, valves, filters, and timers.
For example:
| Head Height | Approximate Pressure |
|---|---|
| 2.3 feet | 1 psi |
| 5 feet | 2.2 psi |
| 10 feet | 4.3 psi |
| 15 feet | 6.5 psi |
| 20 feet | 8.7 psi |
Consider pressure in gravity-fed irrigation to verify manufacturer ratings for frequent pump operation.
These are approximate static pressures. Actual pressure while water is flowing will be lower because of friction through tubing, valves, filters, fittings, and emitters.
Pressure Is Not the Same as Flow Rate
A gravity system needs both enough pressure and enough water flow.
Flow rate describes how much water moves through the system during a period of time, such as gallons per minute or gallons per hour.
You can have enough pressure for an emitter but still have poor irrigation if the tank outlet, hose, or filter cannot supply enough total flow.
For example, 50 emitters using 0.5 gallon per hour each would require about:
50 × 0.5 = 25 gallons per hour
The tank, outlet, filter, main line, and elevation all need to support that flow.
If they cannot, divide the system into smaller zones.
How High Should a Rain Barrel Be for Gravity Irrigation?
A few feet of elevation can operate very simple irrigation setups, but more elevation gives you more usable pressure.
There is no universal ideal height.
Instead of choosing the platform height first, work backward:
- Check the minimum pressure needed by the irrigation parts.
- Convert that pressure into required head height.
- Account for pressure loss through the plumbing.
- Check whether that elevation can be provided safely.
Do not build an unsafe platform simply to gain a few more pounds of pressure.
A pump is usually the better choice when the system needs much more pressure than the site can provide naturally.
How to Improve a Weak Gravity-Fed System
If water barely reaches the end of the line, start with the easiest causes.
Raise the Water Source Safely
More head height creates more pressure.
Natural elevation is usually preferable to a tall platform.
Use Larger Main Tubing
A larger line can reduce friction losses, especially over long distances.
Shorten the Irrigation Runs
Long tubing creates more resistance.
Several shorter zones may perform better than one long zone.
Reduce the Number of Emitters Running at Once
Each open emitter uses part of the available flow.
Smaller zones can improve distribution.
Clean the Filter
A dirty filter can severely restrict a low-pressure system.
Check the Tank Outlet
A small spigot may become the main restriction even if the tubing downstream is large.
Remove Unnecessary Restrictions
Extra adapters, narrow valves, long hoses, and incompatible pressure regulators can reduce flow.
Do not automatically install a standard pressure regulator on a very low-pressure gravity system. A regulator cannot increase pressure and may create another restriction.
Can You Use a Timer?
Yes, but the timer must operate at your available pressure.
Many garden-hose timers are designed for pressurized household water.
A timer may look open while still restricting a gravity-fed system enough to stop proper irrigation.
Check the manufacturer's minimum pressure and flow requirements.
Mechanical or electronic devices also need regular checking. Do not assume an unattended irrigation system will always start, stop, or deliver the expected amount of water.
Managing Sediment in the Tank
Rainwater tanks often collect some sediment over time.
Keep the irrigation outlet slightly above the very bottom of the tank when the tank design allows it. This can reduce the amount of settled material entering the line.
The tradeoff is that some water will remain below the outlet.
Keep the roof, gutters, inlet screen, and storage tank reasonably clean. A first-flush diverter may also help in some roof collection systems. It diverts the first portion of roof runoff away from the storage tank, where some roof debris and contamination may be concentrated.
The irrigation filter still needs regular inspection and cleaning.
Plan for Overflow
Your irrigation system does not replace the tank overflow.
Rain barrels and tanks need a dedicated overflow route for times when rainfall enters the tank faster than irrigation removes water.
Route overflow to a suitable drainage area away from foundations and places where erosion or unwanted pooling could occur.
Do not depend on the irrigation tubing to handle storm overflow.
Protect the System From Freezing
If your climate freezes, water trapped in irrigation tubing, filters, valves, and exposed fittings can expand and damage them.
Before freezing weather, follow the winterizing requirements for your tank and irrigation equipment.
Drain vulnerable components where practical and protect equipment according to its design.
Large tanks may need a site-specific freeze plan. Do not assume wrapping a tank or pipe guarantees freeze protection during prolonged cold weather.
Keep the Tank Covered
A rainwater irrigation tank should be covered and screened.
Limit sunlight entering the tank because light can encourage algae growth.
Screen openings that could allow mosquitoes, insects, or debris into the storage container.
Keep access covers secured while still allowing safe inspection and cleaning.
When a Pump Makes More Sense
Gravity feeding is attractive because it is simple and uses no electricity. It is not always the best choice.
Consider a pump if:
- The storage tank cannot be placed above the garden.
- The garden is uphill from the tank.
- You need conventional sprinklers.
- The irrigation equipment requires higher pressure.
- The main line is very long.
- You need consistent pressure as the tank empties.
- You want to operate many irrigation zones at once.
When sizing a pump, pressure is only one part of the decision. You also need to consider flow rate, vertical lift, total line resistance, power supply, dry-run protection, and the requirements of the irrigation equipment.
A Simple Example
Suppose you have a rain barrel beside a garden.
The water surface in the barrel is about 6 feet higher than the lowest drip line.
Your approximate static pressure is:
6 ÷ 2.31 = 2.6 psi
A practical system might look like this:
Rain barrel → shutoff valve → low-restriction filter → main tubing → zone valve → low-pressure drip line → flushable end
If the drip equipment works at that pressure and the total flow demand is low enough, the system may work without a pump.
If the farthest emitters stop flowing when the barrel gets half empty, divide the garden into smaller zones or reduce resistance before deciding to raise the barrel higher.
Keep the Design Simple
A good gravity-fed irrigation system does not need many parts.
The most important factors are:
- Safe tank placement
- Enough vertical head
- Low-pressure-compatible irrigation equipment
- Adequate tubing size
- Good filtration
- Manageable irrigation zones
- Easy flushing and maintenance
Build the system around the pressure gravity can realistically provide rather than trying to make standard high-pressure irrigation equipment work from a low rain barrel.
Frequently Asked Questions
Can a rain barrel run a drip irrigation system without a pump?
Yes. A rain barrel can run some drip systems if the barrel is high enough and the emitters, tubing, filter, valves, and timer are suitable for low-pressure operation. Large or high-pressure systems may still need a pump.
How much pressure does a rain barrel create?
About 2.31 feet of vertical water height produces approximately 1 psi. A 5-foot difference between the water surface and irrigation outlet provides about 2.2 psi before accounting for friction losses.
Does raising a rain barrel increase water pressure?
Yes. Raising the water surface increases head height and therefore increases pressure. The support must be strong enough for the full weight of the filled barrel.
Can I use a normal garden hose for gravity irrigation?
You can, but a long garden hose may restrict flow more than larger irrigation tubing. The effect is especially noticeable when the available pressure is already very low.
Why does my gravity drip system stop working when the tank gets low?
The pressure falls as the water level drops. The remaining head height may no longer be enough to overcome resistance from the filter, tubing, valves, and emitters.
Do I need a pressure regulator on a gravity-fed irrigation system?
Not necessarily. Many gravity systems already operate below the pressure that standard regulators are designed to control. A regulator can also add resistance. Use one only when the irrigation equipment requires it and it operates within your available pressure range.
Can gravity-fed irrigation water uphill?
Water can move through small rises in a filled line, but the final irrigation outlet must still have enough usable head relative to the tank's water level. A garden substantially uphill from the tank will usually need a pump.
How often should I clean a gravity irrigation filter?
Inspect it regularly and clean it when debris starts to collect or flow decreases. The exact schedule depends on the cleanliness of the stored water, the filter size, and how often the system runs.