As an affiliate, we may earn a commission from qualifying purchases. We get commissions for purchases made through links on this website from Amazon and other third parties.
Yes. A DIY gravity drip irrigation system can work well for garden beds, containers, and small greenhouse setups. It uses the weight of stored water instead of a pump.
The main limit is pressure. A tank or rain barrel placed only a little above the garden creates much less pressure than a normal household faucet. Your tubing, emitters, filter, and layout must all work at low pressure.
How a Gravity Drip Irrigation System Works
A basic system has four parts:
- A raised water container
- A filter
- A main supply tube
- Small drip lines or emitters near the plants
Water flows downhill from the container into the irrigation tubing.
The higher the water surface is above the emitters, the more pressure the system has. This vertical difference is called head height.
As the container empties, the water level drops. That means pressure also drops.
This is why gravity drip systems usually work best with short lines, gentle elevation changes, and low-pressure irrigation parts.
How Much Height Does the Water Tank Need?
You do not need a very tall tower for a small garden, but raising the tank helps.
As a rough physical relationship, about 2.31 feet of water height creates 1 psi of pressure.
For example:
| Water height above emitters | Approximate pressure |
|---|---|
| 2.3 feet | 1 psi |
| 4.6 feet | 2 psi |
| 6.9 feet | 3 psi |
| 9.2 feet | 4 psi |
Many standard drip irrigation parts are designed for higher pressure than a simple rain barrel can provide.
That does not mean gravity irrigation will not work. It means you should choose tubing and emitters made for very low-pressure or gravity-fed systems.
Do not assume a standard pressure-compensating emitter will work correctly from a barrel sitting a few feet above the garden.
What You Need
A simple setup may include:
- Rain barrel, IBC tote, or other suitable water tank
- Strong, stable tank stand if elevation is needed
- Tank outlet or bulkhead fitting
- Shutoff valve
- Irrigation filter
- Main irrigation tubing
- Smaller distribution tubing if needed
- Low-pressure drip emitters, drip tape, or porous irrigation line
- End caps or flush valves
- Stakes or clips to hold tubing in place
A bulkhead fitting is a sealed fitting installed through the wall of a tank. It gives you a secure place to connect a valve or pipe.
The exact parts depend on the tank outlet size and the irrigation tubing you choose. Check connection sizes before buying adapters.
Start With the Water Source
You can gravity-feed irrigation from stored rainwater or another suitable irrigation water source.
If you use roof runoff, keep debris out of the tank as much as practical.
A rainwater collection system may include:
- Gutter screens
- Leaf screens
- A debris diverter
- A first-flush device
- A covered storage tank
A first flush device diverts some of the first runoff from a roof before water enters storage. This can reduce some of the dirt and debris washed from the roof, but it does not make rainwater safe to drink.
For irrigation, the bigger issue is often clogging. Leaves, grit, insects, algae, and other debris can block small drip openings.
Add a Filter Before the Drip Lines
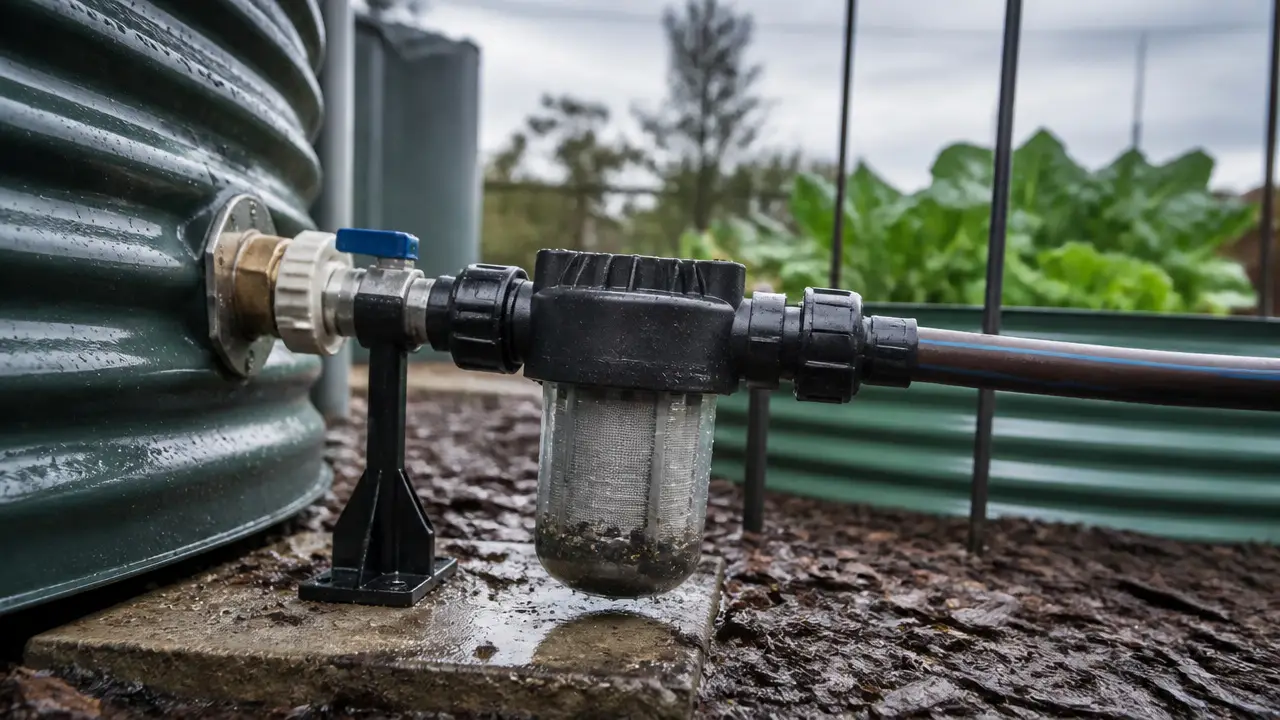
A filter is one of the most important parts of a gravity drip system.
Drip emitters have small water passages. Even a small piece of debris can block them.
Place a filter between the tank and the irrigation tubing.
Filters are often described by mesh size or micron rating. A micron is a very small unit of measurement. A lower micron number generally means the filter catches smaller particles.
However, do not choose a filter only by its micron number.
The filter must also:
- Work at your low operating pressure
- Handle the amount of water you need
- Match the needs of your drip equipment
- Be easy to open and clean
A very restrictive filter can reduce flow in a gravity system.
Choose Low-Pressure Drip Equipment
This is where many DIY systems run into trouble.
Normal household irrigation systems may operate at much higher pressure than a gravity-fed barrel. Some emitters will barely drip when connected to a low tank.
Look for equipment that is specifically designed to operate at very low pressure.
Possible options include:
Drip Tape
Drip tape can work well for rows of vegetables. It has small outlets spaced along a thin tube.
Some types can operate at relatively low pressure, but the required pressure varies. Check the manufacturer's operating range.
Individual Drip Emitters
These can water containers or individual plants.
Gravity systems usually need emitters that can operate at very low pressure. Avoid assuming that pressure-compensating emitters will work from a low barrel.
Small Open Drip Lines
Another simple option is small distribution tubing that delivers water directly near each plant.
This may be easier to make work under low pressure than equipment with complex internal emitters.
Keep outlet sizes controlled so the plants closest to the tank do not take most of the available water.
Keep the Layout Simple
Gravity systems become harder to balance as they get larger.
For the best chance of even watering:
- Keep irrigation lines fairly short
- Avoid long uphill sections
- Divide large gardens into separate zones
- Keep emitters at similar elevations when possible
- Use similar line lengths within each zone
- Avoid too many emitters on one line
Water naturally takes the easiest path.
If one part of the garden is several feet lower than another, the lower section may receive more pressure and flow.
A long line can also lose pressure from friction.
Flow Rate Matters as Much as Pressure
Flow rate is the amount of water moving through the system during a certain amount of time.
A tank can have enough water but still provide poor irrigation if the outlet, filter, tubing, or emitters restrict flow too much.
For example, a small tank outlet feeding many drip lines may not supply all of them evenly.
Before building the whole garden system, test a small section.
Fill the tank to a normal level and connect:
- The valve
- The filter
- A section of main tubing
- Several planned emitters or drip lines
Run the system and check the outlets farthest from the tank.
Then test again when the tank is partly empty. Gravity pressure will be lower at that point.
A Simple DIY Layout
A basic layout might look like this:
Raised tank → shutoff valve → filter → main irrigation tube → branch lines → emitters → flush ends
The tank should be above the irrigation area.
If possible, place the main line so water moves gently downhill toward the garden.
Branch lines can then run through beds or rows.
Install a way to open the end of each line. This lets you flush out sediment instead of leaving it trapped in the tubing.
Step-by-Step Installation
1. Plan the Irrigation Area
Decide what you want to water.
Count the beds, rows, containers, or individual plants.
Measure the distance from the tank to the farthest watering point.
Also note changes in elevation.
A small level garden is much easier to serve by gravity than a large sloping property.
2. Choose a Safe Tank Location
Place the tank on firm, level ground.
If you raise it, use a platform designed for the full weight of the filled container.
Water is heavy. A large tank can place thousands of pounds of load on its support.
Do not place a heavy tank on improvised blocks, loose soil, damaged decking, or a structure that has not been designed for the load.
Large elevated tanks may require professional structural advice.
3. Install the Outlet and Shutoff Valve
Connect the irrigation system to a suitable tank outlet.
Use fittings that match the tank and tubing.
A shutoff valve lets you stop water while cleaning the filter or changing irrigation lines.
Avoid forcing mismatched pipe threads or tubing sizes together. Poor connections can leak or crack the tank fitting.
4. Install the Filter
Put the filter downstream of the shutoff valve.
Install it in the direction shown by its manufacturer.
Account for practical considerations for drip irrigation work with gravity feed to verify emitter flow under available pressure and pump capacity.
Make sure you can reach it easily because gravity-fed rainwater systems often need regular filter cleaning.
5. Run the Main Line
Run the main tubing from the tank toward the garden.
Try to avoid sharp bends, crushed tubing, and unnecessary uphill sections.
Secure the line so it does not move when filled with water.
6. Connect the Drip Lines
Attach the smaller watering lines or drip tape.
Keep each zone manageable.
A smaller system with good flow is usually better than connecting every bed to one weak gravity line.
7. Flush the System
Before installing final end caps, let water run through the tubing.
This helps remove dirt or plastic fragments left from installation.
Flush the lines again when you see sediment collecting.
8. Test Every Outlet
Check the emitters near the tank and at the far end.
Look for outlets that flow much faster or slower than the rest.
Test with a full tank and again at a lower water level.
This shows how much performance changes as the available head height decreases.
How Long Should You Run the System?
There is no single correct watering time.
The amount of water your plants receive depends on:
- Emitter flow
- Tank water level
- Soil type
- Plant size
- Weather
- Mulch
- Irrigation spacing
- Number of emitters per plant
Instead of relying only on a timer, check the soil after irrigation.
You want water to reach the root zone without producing unnecessary runoff or keeping the soil constantly saturated.
Gravity systems may need longer run times than pressurized irrigation because their flow is often lower.
Can You Add a Timer?
Sometimes.
Many standard automatic irrigation valves need more pressure than a gravity system provides.
A timer or valve that works on a household faucet may not open or close correctly at very low pressure.
If you want automatic watering, check the device's minimum operating pressure and make sure it is compatible with gravity-fed water.
Mechanical or low-pressure irrigation controls may be better suited to this type of system, depending on the design.
Do not assume that adding a standard hose timer will work.
Preventing Clogs
Clogging is one of the most common problems with rainwater-fed drip irrigation.
To reduce it:
- Keep the storage tank covered
- Screen incoming water
- Use an irrigation filter
- Clean the filter regularly
- Flush drip lines
- Keep algae and debris out of the tank
- Check emitters during the growing season
If your tank collects sediment, avoid drawing water from the very bottom where practical.
However, the outlet position must still work with your tank design and available water level.
What If the Last Emitters Barely Drip?
Low flow at the far end usually points to one or more problems.
The Tank Is Too Low
More head height can increase pressure.
Only raise the tank if you have a properly designed support capable of carrying the full load safely.
There Are Too Many Emitters
Divide the system into smaller irrigation zones.
Run one section at a time instead of trying to feed the entire garden.
The Filter Is Dirty
A clogged filter creates resistance that can greatly reduce flow in a low-pressure system.
Clean it and test again.
The Tubing Is Too Small
Long runs through narrow tubing create friction.
A larger main supply tube may reduce pressure loss before water reaches smaller branch lines.
The Emitters Need More Pressure
Some drip products simply are not suitable for gravity irrigation.
Check their stated operating pressure.
Can a Rain Barrel Water a Garden by Gravity?
Yes, especially if the garden is small and below the barrel.
A typical rain barrel works best when:
- It is raised safely
- The irrigation run is short
- The garden is fairly level
- The filter stays clean
- The system has only a modest number of outlets
- The drip equipment works at low pressure
A large garden may be easier to manage by dividing it into several zones.
If you need long lines, higher pressure, uphill delivery, or many emitters operating at once, a pump may be more practical.
When a Pump Makes More Sense
Gravity irrigation is simple, but it has limits.
Consider a pump if you need to:
- Move water uphill
- Run long irrigation lines
- Operate many emitters at once
- Use equipment that requires higher pressure
- Run sprinklers
- Maintain more consistent pressure as the tank empties
Pump selection involves more than tank size.
You also need to consider required pressure, flow rate, lift, power supply, pipe size, controls, and dry-run protection.
Lift is the vertical distance the pump must move water upward. It contributes to the total head height the pump must overcome.
If electrical equipment will be installed outdoors or around water, use equipment intended for that environment and follow applicable electrical requirements. Complex electrical work is a good place to use a qualified electrician.
Cold-Weather Considerations
Water trapped inside filters, valves, tubing, and fittings can freeze.
Freezing water expands and can crack components.
If your system is exposed to freezing weather:
- Provide a way to drain irrigation lines
- Follow the tank manufacturer's cold-weather guidance
- Remove or protect components that cannot tolerate freezing
- Do not assume flexible tubing will prevent freeze damage
Large tanks also need proper winter planning. Their safe winter setup depends on the tank material, plumbing, climate, and how the system is used.
Is a DIY Gravity Drip System Worth Building?
For a small garden, it can be one of the simplest ways to use stored rainwater.
The best systems are not complicated. They have enough elevation, a clean water path, a good filter, low-pressure irrigation parts, and short manageable zones.
Build one section first rather than connecting the whole garden at once.
If the test section waters evenly with both a full and partly empty tank, you can expand it with much more confidence.
Frequently Asked Questions
How high should a rain barrel be for drip irrigation?
Higher placement creates more pressure. About 2.31 feet of water height produces roughly 1 psi. The exact height you need depends on the irrigation equipment, line length, elevation changes, and number of outlets.
Can I connect regular drip irrigation to a rain barrel?
Sometimes, but many standard drip components are designed for more pressure than a rain barrel provides. Check the minimum operating pressure of the emitters, valves, filters, and other components before using them.
Do I need a filter for gravity drip irrigation?
A filter is strongly recommended, especially when using stored rainwater. Small drip passages clog easily from sediment, insects, algae, and other debris.
Can gravity drip irrigation run uphill?
Water can move through small rises if there is enough pressure from the water level above them, but uphill sections reduce the pressure available at the emitters. For meaningful elevation gains, a pump may be more practical.
Why does my gravity drip system slow down as the tank empties?
Pressure depends on the vertical distance between the water surface and the emitters. As the water level falls, that distance becomes smaller, so the available pressure decreases.
Can I use a garden hose timer with a rain barrel?
Only if the timer is designed to operate at the low pressure your gravity system provides. Many faucet timers need higher inlet pressure and may not work correctly with a rain barrel.
How do I stop drip emitters from clogging?
Screen incoming water, keep the tank covered, install a suitable irrigation filter, clean the filter regularly, and flush the irrigation tubing when sediment builds up.