As an affiliate, we may earn a commission from qualifying purchases. We get commissions for purchases made through links on this website from Amazon and other third parties.
Outdoor pipe insulation helps slow heat loss and reduce the chance of freezing, but insulation alone cannot guarantee that a water-filled pipe will survive cold weather. The best setup depends on the pipe location, how cold your winters get, whether water keeps moving, and whether the line can be drained.
For rainwater systems, the safest approach is usually to combine insulation with good pipe routing, drainage, shutoff points, and freeze protection where needed.
Why Outdoor Pipes Freeze
A pipe freezes when the water inside it loses enough heat to turn to ice. Outdoor pipes are especially exposed because they may be surrounded by cold air for hours or days.
Common problem areas include:
- Pipes running along an outside wall
- Exposed lines between a rain tank and pump
- Above-ground irrigation pipes
- Tank outlets and valves
- Pipes under decks or raised cabins
- Hose bibs and outdoor faucets
- Short sections of pipe near pumps or filters
Insulation slows the movement of heat out of the pipe. It does not create heat.
This matters during long cold periods. If the pipe and the water inside it eventually reach freezing temperatures, insulation may only delay freezing rather than prevent it.
Start by Checking the Whole Pipe Run
Before adding insulation, follow the pipe from one end to the other.
Look for sections that are:
- Fully exposed to outdoor air
- In shaded areas that stay colder
- Close to the ground but not buried
- Near openings where wind can pass through
- Connected to metal valves or fittings
- Holding standing water
- Hard to drain before winter
Pay special attention to elbows, tees, valves, filters, pumps, and threaded fittings. These parts can be more difficult to insulate completely.
A well-insulated straight pipe can still freeze if an exposed valve beside it remains full of water.
Choose Insulation Made for Pipes
Pipe insulation should fit the outside diameter of the pipe closely.
Common types include foam sleeves and rubber-style pipe insulation. Some materials are designed mainly for indoor use, so check whether the insulation is suitable for outdoor exposure.
Outdoor insulation needs to handle more than cold. It may also face:
- Sunlight
- Rain
- Condensation
- Wind
- Insects
- Rodents
- Physical damage
Some foam insulation can break down when left in direct sunlight. In those cases, it may need a weather-resistant outer covering.
Do not assume that thicker insulation automatically solves every freeze problem. Thickness helps reduce heat loss, but climate and exposure still matter.
Measure the Pipe Before Buying Insulation
Pipe insulation is normally sized to fit a specific pipe diameter.
Measure the pipe itself rather than guessing from the fitting size. Plumbing pipe sizes can be confusing because the labeled pipe size does not always match the actual outside diameter.
You also need enough material for:
- Straight pipe
- Elbows
- Tees
- Valves
- Couplings
- Other exposed fittings
If insulation is too large, air gaps can reduce its effectiveness and make it harder to seal.
If it is too small, the insulation may split or fail to close properly.
Clean and Dry the Pipe
Install insulation on a pipe that is clean and dry.
Remove:
- Mud
- Algae
- Loose dirt
- Old tape
- Flaking paint
- Moisture
Check the pipe for leaks before covering it.
A slow leak hidden under insulation can go unnoticed and may damage fittings, insulation, pumps, or nearby structures.
Repair leaking joints before continuing.
Fit the Insulation Snugly
Most tubular pipe insulation has a slit along one side.
Open the slit and place the insulation around the pipe. Push the edges together so the insulation completely surrounds the pipe.
Avoid crushing the material.
Compressed insulation may not work as intended because some insulation depends on trapped air to slow heat transfer.
Where two pieces meet, position them tightly together. Large gaps can create cold spots.
Seal the Joints
The seams between insulation sections matter almost as much as the insulation itself.
Join neighboring sections tightly and secure them using a method compatible with the insulation material.
Depending on the insulation, this may involve:
- Built-in adhesive strips
- Outdoor-rated insulation tape
- Manufacturer-approved adhesive
- Weather-resistant outer wrap
Do not leave exposed sections of pipe between sleeves.
Water can also enter poorly sealed insulation. If moisture becomes trapped, it can reduce performance and make inspection more difficult.
Insulate Elbows and Fittings Carefully
Elbows, tees, and valves are harder to cover than straight pipe.
You may need to cut insulation pieces so they fit around each fitting without leaving large gaps.
Keep access to parts that still need routine service.
For example, a rainwater system may have a:
- Shutoff valve
- Drain valve
- Pump union
- Filter housing
- Tank outlet
- Check valve
Do not wrap these parts so completely that you cannot inspect, operate, or remove them.
Removable insulation covers can be useful around equipment that needs regular maintenance.
Protect the Tank Outlet
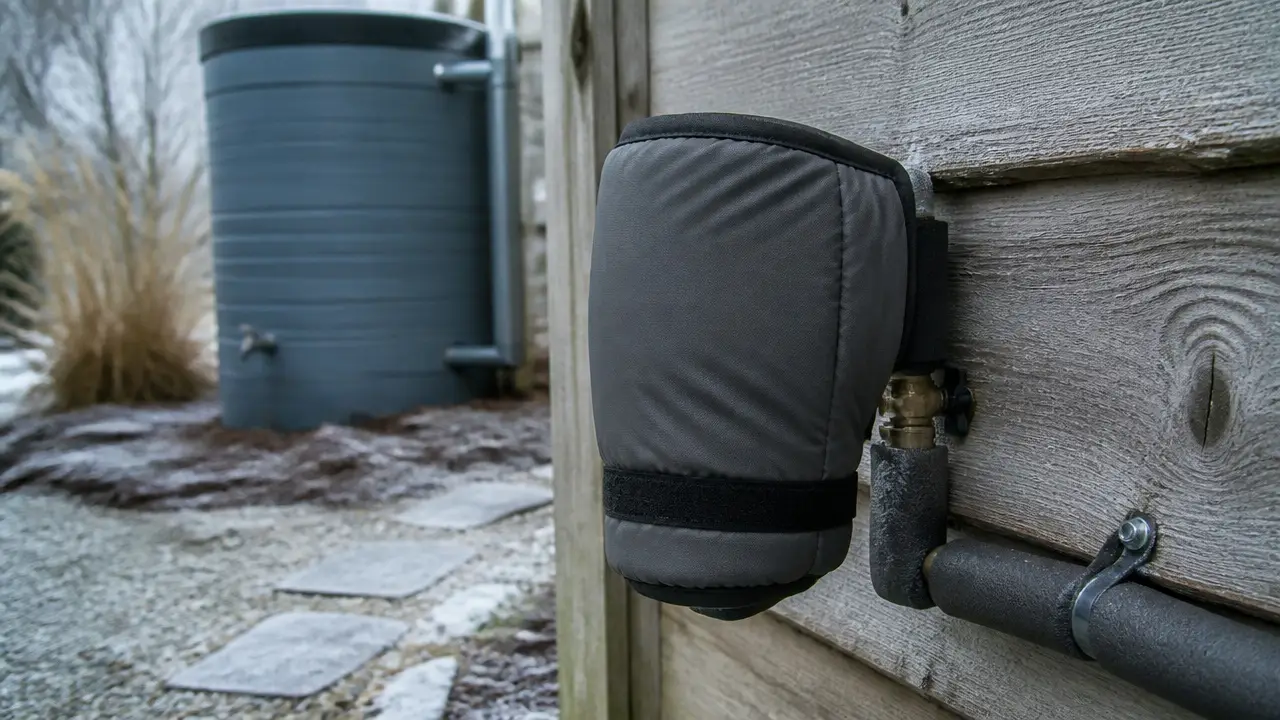
The outlet at the bottom of a rain barrel, IBC tote, or cistern can be one of the first parts of a system to freeze.
The water near the outlet may sit motionless for long periods.
Insulate the exposed outlet pipe and nearby fittings, but remember that the storage tank itself may still freeze if temperatures remain low enough.
An insulated outlet cannot protect a full tank from prolonged freezing conditions.
In severe winter climates, draining seasonal tanks and exposed plumbing may be more dependable than trying to keep the entire system wet.
Pay Attention to Valves
Valves contain larger cavities than straight pipes and may hold trapped water.
Insulation around the pipe does not automatically protect the inside of a valve.
Whenever possible, winterize the system so vulnerable valves can be isolated and drained.
Ball valves can sometimes trap water inside their body depending on their design and position. Other valves may retain water in internal chambers.
Follow the valve manufacturer's winterizing guidance when available.
Keep Outdoor Insulation Dry
Wet insulation may lose much of its insulating value.
If the insulation is not designed for direct weather exposure, protect it with a waterproof or weather-resistant outer layer suitable for the application.
Do not create a covering that traps water against the pipe.
The outer protection should also resist sunlight if the pipe receives regular sun exposure.
Check outdoor insulation each season for:
- Cracks
- Missing tape
- Open seams
- UV damage
- Water intrusion
- Animal damage
Replace damaged sections rather than wrapping more tape around insulation that has already broken down.
Do Not Forget Wind Exposure
Moving air can cool exposed plumbing much faster than still air.
A pipe beneath an open deck or beside a building corner may experience much stronger cooling than a pipe in a sheltered enclosure.
Where practical, reducing direct wind exposure can improve freeze resistance.
For example, pipes may sometimes be routed inside a protected utility space instead of along the outside of a wall.
Do not block required ventilation around pumps, electrical equipment, or other components.
Drain Pipes That Do Not Need Water in Winter
For many seasonal rainwater systems, draining the pipe is the simplest freeze-protection method.
A properly designed drainable system allows water to leave exposed sections instead of remaining trapped inside them.
This is especially useful for:
- Garden irrigation
- Rain barrels
- Seasonal IBC tote systems
- Outdoor wash lines
- Cabin systems that are unused during winter
Guidance on insulation and covers for exterior pipes helps verify temperature-dependent protection for exterior water lines.
A pipe must be sloped and arranged correctly if gravity drainage is expected to work.
Low spots can trap water even when the rest of the line appears empty.
Check valves, filters, pumps, and closed valves can also prevent complete drainage.
Burying Pipe Can Offer Better Protection
Where practical, placing water lines below ground may provide more reliable protection than insulating an exposed pipe.
Soil temperature changes more slowly than outdoor air temperature.
However, burial depth needed for freeze protection depends on local conditions. Frost depth can vary greatly by region.
Other considerations include:
- Pipe material
- Soil movement
- Drainage
- Vehicle loads
- Underground utilities
- Local plumbing requirements
Do not guess at required burial depth for permanent plumbing. Check current local guidance before installing underground water lines.
When Insulation Alone Is Not Enough
Insulation may not be enough when:
- Temperatures remain below freezing for long periods
- The pipe contains standing water
- The pipe is exposed to strong wind
- The system must remain operating through winter
- Pipes cannot be drained
- Pumps, valves, or filters are exposed
- The line supplies a building
In these cases, the system may need a more complete freeze-protection plan.
That could involve routing pipes through conditioned space, burying lines appropriately, building a protected enclosure, draining seasonal plumbing, or using an approved heat-tracing system.
Using Heat Cable or Heat Trace
Electric heat cable can add heat instead of simply slowing heat loss.
This can be helpful for pipes that must remain full during freezing weather, but electrical heating needs careful installation.
Use only heating equipment specifically approved for the pipe material and intended location.
Some heat cables are not suitable for plastic pipe. Others have specific requirements for insulation thickness, overlap, thermostats, or outdoor use.
Do not improvise with household heating products.
Outdoor electrical equipment also needs suitable electrical protection and installation. If you are unsure how to provide safe power outdoors, use a qualified electrician.
Insulation may be installed over certain heat-tracing systems when allowed by the equipment manufacturer.
Always follow the heat cable instructions rather than assuming all systems are installed the same way.
Protect Pumps and Filters Too
A pipe may survive winter while a pump or filter beside it is damaged.
Water can remain inside:
- Pump housings
- Filter housings
- Pressure gauges
- Pressure switches
- Check valves
- Strainers
- UV treatment chambers
- Hose connections
These parts may crack when water freezes and expands.
If equipment is not designed to remain in freezing conditions, follow its winterization instructions.
In seasonal rainwater systems, removing and storing certain components indoors may be easier than trying to insulate them outdoors.
Avoid Common Insulation Mistakes
Leaving Small Gaps
Even a short exposed section can become a freeze point.
Cover the whole vulnerable run, including fittings where practical.
Using Indoor-Only Insulation Outdoors
Some insulation deteriorates quickly from sunlight and weather.
Use materials suitable for outdoor conditions or add suitable weather protection.
Assuming Insulation Generates Heat
It does not.
Insulation only slows heat transfer.
Ignoring Standing Water
A fully insulated pipe that remains full can still freeze during a long cold spell.
Drain exposed lines when the system does not need to operate.
Covering Leaks
Always inspect and repair plumbing before insulating it.
Forgetting Valves and Filters
These parts often retain water even when nearby pipes have been drained.
Insulating Damaged Pipe
Replace cracked, badly weathered, or weakened pipe before covering it.
A Practical Winter Setup for a Rainwater System
A simple seasonal rainwater system might include a storage tank, outlet valve, pump, and garden line.
In a freezing climate, a practical winter plan may be:
- Stop collecting water if the storage system is not intended for winter use.
- Empty exposed tanks as required by their manufacturer.
- Disconnect hoses and irrigation lines.
- Drain low points in the plumbing.
- Drain pumps and filter housings according to their instructions.
- Leave appropriate drain points open where the system design allows.
- Insulate any sections that must remain in service.
- Protect insulation from rain, sunlight, and physical damage.
- Inspect the system again after major cold weather.
The right sequence varies by system. Avoid leaving trapped water between two closed valves.
Inspect the Insulation Every Year
Outdoor pipe insulation is not a permanent one-time installation.
Inspect it before each cold season.
Look closely around:
- Fittings
- Pipe supports
- Tank outlets
- Walls
- Valves
- Pump connections
- Seams between insulation sections
Replace loose or damaged insulation.
Also make sure the pipe itself has not shifted. Movement can open gaps between insulation sections.
Know When to Use Professional Help
A basic foam sleeve on a small seasonal garden line is usually a manageable DIY job.
Consider professional help when freeze protection involves:
- Permanent household plumbing
- Electrical heat tracing
- Underground pipe installation
- Pressure systems
- Plumbing inside walls
- Large cistern systems
- Equipment that supplies essential household water
- Local plumbing or electrical requirements you are unsure about
Freeze damage can affect more than one pipe. A split line may release a large amount of water when it thaws, especially if it is connected to a pressurized system.
Frequently Asked Questions
Does pipe insulation completely prevent freezing?
No. Insulation slows heat loss, but it does not produce heat. During prolonged freezing weather, water inside an insulated outdoor pipe can still freeze.
How thick should outdoor pipe insulation be?
The useful thickness depends on the pipe size, insulation material, temperature exposure, wind, and how long cold weather lasts. Follow the insulation manufacturer's sizing guidance rather than choosing thickness by appearance alone.
Should I insulate PVC pipe outdoors?
PVC and other plastic pipes can be insulated when freeze protection is needed. Use insulation suitable for the pipe and outdoor environment. Insulation does not make a water-filled PVC pipe freeze-proof.
Can I use pipe insulation on rain barrel plumbing?
Yes. It can help protect exposed outlet pipes and fittings, but a rain barrel and its valves can still freeze. In cold climates, draining a seasonal barrel and its plumbing is often more reliable.
Should outdoor pipes be drained even if they are insulated?
If the system does not need to operate during winter, draining vulnerable pipes is usually a strong form of freeze protection. Make sure low spots, valves, pumps, and filters do not retain trapped water.
Can I put insulation over heat cable?
Some heat-tracing systems are designed to be covered by insulation, but others have specific restrictions. Follow the heat cable manufacturer's instructions for pipe material, insulation type, spacing, and electrical protection.
What parts of a rainwater system are most likely to freeze?
Exposed pipes, tank outlets, valves, pumps, filter housings, gauges, and low sections that hold standing water are common problem areas.
Is burying a pipe better than insulating it?
Burial can provide better freeze protection because soil temperatures are more stable than outdoor air. However, the required depth depends on local frost conditions and installation requirements. Check local guidance before burying permanent water lines.