As an affiliate, we may earn a commission from qualifying purchases. We get commissions for purchases made through links on this website from Amazon and other third parties.
Drip irrigation works well when water reaches each plant slowly and evenly. Most problems come from poor pressure, clogged emitters, lines that are too long, or a system that is not adjusted as plants and weather change.
A good drip system does not need to be complicated. It does need the right parts, clean enough water, regular checks, and watering times that match the soil and plants.
1. Using the Wrong Water Pressure
Drip irrigation is designed to work within a certain pressure range. Too much pressure can cause fittings to leak, tubing to separate, or emitters to release more water than intended.
Too little pressure can create the opposite problem. Emitters near the water source may work while those farther away barely drip.
A pressure regulator is often used to lower household water pressure to a level that suits the drip system. If you use a pump with a rainwater tank or cistern, check that the pump, regulator, tubing, and emitters can work together.
Do not judge pressure only by how strong the water feels at the faucet. The pressure available inside the irrigation line can change as water moves through filters, valves, fittings, and long runs of tubing.
2. Skipping the Filter
Small drip emitters have narrow water passages. Dirt, roof debris, algae, mineral particles, and sediment can clog them.
This is especially important when irrigating with stored rainwater.
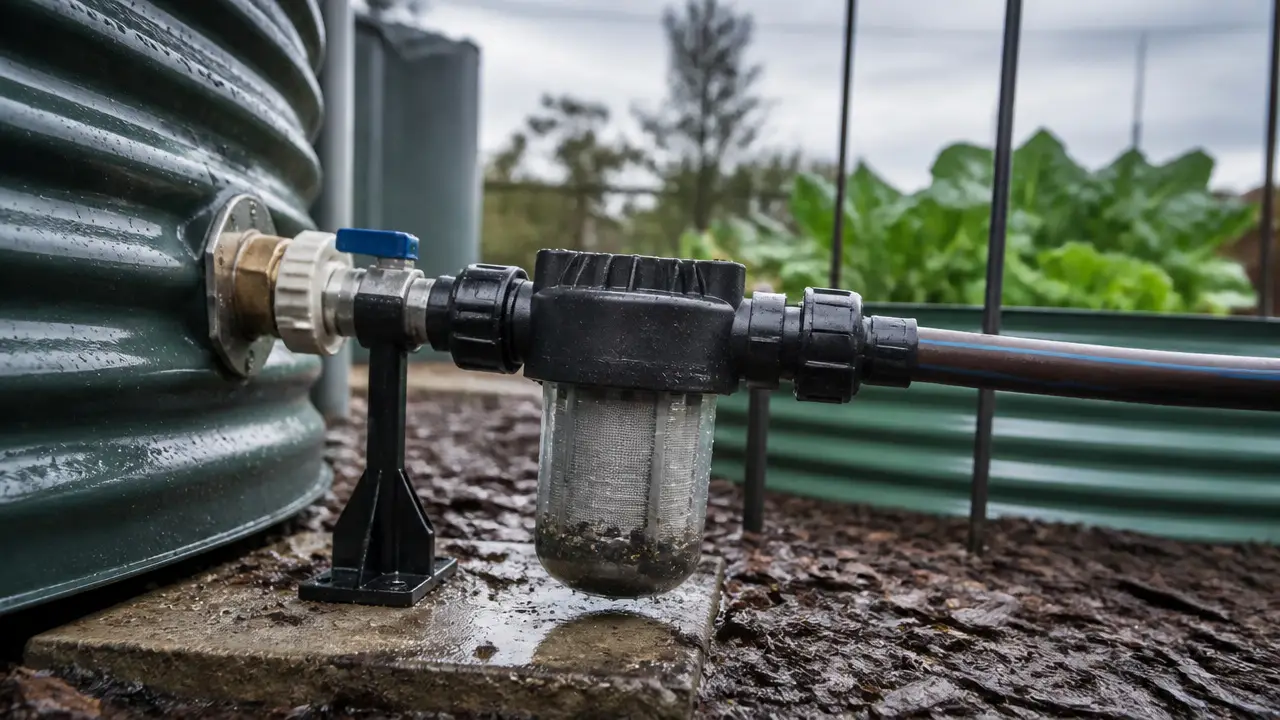
A filter should normally be installed before small emitters or dripline. The correct filter depends on the irrigation equipment and the type of debris in the water.
A filter's micron rating describes the approximate size of particles it is designed to catch. A smaller micron number means finer filtration.
Do not simply install the finest filter you can find. A filter that is too fine may clog quickly and reduce flow. Follow the filtration requirements of the emitters or dripline you are using.
The filter also needs cleaning. Installing one and forgetting about it eventually creates another restriction in the system.
3. Making Drip Lines Too Long
Water loses pressure as it moves through tubing. Very long irrigation runs can therefore water unevenly.
Plants near the beginning may receive enough water while plants near the end receive less.
The practical maximum length depends on several things, including:
- tubing diameter
- emitter flow rate
- emitter spacing
- inlet pressure
- elevation changes
- total water demand
Do not assume every roll of tubing can be installed as one continuous line.
For larger gardens, divide the area into shorter watering zones instead of trying to operate everything from one very long line.
4. Connecting Too Many Emitters to One Line
Every emitter adds to the system's required flow.
Flow rate is the amount of water moving through the system over a given period. Emitters are commonly rated by how much water they release per hour.
If the combined demand from all emitters exceeds what the water source or tubing can supply, watering becomes uneven.
This can happen when a small garden system is expanded over several seasons. A line that worked for ten plants may not work properly after dozens more emitters are added.
Add up the expected flow from the emitters in each zone and compare it with the available water supply.
5. Mixing Parts That Do Not Fit Together
Drip irrigation tubing is available in different sizes, and similar-looking parts are not always interchangeable.
A fitting that is slightly too large may leak. One that is too small may be difficult to install or may damage the tubing.
Problems are especially common when combining:
- mainline tubing from one system
- fittings from another
- small distribution tubing
- garden hose adapters
- filters
- pressure regulators
- valves
- pumps
Check actual tubing dimensions and fitting requirements rather than choosing parts by appearance alone.
This also matters when connecting irrigation to a rain barrel or IBC tote. Make sure the tank outlet, bulkhead fitting, valve, hose adapter, and irrigation tubing form a compatible chain.
A bulkhead fitting is a sealed fitting installed through the wall of a tank so water can enter or leave without leaking around the opening.
6. Expecting a Rain Barrel to Provide High Pressure
A raised rain barrel can supply drip irrigation by gravity, but the available pressure may be low.
Water pressure from gravity depends mainly on the vertical distance between the water level and the irrigation outlet. This vertical difference is often called head height.
A barrel sitting just above garden level may provide enough flow for some low-pressure irrigation setups but not others.
Standard pressure regulators, certain emitters, timers, and long drip lines may not operate correctly at very low pressure.
For gravity-fed systems, choose components intended to work under low pressure and keep the irrigation layout modest.
If you use a pump, make sure it is suitable for the required flow and pressure and has appropriate protection against running dry.
7. Burying Emitters Without Considering Clogging
Placing irrigation close to plant roots can reduce water loss, but burying standard drip parts without planning for it can cause problems.
Soil may enter damaged openings. Roots may grow around emitters. Clogs and leaks also become harder to see.
Some dripline is specifically designed for subsurface irrigation. Ordinary surface tubing should not automatically be treated as equivalent.
For many home gardens, keeping tubing on the soil surface and covering it lightly with mulch makes inspection easier.
Do not bury fittings so deeply that leaks or blockages become difficult to find.
8. Putting Emitters Too Far From the Roots
Water only helps a plant if it reaches the active root zone.
An emitter placed far from a young plant may leave its roots dry even though nearby soil looks wet.
Place water where the roots currently grow, then adjust emitter positions as plants mature.
Trees and large shrubs may eventually need water distributed across a wider area instead of concentrated near the trunk.
9. Using the Same Emitter Setup for Every Plant
Plants do not all need the same amount of water.
A small herb, tomato plant, shrub, and fruit tree may have very different root zones and water needs.
Using identical emitters everywhere can lead to some plants being overwatered while others remain dry.
You can adjust a system by changing:
- emitter flow
- number of emitters
- emitter placement
- watering duration
- irrigation zones
Plants with very different needs are often easier to manage when they are placed on separate zones.
10. Watering for Too Short a Time
Drip irrigation applies water slowly. Running it for only a few minutes may wet the surface without reaching much of the root zone.
The correct watering time depends heavily on soil.
Sandy soil drains quickly. Clay soil absorbs and drains more slowly. Loam usually falls somewhere between.
Instead of choosing watering time by guesswork, check how deep the soil becomes moist after irrigation.
Dig carefully near the root zone after watering. If only the top layer is damp, the system may need a longer run time.
11. Watering Too Often
Slow watering does not automatically mean frequent watering is better.
Repeated shallow irrigation can keep the surface wet while deeper soil receives little water. It can also create conditions that favor some weeds and plant diseases.
Many established plants benefit from watering that reaches farther into the root zone followed by enough time for the soil to partially dry.
The right schedule depends on plant type, soil, temperature, rainfall, mulch, and season.
Adjust the schedule instead of running the same program every day of the year.
12. Ignoring Rainfall
Examine pressure regulators suited to drip irrigation to verify inlet conditions needed to protect the pump.
Automatic irrigation can waste stored or household water if it continues running after useful rain.
This matters even more when a rainwater tank has limited capacity.
Check recent rainfall and soil moisture before irrigating. Automatic systems may also use compatible rain or soil-moisture controls, but these still need to be checked for proper operation.
Remember that light rain may wet leaves and surface soil without supplying enough water to deeper roots.
13. Installing Emitters Where They Cannot Be Checked
Drip irrigation is easy to ignore because much of the system is quiet and close to the ground.
That makes regular inspection important.
Keep emitters and important fittings accessible enough to see whether they are:
- dripping correctly
- clogged
- leaking
- disconnected
- buried
- damaged by animals or tools
A hidden leak can empty a rain barrel or tank much faster than expected.
14. Forgetting to Flush the Lines
Small pieces of debris can collect inside irrigation tubing during installation and normal use.
Most systems should have a way to open the ends of the lines for flushing.
Flushing lets water carry loose sediment out instead of forcing it toward the emitters.
It is particularly useful after installing new tubing, repairing a line, or restarting a seasonal system.
If stored rainwater carries noticeable sediment into the irrigation system, also inspect the tank intake, prefilter, and irrigation filter.
15. Leaving Open Tube Ends Unsealed
An open drip line can lose a large amount of water and reduce pressure throughout the rest of the zone.
It can also allow dirt or insects to enter when the system is off.
Use the proper end closure or flush valve for the tubing.
Make sure you can still reopen the line when flushing is needed.
16. Ignoring Elevation Changes
A garden is not always level.
Long slopes can cause pressure differences between the high and low parts of an irrigation zone. That can change emitter output.
Pressure-compensating emitters can help in some layouts. These are designed to maintain a more consistent flow across a specified pressure range.
They still have operating limits, so they do not solve every elevation or pressure problem.
For steep or large properties, dividing irrigation into separate zones may provide better control.
17. Installing a Timer That Does Not Work With the Water Source
A timer can make drip irrigation easier, but not every timer works well with every setup.
Some valves need a minimum pressure to open or close correctly. A gravity-fed rain barrel may not provide enough pressure.
A pump-fed system can create different concerns. The timer, pump controls, valves, and pressure equipment must operate in the correct order.
Check the timer's pressure and flow requirements before using it with a tank system.
Electrical pumps and controls should be installed in a way that follows their instructions and applicable electrical requirements. Use qualified help when wiring or pressure-system work is beyond a simple plug-in setup.
18. Letting the Pump Run When the Tank Is Empty
A pump connected to a rainwater tank should not be allowed to operate without enough water unless it is designed to tolerate that condition.
Running a pump dry can damage some pumps.
A suitable system may use dry-run protection, a float switch, or another approved control to stop the pump when the tank level becomes too low.
Do not assume an irrigation timer alone protects the pump.
19. Forgetting About Winter
Water trapped in tubing, filters, valves, regulators, or pumps can freeze.
Freezing water expands and may crack irrigation parts.
In freezing climates, follow the winterizing instructions for each component in the system. Some parts may need to be drained, removed, or stored in a protected location.
Do not assume flexible tubing makes the entire system freeze-proof. Rigid fittings, filters, valves, and pump housings may be less forgiving.
20. Treating Drip Irrigation as a Set-and-Forget System
Drip irrigation reduces watering work, but it still needs maintenance.
Check the system during operation several times through the growing season. Look for dry plants, unusually wet areas, blocked emitters, damaged tubing, and changes in pressure.
Also inspect:
- filters
- line ends
- connections
- valves
- timers
- pumps
- tank water levels
Plants grow, roots spread, weather changes, and emitters can clog. A layout that worked in spring may need adjustment by midsummer.
A Simple Way to Avoid Most Drip Irrigation Problems
Start with the water source and work toward the plants.
Make sure the source can provide enough flow. Add suitable filtration. Control pressure when needed. Use compatible tubing and fittings. Keep individual zones within reasonable lengths and flow demands.
Then place emitters where the roots actually need water.
After installation, run the system while you can watch it. Check the beginning, middle, and end of each line. Look for leaks and compare emitter flow.
Finally, check the soil rather than relying only on the timer. The goal is not to run the irrigation system for a certain number of minutes. The goal is to supply the root zone with an appropriate amount of water.
Frequently Asked Questions
Do drip irrigation systems need a pressure regulator?
Many drip systems connected to pressurized household plumbing do. A regulator helps keep pressure within the range intended for the tubing and emitters. Gravity-fed rain barrels may already have very low pressure and may require components designed specifically for low-pressure operation instead.
Does drip irrigation need a filter?
A filter is usually a good idea, especially with small emitters. It becomes particularly important with stored rainwater because sediment, organic debris, or algae can enter the irrigation system. Match the filter to the requirements of the drip equipment.
Why are the emitters at the end of my drip line barely working?
Possible causes include low inlet pressure, excessive line length, too many emitters, a dirty filter, undersized tubing, elevation changes, or partial clogging. Check the system from the water source toward the end of the line.
Can I connect drip irrigation directly to a rain barrel?
Sometimes. Gravity-fed barrels provide much less pressure than typical household plumbing, so the emitters, valves, timer, tubing length, and elevation must all suit low-pressure operation. Larger or more demanding systems may need a properly sized pump.
How often should drip irrigation lines be flushed?
There is no single schedule that fits every system. Flush when installing the system, after repairs, and whenever sediment or clogging becomes a concern. Systems using stored rainwater may need more frequent inspection if debris is reaching the irrigation lines.
Should drip tubing go above or below mulch?
For many garden systems, placing tubing on the soil and covering it lightly with mulch works well. This keeps water close to the soil while allowing the line to remain accessible. Avoid hiding fittings and emitters so deeply that leaks or clogs are difficult to find.
Why does my drip system keep clogging?
Common causes include inadequate filtration, sediment in the water source, dirty lines, mineral buildup, algae, or debris entering through open tubing. Inspect the filter and water source as well as the individual emitters.
Can I leave drip irrigation installed over winter?
That depends on the climate and the equipment. In freezing areas, trapped water can damage filters, valves, pumps, regulators, and fittings. Follow the winterizing directions for each component and drain or protect parts that could freeze.