

As an affiliate, we may earn a commission from qualifying purchases. We get commissions for purchases made through links on this website from Amazon and other third parties.
Best Overall
Best Removable Lid
Best Traditional Raincatcher
A rain barrel kit is useful when you want the main storage container, inlet screen, and outlet hardware to work together without building every part from scratch. But “kit” does not always mean the same thing. Some barrels arrive with a screen and spigot only. Others add a removable lid, hose hardware, overflow parts, or a stand.
The right choice starts with what is actually included and what your downspout still needs. A barrel can be ready for water storage but still require a diverter, downspout extension, overflow hose, stable base, or replacement fitting before it works in your yard.
The four choices here are complete barrel packages rather than small conversion kits. They differ most in cleaning access, outlet hardware, footprint, and how much extra setup work you should expect around the inlet and overflow.
Rain Barrel Kits at a Glance
| Product | Best For | Main Strength | Main Tradeoff |
|---|---|---|---|
| RTS Flat-Back Rain Barrel | Straightforward first setup | Brass spigot, screened inlet, compact flat back | Capacity field conflicts and a separate stand/diverter may still be needed |
| RTS Premium Eco Rain Barrel | Cleaning access | Removable lid, flat back and simple outlet access | Outlet and body leaks appear in some units |
| FCMP Raincatcher 4000 | Traditional wall-side setup | Screened top and established flat-back format | Hose fitting leaks are inconsistent |
| RTS ECO Flat-Back Rain Barrel | Recycled-plastic package | Flat back, inlet screen and compact wall depth | Screen fit and spigot sealing can need attention |
Decide What “Complete” Means for Your Yard
Before buying, list the parts between roof and garden. You may need a downspout diverter or extension, an inlet screen, a barrel, a spigot, an overflow route, a stand, and a hose connection. The products here cover the barrel and several of those functions, but none should be assumed to solve every roof layout.
A good kit reduces compatibility problems. The spigot should already fit the barrel wall, the screen should sit correctly at the inlet, and any lid should open without interfering with the downspout. If you plan to link barrels, check for a compatible connection point rather than drilling a new hole after filling.
Also plan where overflow goes. A barrel package is not complete in practice until storm water has a safe path away from the house after the barrel fills.
A Simple Flat-Back Package With a Brass Spigot
1 / 4
RTS Home Accents Flat-Back Rain Barrel

Back
Flat
Inlet
Screened
Spigot
Brass
Footprint
21 x 19 x 34 in documented
The RTS flat-back barrel is the easiest overall package because it combines a compact wall-side body, screened inlet, and brass spigot without adding much complexity. That is a useful starting point for a homeowner who already knows how the downspout will feed the barrel and mainly needs a sound storage-and-outlet setup.
The documented 21-by-19-inch footprint is manageable beside a wall or fence. Users report easy assembly and a solid feel, and the brass outlet is a stronger starting point than the light plastic taps common on basic barrels.
It still is not a roof-to-garden system by itself. You may need a diverter, stand, overflow routing, or hose depending on the site. The capacity field conflicts, so the recommendation does not rely on an exact gallon claim.
Why It Works
- Screened inlet handles the first line of larger debris control.
- Brass spigot gives a substantial water outlet.
- Flat-back body saves wall-side space.
- Simple package leaves fewer barrel-side parts to match yourself.
What To Keep In Mind
- A downspout diverter or extension may still be required.
- Capacity is omitted because available product details conflict.
- A stable stand may be useful for watering-can clearance.
A Removable-Lid Package for Easier Cleaning
2 / 4
RTS Premium Eco Rain Barrel With Removable Lid

Lid
Removable
Back
Flat
Material
Polyethylene
Stand
Optional
The RTS Premium package makes sense when cleaning access is a priority. Its removable lid lets you inspect the barrel interior, remove sediment more easily, or fill a watering can from the top. That is a meaningful advantage if your roof sheds a lot of fine debris or you expect to clean the barrel seasonally.
The flat-back form keeps it practical beside the house, and an optional matching stand can raise the outlet. Users find the lid convenient, but outlet quality and body sealing vary. Some barrels developed drips or small defects, so the first fill should be treated as a leak test.
The capacity field conflicts and is not used here. Choose this kit because it gives you direct top access and a complete rigid barrel body, not because of a disputed size figure.
Why It Works
- Removable lid improves cleaning and inspection.
- Flat back suits a permanent wall-side location.
- Direct top access can speed watering-can filling.
- Optional stand gives a matched way to raise the outlet.
What To Keep In Mind
- Inspect the outlet and body during the first full fill.
- A separate roof connection may still be needed.
- Capacity is omitted because available product details conflict.
A Traditional Raincatcher Package
3 / 4
FCMP Outdoor Raincatcher 4000

Back
Flat
Inlet
Screened top
Use
Garden and backyard collection
Outlet
Low-mounted spigot
The FCMP Raincatcher 4000 is a familiar all-in-one barrel layout: a flat-back body sits near the wall, roof water enters through a screened top, and a low outlet gives access to stored water. It is easy to understand and works well when the downspout can be routed directly over the inlet.
The main setup concern is the hose fitting. Some barrels stayed dry, while others leaked around the outlet connection. Because the spigot sits low, a stand or elevated base may also be useful if you fill watering cans or want better gravity flow.
Material, dimensions, and capacity fields conflict, so those specifications are not used as ranking claims. This is the traditional pick for readers who want a basic screened barrel package and are comfortable adding the site-specific downspout and overflow pieces.
Why It Works
- Flat back simplifies placement below a wall-side downspout.
- Screened top keeps larger debris out.
- Low outlet supports hose or watering-can use when elevated correctly.
- Straightforward design is easy to inspect and understand.
What To Keep In Mind
- Hose connection leaks have occurred.
- Exact capacity and dimensions are omitted because those fields conflict.
- Plan the overflow route separately if the included setup does not reach a safe discharge point.
A Recycled-Plastic Flat-Back Package
4 / 4
RTS ECO Flat-Back Rain Barrel

Footprint
24 x 19 x 34 in documented
Back
Flat
Inlet
Screened
Material
Plastic
The RTS ECO barrel is the right fit when recycled-plastic construction matters and you want a simple flat-back package. Its documented 24-by-19-inch footprint stays relatively shallow, and the top screen and outlet give you the main barrel-side pieces needed for normal garden collection.
The spigot can seal well when installed carefully, including with thread tape, and the barrel can be linked to another container. But screen fit, outlet hardware, and manufacturing consistency are mixed. Some barrels arrived with warped or misplaced openings, and some spigots eventually leaked.
The capacity field conflicts and is omitted. This model is useful for DIY-minded owners who are comfortable checking the inlet screen, outlet seal, and barrel body closely during setup.
Why It Works
- Flat-back form fits narrow wall-side areas.
- Screen and outlet are already part of the barrel package.
- Recycled-plastic construction is a clear differentiator.
- Can work in a linked-barrel setup when compatible hardware is used.
What To Keep In Mind
- Inspect screen alignment and barrel openings before filling.
- Spigot sealing can require careful installation.
- Capacity is omitted because available product details conflict.
What You May Still Need Beyond the Barrel Kit
A Downspout Connection
Some yards can drop a downspout directly over the screened inlet. Others need a diverter that sends water through a hose while allowing excess roof flow to continue down the main drain.
A Stable Stand
A stand raises the spigot and improves gravity head, but it has to support the full barrel weight. Do not improvise with narrow or unstable materials.
A Real Overflow Route
The barrel will fill eventually. The overflow should send water away from the foundation and away from the base supporting the barrel.
A Hose or Watering Setup
A barrel spigot can fill watering cans directly. A hose works best when the barrel is elevated and the watering area is downhill.
Better Insect Protection
A coarse inlet screen stops leaves but may not stop every insect. Check every opening, including overflow and linking ports.
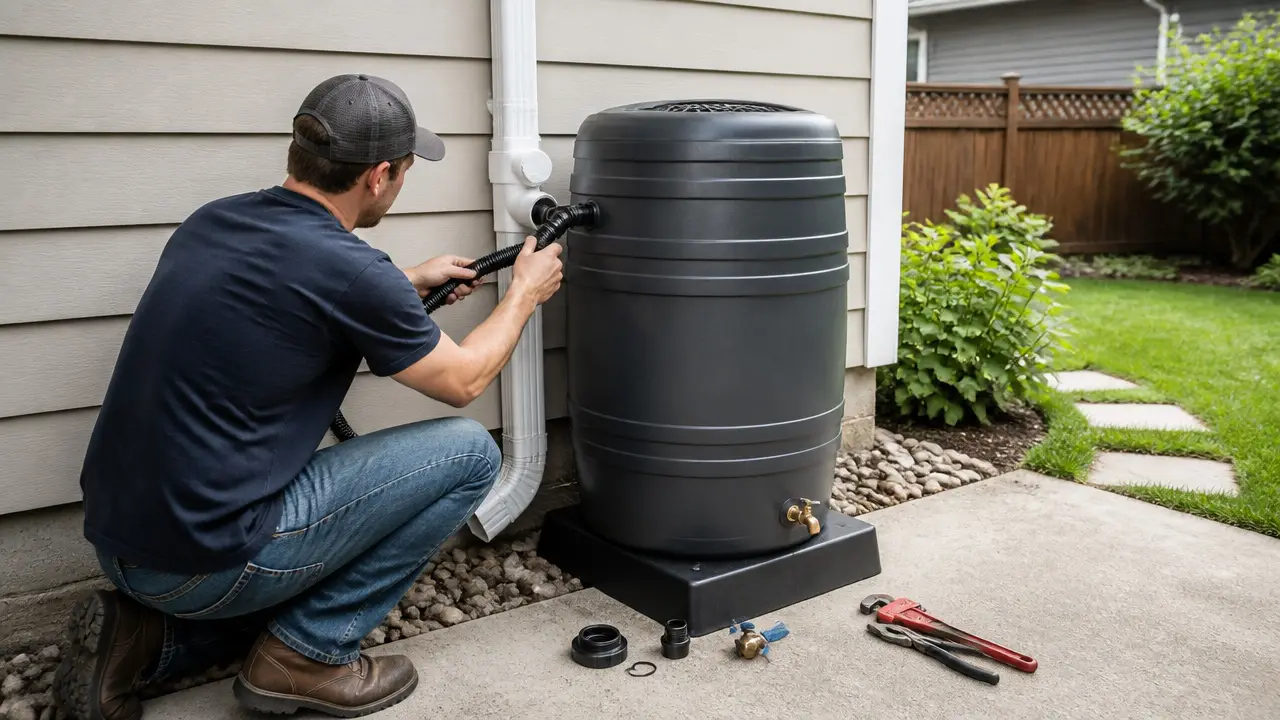
Rain Barrel Kit Setup Order
- Prepare and level the base.
- Position the empty barrel and check downspout alignment.
- Install or inspect the spigot and washers.
- Connect the roof feed or diverter.
- Route overflow away from the building.
- Check that screens and lids close properly.
- Let the first storm partially fill the barrel and inspect every fitting before relying on it.
This order prevents you from discovering a bad fitting after the barrel is too heavy to move.
Frequently Asked Questions
Does a rain barrel kit include a downspout diverter?
Not always. Check the exact package. Many barrel kits include the container, screen, and spigot but still need a separate roof connection or diverter.
Do I need a stand with a rain barrel kit?
A stand is optional for some setups, but it can improve spigot clearance and gravity flow. Use only a stable support made for the filled load.
Can I install a rain barrel kit without cutting the downspout?
Sometimes. A direct downspout can terminate over the barrel inlet, while many diverter systems require modifying the downspout. Follow the connection method designed for your setup.
How do I prevent a new rain barrel from leaking?
Install washers and threaded fittings correctly, use the supplied sealing method, keep hoses from pulling on the spigot, and inspect the first fill before the barrel reaches full capacity.
Can two rain barrel kits be connected together?
Yes when the barrels have compatible ports or accept a suitable connector kit. Keep them level and check the linking seals for leaks.
Is rainwater from a barrel kit safe to drink?
Do not assume roof runoff is safe to drink. Drinking-water use requires a suitable whole-system approach, treatment, local requirements, and current water testing.
For a wider look at complete containers, the best rain barrels guide compares different barrel shapes and access styles. If you need the roof-to-barrel connection rather than the barrel itself, rainwater harvesting kits cover diverter-style packages and their fit questions. For an outlet upgrade, rain barrel spigots compare thread and sealing options. And to keep debris and insects from entering storage, rain barrel screens cover inlet inserts and larger mesh covers.



