As an affiliate, we may earn a commission from qualifying purchases. We get commissions for purchases made through links on this website from Amazon and other third parties.
Attaching heat cable to a water pipe is usually simple, but the cable must match the pipe and be installed exactly as its instructions allow. The basic method is to place the heating cable directly against the pipe, secure it with approved tape, add insulation only as permitted, and connect it to a properly protected electrical supply.
Do not treat heat cable like ordinary electrical wire. Poor attachment, overlapping cable, damaged insulation, or the wrong type of pipe insulation can create an overheating or fire risk. The U.S. Consumer Product Safety Commission recommends using heat cable made for the specific pipe size and material and following the manufacturer's installation instructions.
Before You Attach Heat Cable
First, make sure the heating cable is suitable for the job.
Check the cable instructions for:
- Pipe material, such as copper, steel, PVC, CPVC, or PEX
- Minimum and maximum pipe diameter
- Indoor or outdoor use
- Wet-location use, if the pipe can get damp
- Required insulation
- Required attachment tape
- Whether the cable can cross or overlap
- Whether the cable must run straight or may be spiraled
- Thermostat or temperature-sensor placement
- Required electrical protection
Do not assume one pipe-heating cable works on every type of pipe.
Heat cable used on a rainwater system may be protecting a line from a rain barrel, IBC tote, cistern, pump, or garden-water system. Make sure the cable is intended for water-pipe freeze protection rather than roof and gutter de-icing or another application.
The CPSC specifically advises against using pipe-heating cable for applications it was not designed for.
What You Need
The exact materials depend on the heating cable, but a typical installation may require:
- Pipe heating cable
- Manufacturer-approved attachment tape
- Aluminum foil tape if required for plastic pipe
- Pipe insulation approved for use with the cable
- Suitable electrical outlet
- Ground-fault protection where required
- Weather protection for outdoor electrical connections
Avoid substituting ordinary tape just because it sticks to the pipe.
Some heat-trace manufacturers specifically prohibit vinyl electrical tape, duct tape, metal wire, and metal pipe straps for holding their heating cable in place.
How to Attach Heat Cable to a Pipe
1. Turn Off and Unplug the Cable
Never work on an energized heating cable.
If it is a plug-in cable, leave it unplugged while you install it.
If the system is permanently wired, turn off the correct circuit before working around it. Hard-wired heat-trace systems, new circuits, or electrical connections in wet areas can be a good point to use a qualified electrician.
2. Inspect the Pipe
The pipe should be accessible, reasonably clean, and dry before you attach the cable.
Look for:
- Leaks
- Sharp edges
- Damaged fittings
- Loose valves
- Existing frozen sections
- Old heat cable
- Flammable material touching the pipe
Repair leaks before covering the pipe with heating cable and insulation.
Heat cable should not be used to hide a plumbing problem.
3. Inspect the Heating Cable
Check the full cable before installing it.
Do not use it if you see:
- Cuts
- Cracks
- Flattened sections
- Exposed conductors
- Burn marks
- Damaged plugs
- Damaged end seals
The CPSC recommends replacing heating cable that shows cracking, charring, bare wires, or other deterioration.
Do not repair a damaged heating cable with ordinary electrical tape.
4. Position the Cable Against the Pipe
Place the heating cable directly against the pipe in the position required by its installation instructions.
Many systems run lengthwise along the pipe. Some installations allow spiral wrapping when extra cable or additional heat is required. Others have specific restrictions.
Do not automatically spiral the cable around the pipe.
A straight installation is often easier to inspect and keeps the cable from accidentally crossing itself, but the cable manufacturer's layout requirements take priority.
Pay close attention around:
- Valves
- Elbows
- Tees
- Pipe supports
- Outdoor faucets
- Pump connections
These areas can lose heat differently from a simple straight pipe.
5. Do Not Cross or Overlap the Cable Unless Allowed
This is one of the most important rules.
Some heating cables can overheat where one heated section touches another. The CPSC recommends that heat tape not be overlapped unless the manufacturer's instructions specifically allow it.
Self-regulating cable can behave differently from fixed-output cable, but "self-regulating" does not mean you can ignore its installation limits.
Follow the instructions for your exact cable.
6. Secure the Cable With the Correct Tape
Attach the cable firmly enough to maintain contact with the pipe without crushing or damaging it.
The required tape and spacing depend on the heating-cable system.
Some manufacturers use glass-cloth attachment tape at regular intervals on metal pipe. For example, one commercial heat-trace system specifies glass tape to hold the cable against the pipe and warns against vinyl electrical tape, duct tape, wire, and metal attachments.
Your cable may specify something different.
Do not use:
- Nails
- Screws
- Staples
- Bare wire
- Sharp metal ties
Never puncture the heating cable.
Attaching Heat Cable to Plastic Pipe
Plastic pipe needs extra attention because it does not transfer heat as well as metal pipe.
Some heating-cable systems require aluminum foil tape when used with plastic pipe. The aluminum spreads heat over a larger part of the pipe instead of concentrating it in one narrow area.
For example, current nVent installation guidance for some systems requires continuous aluminum tape when heating cable is installed on plastic piping.
That does not mean every PVC, CPVC, or PEX installation should automatically be wrapped in aluminum tape.
Check whether your heating cable is:
- Approved for your plastic pipe material.
- Installed with aluminum tape beneath the cable, over the cable, or both.
- Limited to particular pipe sizes or insulation thicknesses.
Do not improvise these details.
Attaching Heat Cable to Metal Pipe
Copper and steel transfer heat more readily than plastic.
A compatible heating cable can often be attached directly to the pipe with the specified heat-resistant attachment tape.
Keep the cable in good contact with the pipe.
Avoid placing thick adhesive material between the heating cable and pipe unless the instructions call for it. Anything that reduces contact can also reduce heat transfer.
What About Valves and Fittings?
Valves, tees, and other fittings contain more metal or more surface area than a straight pipe. They may lose more heat.
Some heating-cable systems therefore require additional cable around these components.
Do not simply bunch spare cable around a valve.
Use the layout shown in the heating cable instructions and maintain any required minimum bend radius and spacing.
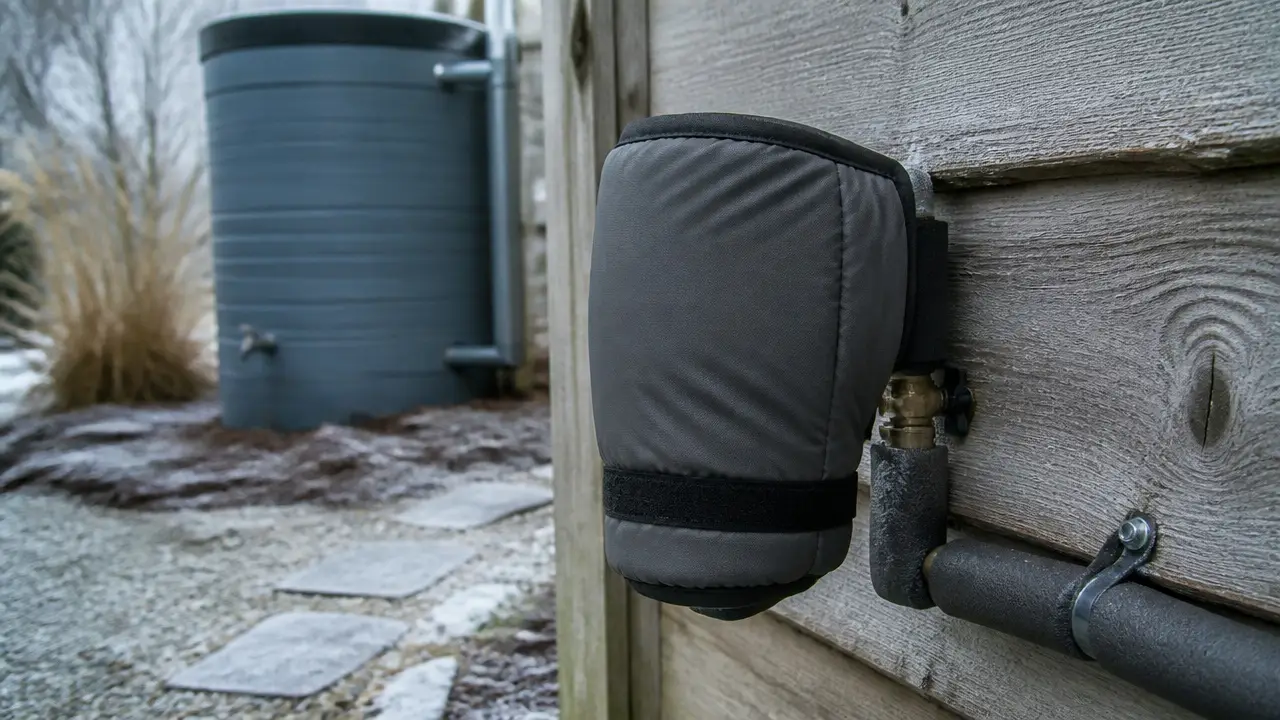
This matters on rainwater systems because an exposed valve at the bottom of a barrel or tote may freeze even when the nearby pipe remains above freezing.
Install the Thermostat or Sensor Correctly
Some pipe-heating cables have a built-in thermostat. Others use a separate temperature sensor or controller.
Sensor placement matters.
Regarding using a water pipe heat cable outside, verify plumbing protection across daytime and overnight temperature swings.
Depending on the design, the sensor may need to:
- Touch the pipe
- Remain exposed to surrounding air
- Sit beneath the insulation
- Be positioned away from the heated cable
Do not assume the thermostat should be taped anywhere convenient.
The CPSC notes that thermostat placement varies between products and recommends following the manufacturer's instructions about whether it should contact the pipe or remain uncovered.
Add Pipe Insulation Only as Directed
Heat cable normally works much better when the system uses suitable pipe insulation, but the insulation must be compatible with the heating system.
Do not put the heat cable over existing pipe insulation. Pipe-heating cable is normally installed directly against the pipe.
Then install the insulation specified or permitted by the cable manufacturer.
Do not assume that thicker insulation is always safer. Older and fixed-output heating systems in particular can have insulation limits because trapping too much heat may cause overheating. The CPSC advises using only insulation suitable for the heating cable and not exceeding the manufacturer's recommended amount.
For outdoor rainwater plumbing, the insulation also needs protection from weather. Wet insulation loses much of its insulating value.
Connect the Electrical Supply Safely
Pipe heating cable combines water, electricity, and long operating periods, so the power connection deserves as much attention as the pipe attachment.
Use the power arrangement specified for the cable.
For plug-in residential systems, this commonly means a properly grounded receptacle and appropriate ground-fault protection. The CPSC recommends using a grounded three-prong connection and GFCI protection for pipe heating cable.
A GFCI, or ground-fault circuit interrupter, shuts off electricity when it detects certain electrical leakage that could create a shock hazard.
For an outdoor installation, electrical connections also need suitable protection from rain and moisture.
Do not:
- Remove a grounding pin.
- Modify the plug to fit another outlet.
- Splice ordinary cord onto heating cable.
- Make an exposed electrical connection outdoors.
- Hard-wire plug-in cable unless the manufacturer permits it.
- Use an extension cord unless the heat-cable instructions specifically allow one.
A permanently wired heat-trace system may require electrical work beyond a simple homeowner installation.
Test the System Before Covering It
Follow the cable manufacturer's testing procedure before installing all the insulation.
Depending on the system, this may include checking:
- Cable condition
- Ground-fault protection
- Controller operation
- Sensor operation
- Heating operation
Do not expect the cable to feel extremely hot. Freeze-protection cable is meant to maintain safe pipe temperatures, not act like an exposed heating element.
Once everything is working correctly, finish the insulation according to the instructions.
Heat Cable Does Not Protect the Entire Rainwater System
A common mistake is protecting one exposed pipe while ignoring everything connected to it.
For example, heat cable on a line leaving an IBC tote does not necessarily protect:
- The tote itself
- The outlet valve
- A filter housing
- The pump
- A pressure switch
- A hose
- A backflow device
- An irrigation valve
- An aboveground tank fitting
Water trapped in any unprotected component can still freeze.
A bulkhead fitting is a fitting that passes through the wall of a barrel or tank and creates a connection for a valve or pipe. These fittings can also be vulnerable to freezing because water may remain inside them.
Look at the whole path from storage to the point of use instead of treating heat cable as complete freeze protection.
When Heat Cable Is Not the Best Solution
Heat cable is useful for short exposed sections that cannot easily be moved or drained.
Other solutions may be simpler for seasonal rainwater systems.
You may be better off:
- Draining outdoor lines before freezing weather
- Disconnecting garden hoses
- Moving removable pumps indoors
- Installing shutoff and drain points
- Burying suitable water lines below the locally appropriate frost depth
- Moving vulnerable plumbing into a protected space
Heat cable also depends on electricity. A power outage during severe cold can leave the pipe unprotected.
For an outdoor rainwater system that is not needed during winter, draining the system may be more dependable than keeping the plumbing full of water and relying on electric heat.
Common Heat-Cable Installation Mistakes
Wrapping Cable Over Pipe Insulation
The cable should normally contact the pipe itself rather than sitting outside the insulation.
Using Whatever Tape Is Available
Duct tape, ordinary electrical tape, metal wire, and cable ties are not automatic substitutes for the attachment method specified by the cable manufacturer.
Crossing the Cable
Unless the instructions explicitly permit crossing or overlapping, keep heated sections separated.
Using the Wrong Cable on Plastic Pipe
Plastic pipe may need a heating cable specifically approved for it along with aluminum heat-distribution tape.
Leaving Outdoor Connections Exposed
Rainwater-system plumbing is often wet. Protect electrical equipment and connections as required for the location.
Ignoring Valves and Fittings
The straight pipe may stay warm while a nearby valve or pump housing freezes.
Covering Damaged Cable With Insulation
Inspect the complete cable before insulating it. Replace damaged heating cable rather than burying the problem.
When to Call an Electrician or Other Qualified Professional
A basic preassembled plug-in heating cable can often be installed by a homeowner when its instructions clearly cover the application.
Professional help is a better choice when the project involves:
- A new electrical circuit
- Permanent hard wiring
- Damaged wiring or receptacles
- Electrical equipment in wet locations
- Large heat-trace systems
- Buried heating cable
- Fire-sprinkler piping
- Fuel or chemical piping
- Commercial plumbing
- Uncertain cable sizing
- Multiple heating circuits or controllers
Fire-protection piping is a special case. Heat tracing used on sprinkler systems must be designed and certified for that application rather than treated like an ordinary household water pipe.
Frequently Asked Questions
Can I use electrical tape to attach heat cable to a pipe?
Not unless the heating-cable manufacturer specifically allows it. Some manufacturers prohibit vinyl electrical tape and require approved glass-cloth or aluminum attachment tape instead. Use the attachment method listed for your cable.
Can heat cable touch PVC or PEX pipe?
Only if the heating cable is approved for that pipe material. Plastic pipe may also require aluminum foil tape to distribute heat. Check the instructions for both the cable and the pipe before installing it.
Should heat cable be wrapped around the pipe?
Not automatically. Many heating cables are installed lengthwise along the pipe. Spiral installation is allowed only when the manufacturer provides instructions for it. Do not spiral extra cable simply to use up excess length.
Can heat cable overlap itself?
Do not overlap or cross heating cable unless the manufacturer's instructions explicitly say that your cable can be installed that way. Overlapping some heating cables can cause excessive heat.
Does pipe insulation go over heat cable?
Often yes, but only when the heating-cable instructions permit or require it. Install the cable directly against the pipe first. Then use the type and thickness of insulation specified for the system.
Can I put heat cable on a rain barrel outlet pipe?
A compatible heating cable may protect the outlet pipe, but it does not automatically protect the barrel, tank fitting, valve, pump, filter, or other water-filled parts. Winter protection should cover the whole exposed system.
Can I leave pipe heat cable plugged in all winter?
Some systems are designed for seasonal continuous connection and use a thermostat or controller to operate only when needed. Follow the instructions for your cable. Inspect the cable and electrical connections before each freezing season and replace any damaged components.