As an affiliate, we may earn a commission from qualifying purchases. We get commissions for purchases made through links on this website from Amazon and other third parties.
A water tank is usually going bad when the tank body starts to crack, bulge, corrode, deform, or leak. A damaged base can also put enough stress on the tank to shorten its life.
Not every leak means the tank needs replacement. Water can escape from a loose fitting, worn gasket, valve, overflow pipe, or plumbing connection. These parts can often be repaired without replacing the tank.
The key is to find out whether the problem is with the tank structure, a connection, or the water stored inside it.
Signs Your Water Tank May Be Failing
Some warning signs are much more serious than others.
Cracks in the Tank Wall
A visible crack is one of the clearest signs of trouble.
Check around:
- The lower part of the tank
- Molded seams
- Pipe connections
- The outlet fitting
- Corners or sharp changes in shape
- Areas that have been hit or stressed
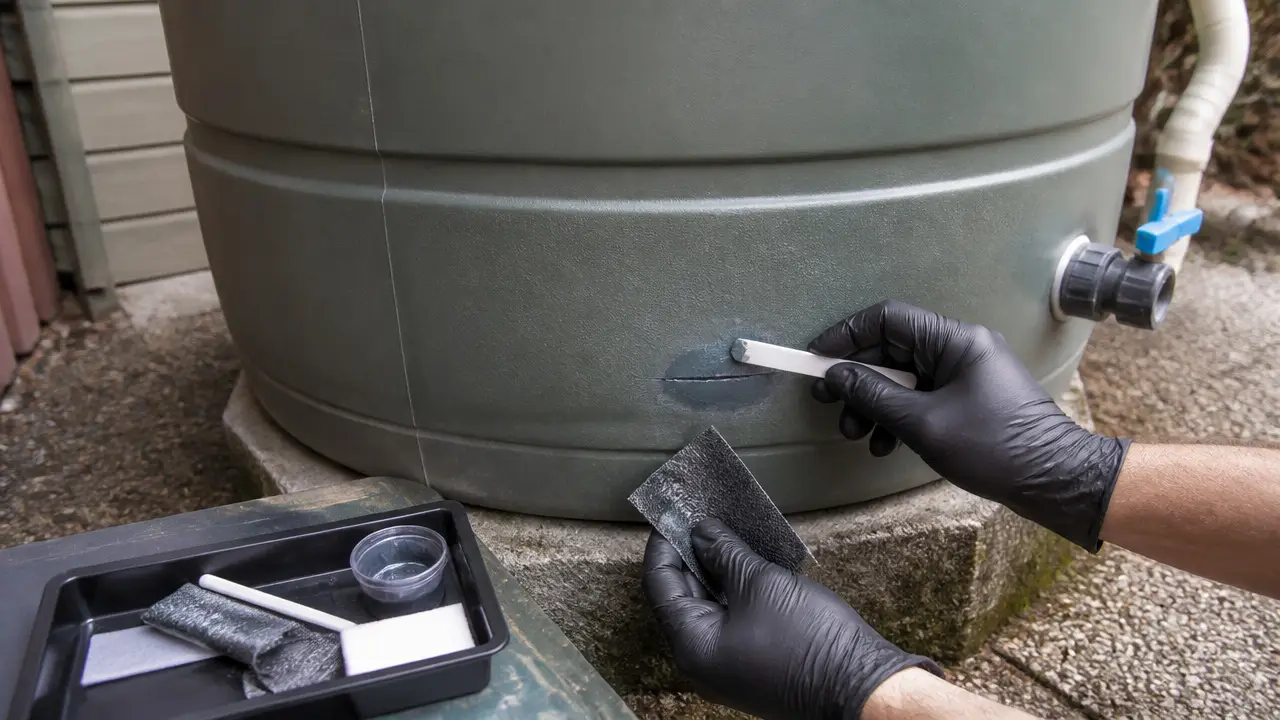
Very small surface marks do not always mean the tank is failing. But a crack that leaks, grows, or opens when the tank is full needs attention.
Do not assume that patching a structural crack will make the tank safe again. A full tank places a large load on its walls.
The Tank Is Bulging or Changing Shape
Some plastic tanks flex slightly as they fill. That does not always mean something is wrong.
Large or new changes in shape are different.
Watch for:
- One side pushing outward
- A bottom that appears distorted
- Deep dents that do not return to shape
- A tank leaning to one side
- A top that has collapsed inward
- Walls that look stretched near fittings
A tank that was designed to stand vertically should not develop a major sideways bulge.
Deformation can come from weakened tank material, poor support, incorrect installation, excessive pressure, or uneven ground.
Water Is Leaking Through the Tank Body
First determine where the water actually starts.
Dry the outside of the tank and watch the area closely. Water running down from a fitting near the top can make it look as though the wall is leaking.
A leak coming directly through a crack or damaged section of the tank body is more serious than a dripping valve or gasket.
Plastic Has Become Brittle
Outdoor plastic tanks are exposed to sunlight, heat, cold, and weather.
Over time, damaged plastic may:
- Become unusually brittle
- Develop fine cracks
- Split around stressed areas
- Lose its normal flexibility
- Show severe surface deterioration
Fading alone does not prove that a tank is unsafe. The important question is whether the material has lost strength.
Do not hit, bend, drill, or aggressively scrape an older tank just to test it. Brittle plastic can crack suddenly.
Metal Is Heavily Rusted or Pitted
Surface rust on a steel tank does not automatically mean the tank is finished.
More serious warning signs include:
- Deep corrosion
- Pitting in the metal
- Rust around seams
- Flaking metal
- Water seeping through corroded areas
- Weak sections around fittings
Corrosion on the bottom is especially worth checking because moisture can become trapped between a tank and its support.
Seams Are Separating
Some tanks have molded, bolted, welded, or joined sections.
Look for changes such as:
- Gaps that were not there before
- Water leaking along a seam
- Cracks spreading away from a joint
- Distortion around a welded area
A structural seam problem deserves more caution than a replaceable plumbing seal.
The Tank Is Leaning
A tank may be perfectly good while the foundation underneath it is failing.
Check whether the tank sits:
- Level
- Fully supported
- On a firm base
- Without erosion or empty spaces underneath it
Water is heavy. A large tank can place a major load on its base.
If the ground settles or part of the support washes away, the tank can twist. That can stress the walls and fittings.
Do not try to lift, straighten, or move a large tank while it contains water.
Check the Fittings Before Blaming the Tank
Leaks often come from replaceable parts rather than the tank itself.
A bulkhead fitting is a fitting that passes through the tank wall and creates a sealed connection for a pipe, valve, or outlet.
Common leak points include:
| Where you see water | Possible cause |
|---|---|
| Around the outlet | Loose or damaged fitting or seal |
| At a valve | Valve or threaded connection leak |
| Around an inlet | Poor pipe connection or damaged gasket |
| Near the overflow | Overflow connection or overflowing tank |
| Running down the wall | Leak located higher than it appears |
| Coming through the wall itself | Possible tank damage |
Do not keep tightening a fitting simply because it leaks. Overtightening can deform a gasket or stress a plastic tank wall.
If the tank wall around the fitting is cracked or badly distorted, replacing the fitting alone may not solve the problem.
Look at the Tank Base
The base is easy to overlook, but it is a major part of the system.
Check for:
- Soil erosion
- Settling
- Cracked support surfaces
- Sharp objects touching the tank
- Uneven support
- Roots pushing against the tank
- Evidence that part of the base has washed away
The correct base depends on the tank design and manufacturer instructions.
A tank designed for full bottom support should not be left hanging over the edge of a pad or resting on a few small contact points.
If you are installing a replacement tank, correct the base problem first. Otherwise, the new tank may develop the same problem.
Check the Tank When It Is Full and Partly Empty
Some problems become easier to see as the water level changes.
When the tank fills, watch for:
- New bulging
- Increasing leaks
- Movement at fittings
- Tilting
- Cracks opening farther
When the water level drops, you may notice deformation that was hidden by the pressure of the water.
You can also mark the water level and check whether it falls when no water is being used. However, a falling level does not prove that the tank body is leaking. Underground pipes, valves, pumps, and household plumbing can also lose water.
Do Not Enter a Water Tank to Inspect It
You can inspect many tanks from the outside or through an opening without climbing inside.
Do not enter a cistern or enclosed tank unless the work is being handled as a proper confined-space job by qualified people.
Tanks can contain unsafe air conditions and have limited ways to get out. Cleaning a large tank is not simply a matter of climbing through the lid with a brush.
Use a flashlight or inspection equipment from outside where practical.
Bad Water Does Not Always Mean a Bad Tank
Odor, color, sediment, algae, insects, or unpleasant taste can point to a water-quality problem. They do not necessarily mean the tank itself is worn out.
For a rainwater tank, investigate the entire collection system.
Possible causes include:
- Dirty gutters
- Roof debris
- Poor inlet screening
- A dirty first-flush system
- Sediment buildup
- Light entering the tank
- Damaged insect screens
- An uncovered opening
- Contaminated source water
A first flush device diverts some of the earliest roof runoff so dirt and debris washed from the roof are less likely to enter storage.
Tank lids, screens, inlet devices, overflow components, sediment, plumbing, and the tank structure all need periodic inspection. EPA rainwater harvesting guidance includes these items as part of system maintenance.
If You Drink the Stored Water
Appearance and smell cannot tell you whether stored water is safe to drink.
Consider key facts about the common causes of leaks in water tanks to verify tank footprint, connections, and site constraints.
If you suspect that a drinking-water tank has been contaminated, do not assume that running the water through one filter makes it safe.
CDC guidance treats safe storage as part of protecting already-safe water from being contaminated again. It also recommends keeping storage containers covered and cleaning them regularly.
For a rainwater or other private drinking-water system, safety depends on the whole setup. That can include the collection surface, prefiltration, storage, treatment, plumbing, maintenance, and appropriate laboratory testing.
If contamination is suspected, use another safe drinking-water source until you know what happened and what treatment or cleaning is needed. Your local health department or a qualified water-treatment professional can help determine appropriate testing.
Signs That Point More Toward Replacement
Repair may make sense when the tank itself remains sound and the problem is limited to a replaceable component.
Replacement becomes more likely when you find:
- A structural crack in the tank body
- Several cracks
- Severe plastic brittleness
- Major bulging or deformation
- Serious corrosion or perforation
- A failing structural seam
- Repeated structural leaks
- Extensive damage around an outlet
- Damage caused by a badly settled base
The size and location of the damage matter.
A small plumbing leak and a long crack near the bottom of a large tank are not equal problems. The lower tank wall carries significant water load when the tank is full.
If you cannot tell whether the damage is structural, have the tank manufacturer, installer, or another qualified professional assess it.
Warning Signs by Tank Material
Different tank materials tend to show different problems.
Polyethylene Plastic Tanks
Look for:
- Cracks
- Deep deformation
- Brittle areas
- Damage around fittings
- Major bulging
- Base problems
Plastic tanks should also be installed according to their intended above-ground or below-ground use. Do not bury an above-ground tank unless the manufacturer specifically allows it.
Steel Tanks
Look for:
- Corrosion
- Deep pitting
- Damaged coatings
- Seam problems
- Leaks around penetrations
- Corrosion near the base
Minor surface rust and structural corrosion are very different conditions.
Concrete Tanks
Look for:
- New or growing cracks
- Leaks
- Movement between sections
- Deteriorating concrete
- Settlement around the structure
Concrete cistern repairs can become structural work. Large cracks, movement, or underground damage should be assessed by someone qualified for that type of tank.
Fiberglass Tanks
Look for:
- Cracks
- Surface damage
- Separation of material layers
- Distortion
- Damage around fittings
Follow the tank manufacturer's repair instructions rather than assuming a general-purpose patch is suitable for stored water.
How to Inspect Your Tank Safely
A simple routine inspection can catch many problems early.
1. Walk Around the Tank
Look at the entire outside surface where accessible.
Check for leaks, cracks, corrosion, bulging, and impact damage.
2. Look at the Ground
Wet ground can reveal a slow leak.
Also check for erosion or settlement that may be affecting the base.
3. Check Every Connection
Inspect the inlet, outlet, overflow, valves, and visible pipes.
Try to determine whether water starts at the fitting or at the tank wall.
4. Check the Lid and Screens
The tank should not have unnecessary openings that allow debris, insects, animals, or dirty runoff to enter.
Repair damaged screens and covers.
5. Watch What Happens During Filling
Observe the tank during rain or while it is being filled, if this can be done safely.
Look for unexpected overflow, deformation, or leaks that only appear at higher water levels.
6. Keep a Record
Take photos of suspicious cracks, corrosion, or bulges.
Compare them during later inspections. A mark that is clearly getting larger is more useful information than trying to remember what it looked like months ago.
Do Not Ignore a Tank That Is Moving or Splitting
A large tank stores a large mass of water.
If the tank is badly leaning, splitting, collapsing, or rapidly leaking, keep people away from the immediate area and avoid unnecessary work around it.
Do not try to brace a failing full tank with improvised boards, straps, blocks, or other supports. Emptying or isolating a damaged tank may also require care depending on its location, plumbing, and foundation.
Get professional help when failure could damage a building, electrical equipment, buried utilities, retaining walls, or nearby property.
Maintenance Can Help You Catch Problems Earlier
Tank maintenance is not only about keeping water clean.
Periodically check:
- Tank walls
- Base and supports
- Lids
- Screens
- Inlets
- Outlets
- Overflow piping
- Valves
- Pumps
- Visible plumbing
- Sediment buildup
Keep vegetation and debris from hiding the tank base or fittings.
For rainwater systems, also maintain gutters, prefilters, screens, and first-flush components. A sound tank cannot keep water clean if dirty water or pests can freely enter it.
Frequently Asked Questions
How do I know if my plastic water tank needs replacing?
Look for structural cracks, major bulging, brittle plastic, repeated leaks through the tank wall, or serious damage around fittings. A leaking valve or gasket by itself usually does not mean the whole tank needs replacement.
Is a bulging water tank dangerous?
A small amount of normal flex may be part of the tank design, but a new or severe bulge can indicate a support, installation, or structural problem. If the shape has changed significantly, stop treating it as a cosmetic issue and have the cause checked.
Can you repair a cracked plastic water tank?
Some tanks and some types of damage may be repairable, but the correct repair depends on the tank material, crack location, intended water use, and manufacturer guidance. Structural cracks, especially low on a large tank, should not be covered with a random sealant and assumed safe.
Why is my water tank leaking from the bottom?
Water may be escaping from the tank itself, an outlet fitting, a valve, or plumbing and then running underneath the tank. Dry accessible surfaces and trace the water back to where it starts. Do not move or lift a full tank to investigate underneath it.
Does dirty or smelly water mean my tank is failing?
Not necessarily. Water-quality problems can come from the roof, gutters, sediment, light, insects, source water, or poor maintenance even when the tank structure is sound. If the water is used for drinking, do not use appearance, taste, or smell alone to judge whether it is safe.
Should I climb inside my tank to check for damage?
No. Large cisterns and tanks can present confined-space hazards. Inspect from outside or through accessible openings where possible. Internal entry and complex cleaning should be handled with proper equipment and procedures.
How often should I check my water tank?
Inspect it regularly and after events that could cause damage, such as severe weather, flooding, ground movement, impact, or unusual freezing conditions. Also follow the tank manufacturer's maintenance instructions. Check fittings, screens, overflow components, the base, and the tank body rather than looking only for obvious leaks.