As an affiliate, we may earn a commission from qualifying purchases. We get commissions for purchases made through links on this website from Amazon and other third parties.
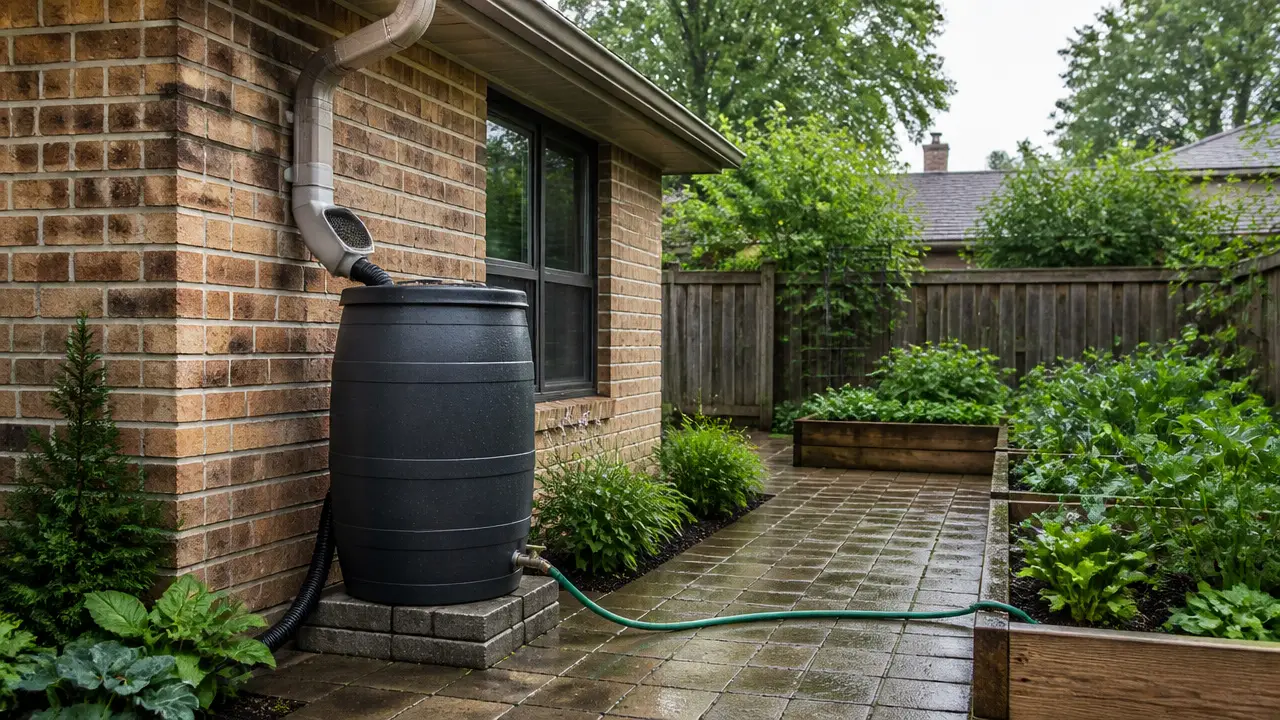
A DIY rainwater diverter lets you send water from a downspout into a rain barrel or storage tank while still giving extra water a safe path away from the house.
For most home systems, the simplest design is an in-downspout diverter. You cut one opening in the downspout, install a fitting or small collection cup, and run a hose from it to the barrel. When the barrel fills, water should continue down the downspout instead of spilling over the barrel.
How a Rainwater Diverter Works
A rainwater diverter sits between your gutter and storage container.
During rain:
- Water runs from the roof into the gutter.
- The gutter sends it down the downspout.
- The diverter sends some of that water through a hose.
- The hose carries it into your barrel or tank.
- Once the storage container is full, extra water continues through the downspout.
That last step is important. A good diverter should not block the normal drainage path.
Some homemade systems simply redirect all the downspout water into an open barrel. That can work, but the barrel then needs a large overflow pipe. An in-downspout diverter is often neater because the original downspout remains part of the overflow system.
What You Need
The exact parts depend on your downspout and barrel, but a basic DIY setup may use:
- Downspout
- Rain barrel or storage tank
- Short section of hose or tubing
- Plastic fitting that fits the hose
- Rubber gasket or seal
- Drill and hole saw
- Tape measure
- Marker
- File or deburring tool
- Downspout screws if needed
- Screen to keep leaves and insects out
Use fittings that are meant for outdoor water use and that fit together without being forced.
Avoid relying on household tape or caulk as the main structural connection. A properly sized fitting and gasket are usually easier to maintain.
Choose the Right Diverter Style
There are several ways to make a rainwater diverter.
In-Downspout Diverter
This is often the best choice for a rain barrel.
A small collector sits inside or through the wall of the downspout. Water enters a hose and flows into the barrel.
When the barrel reaches the correct water level, the hose stays full and additional water tends to continue down the downspout.
This setup keeps the barrel from needing to accept every gallon that comes off the roof.
Downspout-to-Barrel Elbow
You can also cut the downspout and install an elbow that sends nearly all the water into the barrel.
This design is simple, but you must install a dependable overflow outlet on the barrel.
The overflow should move water well away from the foundation.
Manual Flap Diverter
Another option is a Y-shaped or hinged section that lets you manually choose whether water goes to the barrel or continues down the downspout.
This can work well if you want to bypass the tank during winter, maintenance, or long wet periods.
It does not automatically stop filling when the barrel is full unless the barrel has its own overflow.
How to Make a Simple In-Downspout Rainwater Diverter
1. Pick the Barrel Location
Place the barrel on a stable, level base near the downspout.
Remember that water is heavy. A full barrel can weigh hundreds of pounds.
Do not place it on loose soil, weak decking, stacked blocks, or another surface that could shift.
If you raise the barrel to improve gravity flow, use a base designed to safely support the full weight.
2. Decide Where the Water Line Should Be
The height of the diverter matters.
With many fill-and-bypass designs, the connection between the downspout and barrel should be close to the desired full-water level inside the barrel.
If the barrel connection is too low or too high, the system may not behave as expected.
The exact height depends on the diverter design, so think about how water will move through the hose before drilling.
3. Mark the Downspout
Measure carefully and mark the location for the diverter opening.
Choose a straight section of downspout where you have enough room to drill and work.
Avoid cutting directly beside a seam, elbow, support bracket, or damaged section.
4. Drill the Opening
Use a hole saw sized for your fitting.
Make the opening only as large as needed.
After drilling, remove sharp edges. Burrs can damage gaskets or catch debris.
Wear eye protection when drilling metal downspouts.
5. Install the Collection Fitting
Insert the diverter fitting or homemade collection piece according to its design.
The goal is to capture part of the water moving down the inside wall of the downspout without blocking the entire pipe.
A fitting that sticks too far into the downspout can catch leaves and increase the chance of a clog.
Make sure the fitting is secure but do not crush a thin metal downspout by overtightening hardware.
6. Connect the Hose
Run the hose from the downspout fitting to the barrel.
Keep the run:
- Short when possible
- Free of sharp bends
- Supported so it does not sag badly
- Protected from damage
- Sloped correctly for the design
A hose that rises and falls several times can trap water and debris.
Use a hose diameter large enough to carry useful flow. Very small tubing can restrict the system during heavy rain.
7. Install the Barrel Connection
Drill the barrel only where the wall is suitable for a fitting.
A bulkhead fitting is a fitting that passes through the wall of a tank and seals around the hole. It is often a better connection than simply pushing a hose through a drilled opening.
Do not drill through a seam, molded rib, thin damaged area, or location where you cannot properly tighten the fitting.
The inlet should also be screened so mosquitoes and debris cannot easily enter.
8. Keep a Safe Overflow Path
Do not assume a homemade diverter will stop every drop from reaching the barrel.
A separate overflow outlet is a useful backup.
The overflow should be large enough to handle substantial flow and should carry water away from the house.
Do not send overflow toward:
- Foundations
- Basement walls
- Crawl spaces
- Neighboring property
- Septic system areas
- Slopes where erosion could develop
The original downspout should also remain able to carry water normally.
9. Test the System
You do not need to wait for a storm.
Run water into the gutter with a garden hose at a moderate rate.
Check whether:
- Water reaches the barrel
- The hose leaks
- The downspout stays open
- The barrel connection leaks
- Water bypasses correctly as the barrel fills
- Overflow drains away from the house
Then check it again during an actual rain. Roof runoff can enter the system much faster than a light hose test suggests.
A Very Simple DIY Diverter Layout
Evaluating building a rain-barrel downspout diverter helps understand expected collection losses across the catchment surface.
A basic system can look like this:
Roof
  |
Gutter
  |
Downspout
  |
  |---- Diverter fitting ---- Hose ---- Rain barrel
  |
  |
Normal downspout drainage
  |
Drain away from foundation
The important idea is that the downspout still has a clear route downward.
Do You Need a First-Flush Diverter?
A rainwater diverter and a first-flush diverter are not the same thing.
A regular diverter sends water toward your storage tank.
A first-flush diverter temporarily keeps some of the first roof runoff out of the tank. That early runoff may carry more dust, droppings, pollen, and other material from the roof.
A common first-flush design uses a vertical pipe that fills before cleaner runoff is allowed to continue toward storage.
Whether you need one depends on how the water will be used and how your collection system is designed.
For simple garden watering, many systems focus first on good gutter screens, tank screening, and regular cleaning.
For more sensitive uses, water-quality planning becomes much more important.
A first-flush device does not make roof runoff safe to drink.
Add a Leaf Screen Before the Diverter
Large debris should be stopped before it enters small fittings or hoses.
Useful places for screening include:
- Gutters
- Downspout inlet
- Diverter inlet
- Tank inlet
Do not use screening so fine that it constantly clogs.
A screen also needs to be easy to reach because any screen will eventually need cleaning.
Make Sure the Barrel Can Breathe
As water enters a closed tank, air needs a way to escape.
If the tank is completely sealed, filling can become slow or irregular.
A screened vent allows air movement while helping keep insects out.
Do not leave an unscreened opening that mosquitoes can enter.
Avoid Making the Diverter Too Small
A small hose may seem easier to install, but it can limit how quickly water reaches the barrel.
The amount of runoff can become large during heavy rain.
For example, a large roof collecting a strong downpour can produce far more water than a thin tube can carry.
The diverter does not always need to capture all that water. In fact, letting excess water continue down the downspout is one reason this design works well.
The key is making sure neither the diverter nor the barrel creates a backup into the gutter.
Keep the Downspout From Clogging
Inspect the diverter several times during the first few storms.
Look for:
- Leaves
- Roof grit
- Pine needles
- Insects
- Algae
- Sediment
- Crushed hoses
- Loose fittings
Small homemade collectors can catch debris that would normally pass through a downspout.
If the gutter begins overflowing after you install the diverter, stop using it until you find the restriction.
Protect the System From Mosquitoes
Stored rainwater should be screened from insects.
Use tight-fitting lids and insect-resistant screens on:
- Inlets
- Vents
- Overflows
- Other openings
Check screens regularly for tears and gaps.
A diverter hose should not create an open path directly into the barrel.
What to Do in Freezing Weather
Water trapped inside a diverter, hose, fitting, or barrel connection can freeze.
Freezing water expands and can damage fittings or split containers.
If your area freezes, your system may need to be drained, bypassed, disconnected, or otherwise winterized before cold weather.
The right method depends on the tank, plumbing layout, and local climate.
A manual bypass can be useful because it allows the downspout to work normally while the storage system is out of service.
Can You Use PVC Pipe Instead of a Hose?
Yes.
Rigid PVC or other suitable outdoor piping can carry water from a diverter to a tank.
Rigid pipe can work well for longer runs, but alignment matters more than with flexible hose.
Support the pipe properly and avoid putting its weight on a thin downspout or plastic barrel wall.
Remember that rigid pipe may also need freeze protection.
Can a DIY Diverter Feed More Than One Barrel?
Yes.
A common approach is to fill one barrel and connect additional barrels with balance pipes.
The barrels should sit at similar heights if you want the water levels to equalize.
Connections between barrels need enough flow capacity. A tiny hose can make one barrel fill much faster than the others.
Each container should also have secure lids, screened openings, and a safe overflow plan.
When a Homemade Diverter Is Not Enough
A simple DIY diverter is well suited to many garden and non-potable rainwater systems.
A more carefully designed system is appropriate when you have:
- Very large roof areas
- Underground cisterns
- Pumps and pressure tanks
- Indoor plumbing connections
- Automatic controls
- Difficult overflow drainage
- Multiple buildings
- Drinking-water use
Potable means water that is suitable for drinking.
Roof runoff should not be assumed potable because it looks clear or because it passed through a screen, diverter, or filter.
Drinking-water systems require suitable collection materials, treatment, maintenance, current water testing, and compliance with applicable local requirements. Get qualified help when designing a system for household drinking water.
Frequently Asked Questions
Can I make a rainwater diverter without cutting the downspout?
Sometimes. You can redirect the bottom of the downspout into an open barrel or collection pipe. However, the barrel then needs a reliable overflow system. Cutting in an in-downspout diverter usually gives you better control over where excess water goes.
How high should the diverter be above the rain barrel?
For many fill-and-bypass designs, the diverter connection should be near the intended full-water level of the barrel. The correct position depends on how the diverter works and where the barrel inlet sits.
Why is my DIY rainwater diverter not filling the barrel?
Check for a clogged diverter, kinked hose, uphill hose run, poor fitting position, blocked vent, or incorrect barrel connection height. Also make sure water is actually flowing along the part of the downspout where the collector sits.
What happens when the rain barrel becomes full?
A properly designed diverter should let excess water continue through the downspout. It is also wise to give the barrel a separate screened overflow outlet as backup.
Should I put a filter before my rainwater diverter?
At minimum, keep leaves and large debris out of the system with suitable gutter or inlet screens. Additional filtration depends on how the stored water will be used.
Can I connect a garden hose directly to the diverter?
A garden hose can sometimes be used as the transfer line if its diameter, fittings, and layout suit the system. Avoid narrow or badly kinked hoses that restrict flow.
Does a rainwater diverter make collected water safe to drink?
No. A diverter only controls where roof runoff flows. It does not remove all contaminants or make the water potable. Drinking-water use requires a complete collection, treatment, testing, and maintenance plan.