As an affiliate, we may earn a commission from qualifying purchases. We get commissions for purchases made through links on this website from Amazon and other third parties.
A hole in a water tank can often be patched, but the right repair depends on the tank material, the size and location of the damage, and how the stored water will be used.
Small holes in plastic tanks may be repaired with plastic welding or a tank-compatible patch. Metal tanks may need a suitable mechanical patch, sealant, or welded repair. Fiberglass tanks usually need a fiberglass repair system. Large cracks, damaged seams, and holes near fittings are more serious because the tank wall is under stress in those areas.
Before repairing any tank, drain the water below the damaged area and make sure the surface is clean and dry. Do not climb inside a tank unless the tank is specifically designed for safe entry and proper confined-space procedures are being followed.
Start by Identifying the Tank Material
The repair method needs to match the tank.
Common water tank materials include:
- Polyethylene plastic
- Fiberglass
- Steel
- Stainless steel
- Concrete
Using the wrong adhesive or patch can result in a repair that peels away once the tank is filled.
If you are not sure what your tank is made from, check its label or manufacturer information before choosing repair materials.
Polyethylene Plastic Tanks
Many rainwater tanks, agricultural tanks, and portable water tanks are made from polyethylene.
Polyethylene is durable, but it can be difficult to glue. Many common household adhesives do not bond well to it.
For that reason, plastic welding is often a better repair method for polyethylene than simply covering the hole with glue.
Fiberglass Tanks
Fiberglass tanks can often be repaired using resin and fiberglass reinforcement made for the tank material.
The damaged area normally needs to be cleaned, dried, and prepared so the repair can bond securely.
Metal Tanks
Steel tanks can develop holes because of corrosion as well as physical damage.
A patch may stop the immediate leak, but you should also find out why the metal failed. If rust has made a larger area thin, repairing one visible hole may not solve the problem for long.
Concrete Tanks
Small cracks in concrete tanks may sometimes be repaired with materials designed for water-retaining concrete.
A hole or major structural crack is different. Movement, settling, or structural failure may be involved. Those problems usually deserve professional inspection rather than a simple surface patch.
Empty the Tank Below the Hole
Water pressure makes repairs difficult.
Even a small hole may continue leaking while the tank is full. Water can also prevent adhesives, sealants, and repair compounds from bonding correctly.
Drain the tank until the water level is safely below the damaged area.
For repairs close to the bottom of the tank, you may need to empty most or all of the tank.
Plan where the water will go before draining a large cistern. Avoid flooding foundations, slopes, septic areas, or neighboring property.
Clean and Dry the Damaged Area
A patch needs a clean surface.
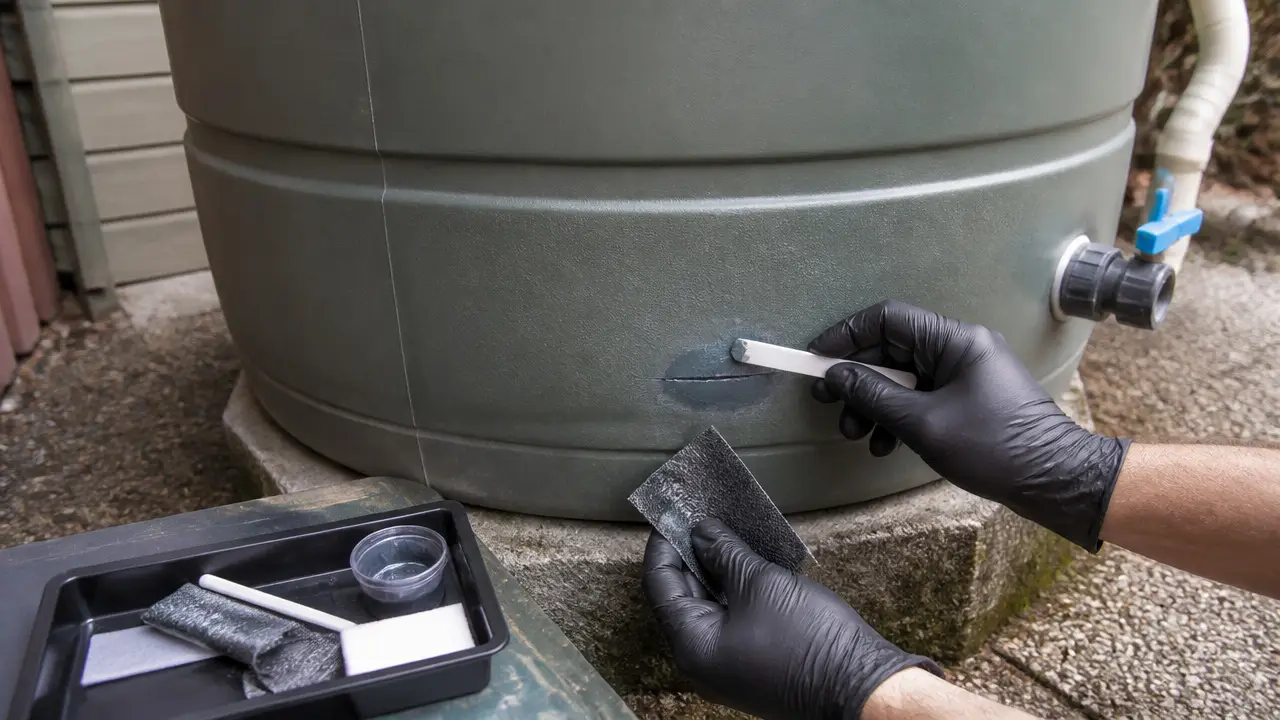
Remove dirt, algae, loose material, grease, old sealant, and other contamination around the hole.
Follow the preparation instructions for the repair material you plan to use. Some systems require light sanding or another specific surface treatment.
Let the area dry completely if the repair product requires a dry surface.
Do not use solvents or cleaners that can damage the tank material or leave unsafe residues behind.
If the tank stores water used for drinking, food preparation, or other potable purposes, any repair material that contacts the water should be suitable for that use.
Potable means water intended for drinking or food preparation. A material being waterproof does not automatically mean it is suitable for contact with potable water.
How to Patch a Small Hole in a Plastic Water Tank
For a small hole in a polyethylene tank, plastic welding is one common repair approach.
Plastic welding uses heat to soften compatible plastic so the damaged area can be joined or reinforced.
1. Identify the Plastic
Confirm that the tank is polyethylene or another plastic that can be repaired using the welding method you plan to use.
Ideally, the filler material should be compatible with the tank plastic.
Do not assume that any scrap plastic will work.
2. Prepare the Surface
Drain the tank below the hole.
Clean the area and remove loose or damaged material as appropriate for the repair method.
The repair area should be dry before welding.
3. Repair the Hole With Compatible Plastic
Follow the instructions for the plastic-welding equipment and filler material.
The goal is to create a continuous repair that bonds with the surrounding tank wall rather than placing a loose covering over the leak.
Avoid overheating the tank wall. Too much heat can distort the plastic, weaken the surrounding area, or make the damage larger.
4. Let the Repair Cool
Allow the repaired area to cool naturally.
Do not refill the tank until the repair has cooled and any additional repair material has reached its required cure time.
5. Test With a Small Amount of Water
Add enough water to place the repaired area under some pressure.
Check carefully for moisture around the patch.
If the repair remains dry, increase the water level gradually and inspect it again.
A repair that holds with only a few inches of water may still leak once the tank is full because pressure increases as water depth increases.
Can You Use Epoxy on a Plastic Water Tank?
Sometimes, but not every epoxy bonds well to every plastic.
Polyethylene and polypropylene are especially difficult surfaces for many adhesives.
A product described as waterproof is not automatically suitable for a polyethylene tank. Check whether the repair compound is specifically compatible with the tank material.
For a tank supplying potable water, also verify that the material is intended for the required water-contact application.
If compatibility is uncertain, plastic welding or a repair method recommended by the tank manufacturer is usually a better starting point.
How to Patch a Fiberglass Water Tank
A typical fiberglass repair uses resin plus reinforcing fiberglass material.
The basic process is to:
- Drain the tank below the damaged area.
- Clean and dry the surface.
- Remove damaged or loose material as appropriate.
- Prepare the surrounding surface according to the repair-system instructions.
- Apply compatible resin and fiberglass reinforcement.
- Allow the repair to cure fully.
- Refill the tank gradually while checking for leaks.
The exact preparation, number of layers, cure time, and allowable water use depend on the repair system.
For potable-water storage, use materials that are specifically suitable for that application.
How to Patch a Metal Water Tank
Before patching a metal tank, inspect the area around the hole.
Planning around sealing leaks in a water tank helps assess safe ventilation and overflow routing for stored water.
If the hole came from rust, gently examine the surrounding metal from a safe location. A small visible opening can sometimes be surrounded by much thinner metal.
A repair may involve a tank-compatible mechanical patch, sealant system, or welded repair.
Welding should be handled with extra care. Tanks can create serious fire, electrical, ventilation, and confined-space hazards depending on their history, construction, coatings, and location.
If welding is needed, hiring someone qualified to repair tanks is usually safer than treating it as a basic DIY patch.
Repairing a Hole Around a Tank Fitting
Leaks near outlets, valves, and pipe connections deserve special attention.
The apparent "hole" may actually be:
- A loose fitting
- A damaged gasket
- A cracked tank wall
- A damaged thread
- A fitting that was overtightened
- Pipe weight pulling on the tank
- A hole that was cut too large
A bulkhead fitting is a fitting that passes through a hole in the tank wall and creates a sealed connection for a pipe, valve, or outlet.
If the tank itself is undamaged, replacing the gasket or fitting may solve the problem.
If the tank wall has cracked around the fitting, simply adding more sealant may not last. The wall may need reinforcement or professional repair.
Also support attached pipes so their weight is not hanging from the tank outlet.
Do Not Just Seal Over a Growing Crack
A crack is different from a simple puncture.
Cracks often develop because the tank wall is moving or being stressed.
Possible causes include:
- An uneven tank base
- Tank movement
- An unsupported pipe
- Impact damage
- Freeze damage
- UV or age-related deterioration
- Excessive stress around a fitting
Patching the visible end of a crack without fixing the cause can allow the crack to continue spreading.
Long cracks, cracks near the bottom, and cracks around molded seams are good reasons to contact the tank manufacturer or a qualified tank repair company.
Check the Tank Base Before Refilling
A repair will have a better chance of lasting if the tank is properly supported.
Water is heavy. A large tank places a substantial load on its base when full.
Check from outside the tank for obvious problems such as:
- Uneven support
- A sinking base
- Sharp objects under the tank
- Unsupported sections
- Tank leaning
- Pipework pulling sideways on fittings
Do not try to lift or reposition a large tank while it contains water.
Structural base problems should be corrected before the tank is returned to normal use.
Be Careful With Holes Near the Bottom
The lower part of a tank experiences more water pressure than the upper part.
This is because head height increases with the depth of water above the damaged point. In simple terms, a hole near the bottom of a full tank has much more water pushing against it than a hole near the top.
That means a patch that seems strong enough when the tank is nearly empty may fail when the tank is filled.
Bottom-wall damage should be inspected carefully, especially on large tanks.
When a Temporary Patch May Be Useful
A temporary patch can sometimes reduce water loss until a proper repair is made.
However, temporary fixes should not be treated as permanent repairs simply because they stop the leak at first.
Pressure, temperature changes, tank movement, UV exposure, and repeated filling and emptying can all affect a patch.
If you use a temporary repair, keep checking it and avoid assuming the tank has returned to its original strength.
When the Tank Should Be Replaced Instead
Not every damaged tank is worth repairing.
Replacement may make more sense when:
- Several cracks are developing.
- The tank wall has become brittle.
- Corrosion affects a wide area.
- A structural seam has failed.
- The base or lower wall is badly damaged.
- A fitting has torn a large section from the tank.
- Previous repairs keep failing.
- The manufacturer advises against repairing the damaged area.
A patch can stop a leak without restoring the original structural strength of the tank.
For a large cistern, household water tank, or tank located where sudden failure could damage property, professional inspection is a sensible choice when structural damage is involved.
Special Considerations for Drinking-Water Tanks
Patching a leak and keeping drinking water safe are separate issues.
If a tank is used for potable water, repair materials should be appropriate for contact with potable water and used according to their instructions.
The tank may also need suitable cleaning or disinfection after repair, depending on how the repair was performed and whether contamination entered the tank.
Do not assume that a waterproof patch makes the stored water safe to drink.
Drinking-water safety depends on the whole system, including collection surfaces, storage conditions, treatment, maintenance, current water testing, and any applicable local requirements.
If there is uncertainty about contamination after a tank repair, use another safe drinking-water source until the system has been properly evaluated.
Avoid Entering the Tank
Many water tanks are confined spaces.
Entering a tank can expose a person to poor ventilation, hazardous gases, difficult exits, slippery surfaces, and other serious risks.
Do not climb inside a tank just because the repair is easier to reach from the interior.
Repairs requiring entry into a large cistern or enclosed tank should be handled using appropriate confined-space procedures by people trained and equipped for that work.
Test the Repair Gradually
Once the repair has fully cured, refill the tank slowly.
Start with a modest water level and inspect the repaired area.
Look for:
- Dampness
- Drips
- Bulging
- New cracks
- Separation around the patch
- Movement around nearby fittings
Continue filling in stages if everything stays dry.
Check the repair again after the tank has been filled for some time.
Also inspect it during the next several fill-and-drain cycles. A patch can sometimes survive the first test but begin leaking after the tank expands and contracts.
Frequently Asked Questions
Can I patch a water tank without emptying it?
Sometimes you only need to lower the water below the damaged area. Most permanent repairs work better on a clean, dry surface, so repairing an actively leaking hole is usually difficult. Damage near the bottom may require draining most or all of the tank.
What is the best way to repair a hole in a polyethylene water tank?
Plastic welding with compatible material is commonly used for polyethylene tanks because many ordinary adhesives do not bond well to polyethylene. Follow the tank manufacturer's repair guidance when available.
Will silicone sealant fix a hole in a water tank?
Silicone may seal some joints, but it is not a universal structural repair. It may bond poorly to some tank plastics and may fail when exposed to water pressure or tank movement. Match the repair material to the tank and damage.
Can I use epoxy to repair a drinking-water tank?
Only use a repair material that is compatible with the tank and suitable for the intended potable-water contact application. A general-purpose or waterproof epoxy should not automatically be assumed suitable for drinking-water storage.
Why does my tank keep cracking around the outlet?
The fitting may be overtightened, the pipe may be unsupported, or the tank wall may be moving. An uneven tank base can also add stress. Fixing only the crack without correcting the cause may lead to another failure.
How long should I wait before refilling a patched tank?
Use the full cure time specified for the repair material. Cure times vary with the material, temperature, humidity, and repair system. Refilling before the repair is fully cured can weaken the bond.
Can a large crack in a water tank be repaired?
Some cracks can be professionally repaired, but large cracks may indicate structural damage. Cracks near seams, fittings, or the bottom of a large tank deserve extra caution. Contact the manufacturer or a qualified tank repair professional if the tank's structural strength may be affected.